Booking Service Tracker User Guide
Written By Ed Kinne
Introduction
Field teams (Catering, AV/IT, Facilities) use the Service Tracker mobile app to action the services (“addons”) that are attached to room/desk bookings.
Actions you take on mobile/ipad/tablet—Approve/Deny, Delivered, Retrieved, and Notes—immediately reflect in the Service Tracker page in the Korbyt Booking web app for supervisor visibility and reporting.
Install the app (iOS / Android)
Open the App Store (iOS) or Google Play (Android)
Search “Korbyt Service Tracker”
Install
First‑time configuration (Admin tab)
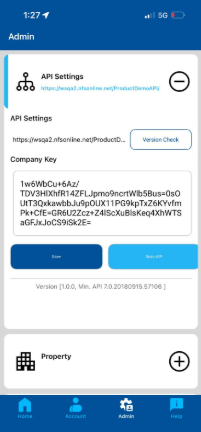
Launch the app → tap Admin.
In API Settings, enter:
API/Server URL (tenant base URL), e.g., https://<yourtenant>/ProductDemoAPI/.
Company Key provided by your admin.
Tap Version Check to validate connectivity (optional) or
Scan API to scan the QR code instead of manually typing in the API URL.
Preset default filters used by Home (Optional):
Property → choose one or leave blank to see all.
Resource Type → e.g., Meeting Rooms, Desks.
Department → e.g., Catering, Facilities.
Tap Save.
Using the Application
After initial download and configuration is completed, these steps will assist you with day-to-day tasks.
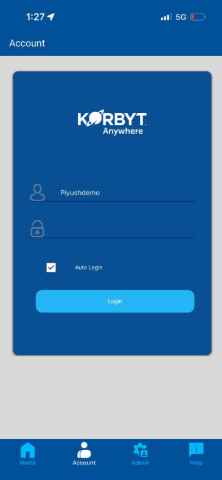
Sign in (Account tab)
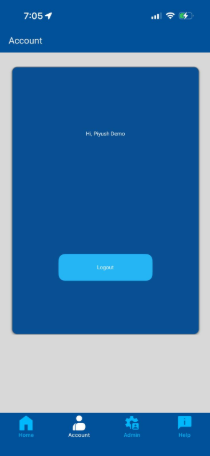
Tap Account.
Enter your Username and Password and sign in.
Once signed in, you’ll see your display name and a Logout button.
Start your shift: Review “My Services”
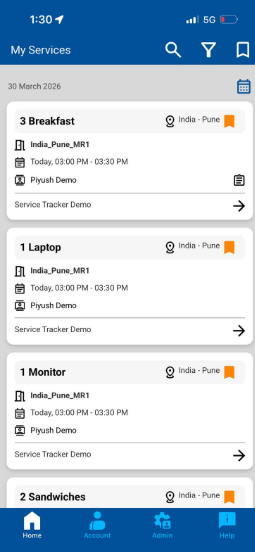
Tap Home to open My Services (today’s date shows at the top).
Review the list of service cards; each shows Service name, Room, Location, Date, Time,
Meeting title, Host.
Use the top-right Calendar icon to change the date.
Use Filter to refine the list by Property / Area / Resource Type / Department / Status.
Pro tip: Set your default filters in the Admin tab so your daily list is already scoped to your department.
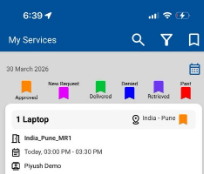
Understand the color flags (legend)
Approved → Orange ribbon on the card.
Delivered → Green ribbon.
Retrieved → Purple ribbon.
Past → Red ribbon.
Quick actions from the list (Deliver)
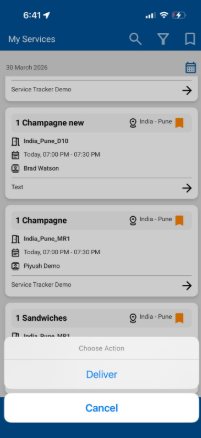
Long-press a service card to open Choose Action.
Tap Deliver to mark the item delivered without opening details.
The card ribbon turns Green and the system stamps Delivered By and Delivered Time.
Open Service Detail
Tap DETAILS on any card.
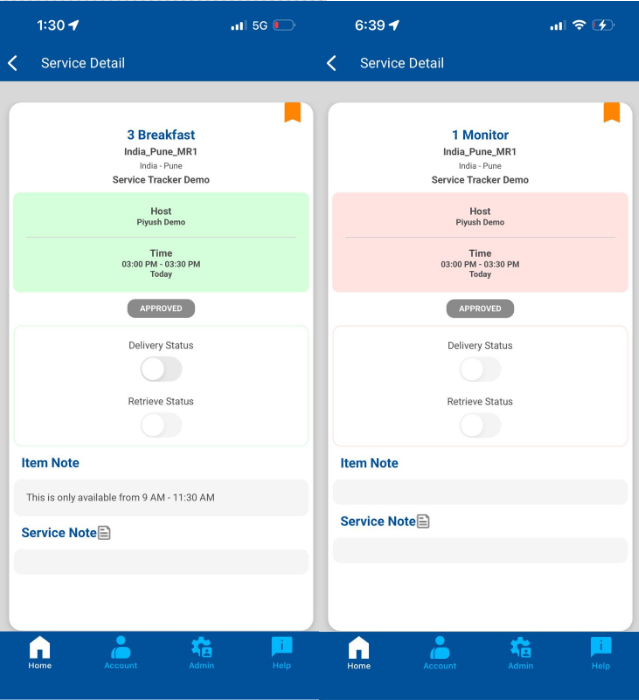
Review Host, Time, current Status, and the two toggles:
Delivery Status (on/off)
Retrieve Status (on/off)
If the background is green, the item is editable (current/future). If red, it’s locked or in the past.
Mark Delivered (from Details)
On Service Detail, toggle Delivery Status ON.
The app records Delivered By (your name) + Delivered Time.
The card ribbon on the list switches to Green.
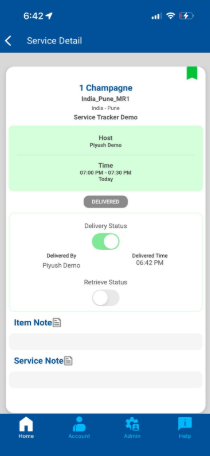
Mark Retrieved (after the meeting starts)
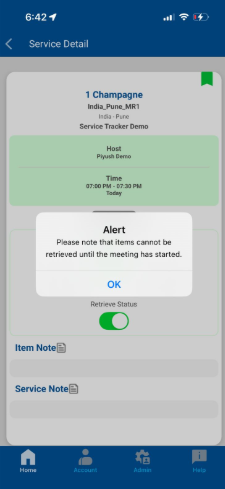
Retrieval is gated until the meeting start time.
When eligible, open Service Detail and toggle Retrieve Status ON.
The app records Retrieved By + Retrieved Time, and the card ribbon turns Purple.
If you try to retrieve early, you’ll see an alert; wait until the meeting begins.
Add Notes (from list or details)
You can add context that supervisors and other teams will see in the web app.
Ways to add notes
From My Services: tap the Notes icon on a card → choose Item Note (this specific add‑on) or Service Note (service‑level).
From Service Detail: scroll to Item Note / Service Note and add your text.
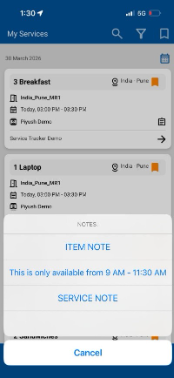
Best practice: Use Item Note for instructions unique to a specific service line (e.g., “This is only available from 9 AM – 11:30 AM”)
End of shift checklist
On Home, filter by Status to find any Approved items not yet Delivered; action them or leave a note.
Filter for Delivered items not yet Retrieved; if the meeting has ended, retrieve them.
If using a shared device, go to Account → Logout
How mobile actions sync to Korbyt Booking (web)
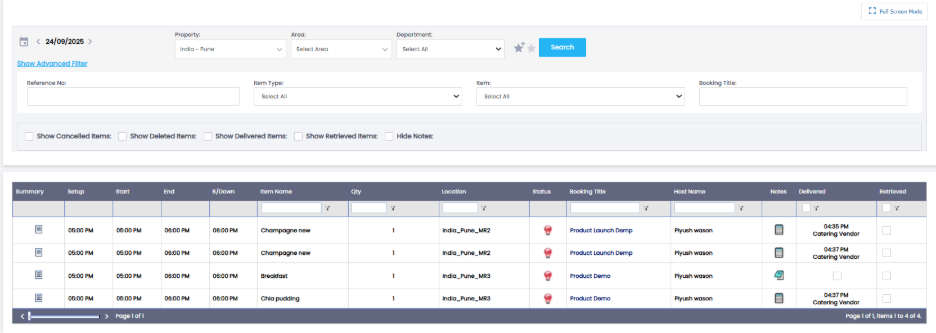
As you Deliver/Retrieve or add Notes, the Service Tracker page in the web application updates immediately for supervisors, with columns showing Delivered/Retrieved timestamps and who performed the action. Notes appear under the item.
Supervisors can search by Area, Item Type, Department, Item, Reference #, Booking Title, and apply quick filters (Cancelled/Deleted/Delivered/Retrieved).
FAQ
What’s the difference between Item Note and Service Note?
A. Item Note attaches to the specific add‑on line (best for instructions and variations). Service Note is a general, service‑level note. Both are visible in the web Service Tracker.
Why can’t I toggle Retrieve?
A. Retrieval is intentionally blocked before the meeting starts. You’ll see an alert if you try early. Once the start time passes, the toggle is enabled.
Do my Delivered/Retrieved updates show on the web?
A. Yes—actions sync immediately to the Service Tracker page with your name and timestamp.
What do the ribbon colors mean?
A. Orange = Approved, Green = Delivered, Purple = Retrieved, Red = Past. Use the Legend to confirm your tenant’s colors.
How do I see only my department’s items?
A. Set Admin defaults for Property/Resource Type/Department and use Filter on the Home screen during your shift.
The Details screen background is red—why can’t I edit?
A. Red indicates the item is in the past or otherwise not editable. Current/future, editable items show a green background.
Can I approve/deny from the list?
A. Yes—use the list controls or open Details to review before updating status.
What if an item is missing?
A. Confirm your date and filters. If it’s still missing, the service may have been cancelled/removed in the main booking—check with your coordinator.