Mobile & Web Email Campaigns
Using the optional email campaign capabilities of your Korbyt Mobile & Web application to communicate with your audience
Written By Ed Kinne
Last updated 11 months ago
The Email Marketing section of your Mobile & Web application is an optional configuration that allows you to use easy-to-customize email templates to communicate with your audience of Mobile & Web users.
If you do not see the Email Marketing options please contact Support@Korbyt.com to enquire about having them turned on
Creating Email Messages
To create emails:
Click the Mega Menu and navigate to Content > Email Marketing.
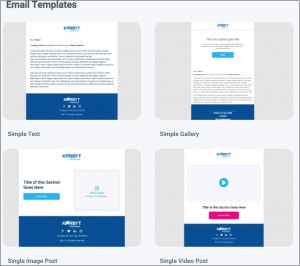
Click Create Email.

Select an email template.
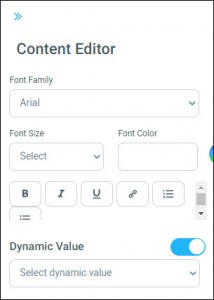
Update the various sections of the email template by applying the necessary font, button, and dynamic value attributes:
Hover over the section.
Click the pencil icon


You can select the necessary font, button, and dynamic value attributes from the Content Editor pane.
Enter the following Email Settings:
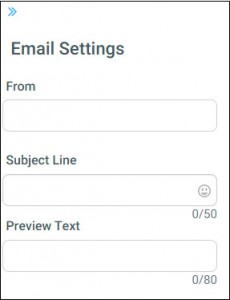
Enter the “friendly from” you want to use in the From field.
Enter a Subject Line.
The character limit for the Subject Line is 50.
Enter a brief description in the Preview Text field.
The character limit for the Preview Text field is 80.
If you’re not ready to distribute the email, click Save as Draft.
To see what the email will look like before distributing it, click Send > Send Test.

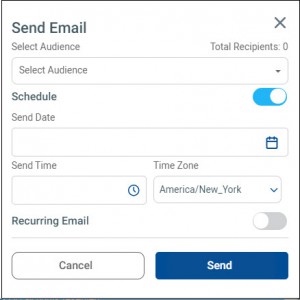
To schedule the email:
Click Send > Send Email.
From the Send Email dialog, select the appropriate audiences from the Select Audiences drop-down.
Click the Schedule toggle.
Provide the following information:
Send Date
Send Time
Time Zone
If you want to distribute the email on a recurring basis, do the following:
Click the Recurring Email toggle.
Select a frequency (Daily, Weekly, or Monthly.
Click Send.
Email Campaign Branding Controls
These settings allow you to configure a variety of email attributes that will be auto-populated when creating new emails.
To set email attributes from your CMS:
Click the gear icon in the upper right and click the Email Campaigns tab.

You can now customize the Email Campaign settings
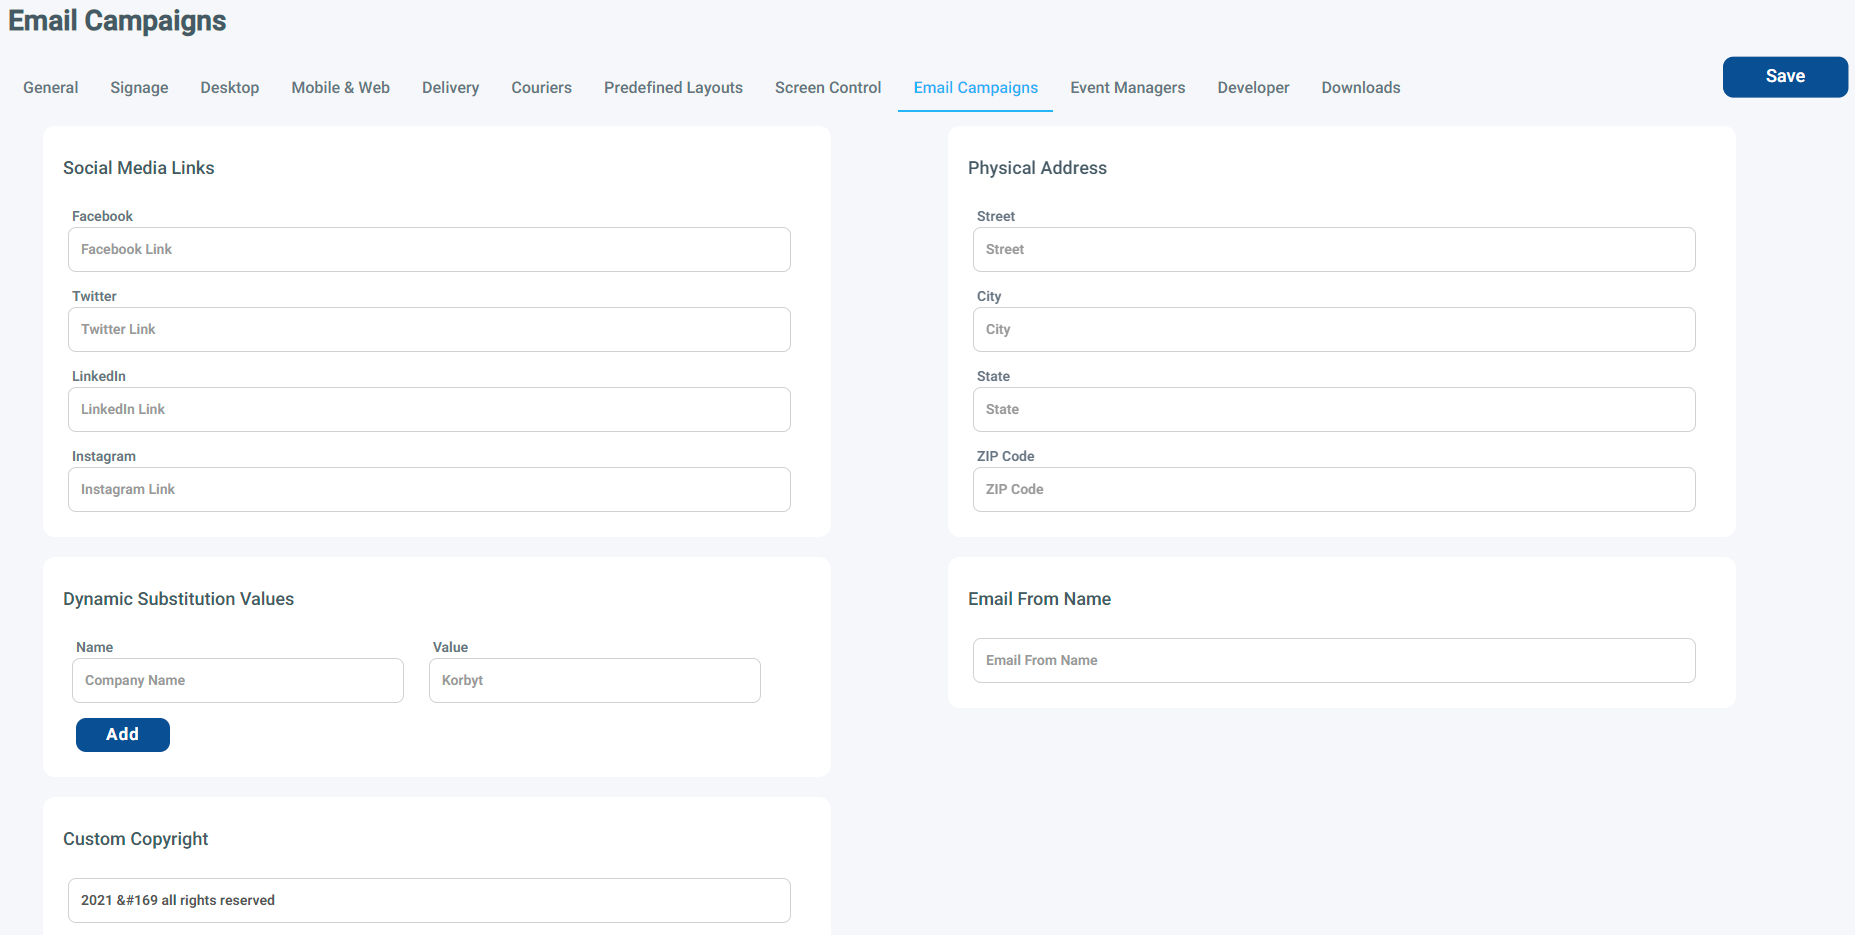
Enter Social Media Links.
Adding a link will add the appropriate icon to the email footer and link to your target url
Enter Dynamic Substitution Values.
Dynamic substitution values are variables, such as the name of your company, that can be inserted into various sections of an email.
Click the Add button to add multiple dynamic substitution values.
Enter a Physical Address.
Enter an Email From Name Name/text.
All emails will come from an email address you specify such as noreply@company.com.
The friendly from allows you to customize what your employees will see in the from address in their email application. This can be set here as a default and updated on each email as needed.
Enter Customer Copyright text
Will add your copyright text to each email
Click Save.
Email Analytics
After distributing an email, you can go to the Email Dashboard to track various analytics for that email. You can view your email analytics by clicking the hamburger icon and navigating to Analytics > Email.
The following email analytics can be tracked from the Email Dashboard:
Emails Sent: Total number of emails that have been sent.
Successful Deliveries: Total number of emails that were successfully delivered.
Unique Opens: Total number of emails that have been opened. Only one click per recipient will be included.
Total Clicks: Total number of links that have been clicked. Multiple clicks by the same recipient will be included.
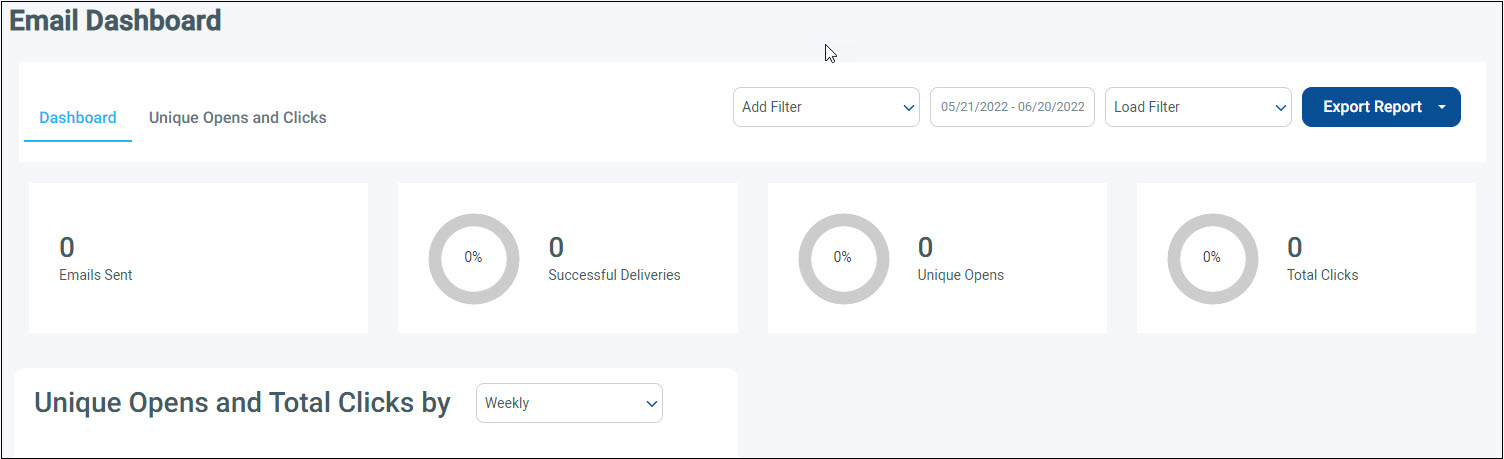
You can filter these email analytics by mobile device (iOS or Android), web, or any predefined attributes.
The Email Dashboard also provides graphs and maps so that you can visualize your unique open and total click data.