Mobile & Web Quick Start Guide
Written By Ed Kinne
Last updated 8 months ago
The Mobile and Web platform allows you to create a rich and interactive communication platform for your audience. This guide provides instructions on setting up your Korbyt Anywhere Mobile, Web, and Email service and getting started with communicating with your audience.
This article covers many of the common steps to set up your system, and is not meant to be exhaustive of everything Korbyt can do.
Logging In & Navigating the CMS
To log into the Korbyt Anywhere Content Management System (CMS) navigate to Korbyt.com/login
A Chrome or Edge web browser is required for full functionality
Enter your email address and password or use the SSO service configured for your tenant
When you log in you will be viewing the dashboard for your service
If you also subscribe to Korbyt Signage, you may have to select the Mobile & Web service
The different sections of Korbyt can be opened through the Sidebar Navigation
The Sidebar can be expanded to show full names of sections or collapsed down to just show Icons
Or you may have our Mega Menu-based navigation

1 - The Mega Menu in the upper left, click to open all the working sections
2 - The system selection to switch between Signage and Mobile & Web
3 - The Mega Menu for Mobile & Web control
Continued Learning on Basic Navigation and User Management
If you need more info on the Sidebar Navigation, see Side Navbar CMS Navigation
If you need to add other Content Managers and Authors, see How To Manage CMS Users And User Groups , and Content Managers (CMS Users) Roles And Abilities
Set your Branding
You can control the icons and colors that your Mobile and Web experience shows.
To set your Branding, refere to Branding Controls For Mobile & Web
These branding settings are shared by all parts of Korbyt you may be using.
Adding End Users and Audiences
End users are the individuals who will view and interact with your Mobile & Web news feed via the Mobile app or Web Browser.
Having an account as a Content Manager with access to the CMS does not create an End User account that allows you to login and view the platform the way your audience will see it.
They are two seperate types of user accounts and you can have one of each if needed.
If you are not ready to roll out to your entire audience yet, it is still advisable to create initial end-user identities for yourself and others who will be performing the initial setup of your Mobile and Web platform.
Audiences are a feature in the CMS that lets system administrators group users by various characteristics and lets communicators post items to specific audiences. Audiences can be defined by geography, role/position, tenure, or any other attribute to help you target communications for your organization.
You can create audiences at any time, and individual people can be members of multiple audiences.
It is suggested to create a Test or Tester Audience so you can see the effect as you set up the tenant.
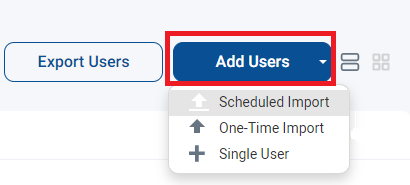
Adding End Users One at a Time
You can also add multiple people in a file upload, see One-Time Import of a User List
To add a single End User one at a time:
In the Users screen described above, click on the Add Users button and select Single Users
Fill in the required information (*)
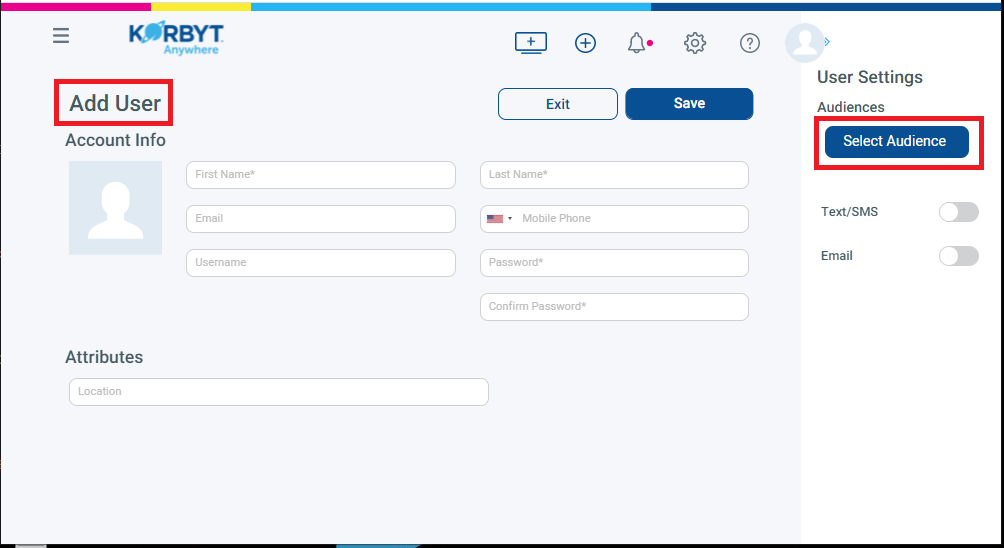
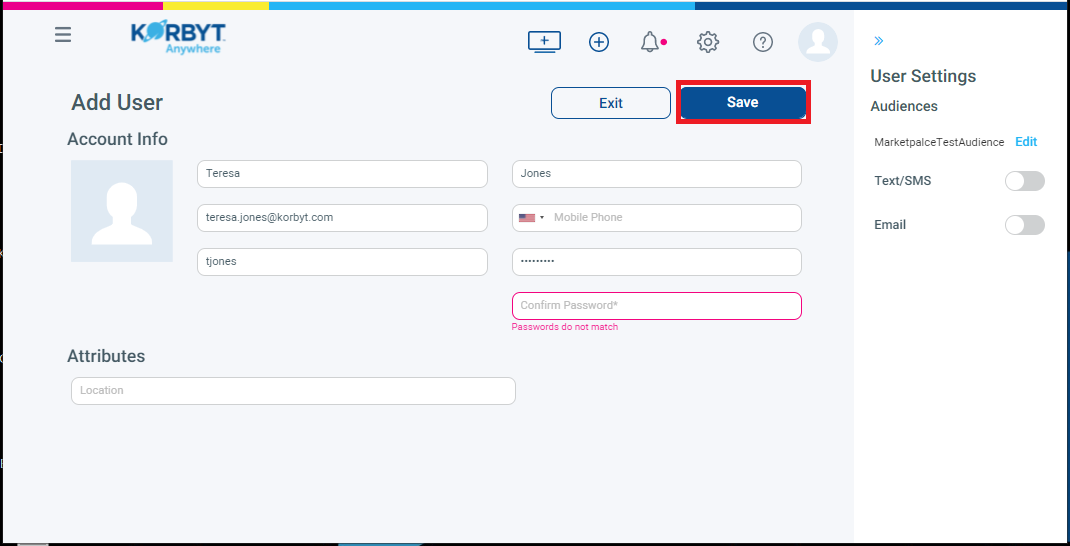
Optional - Click on the button to select the Audience.
Audience Membership is how specific messages are targeted to a group. It can be set when creating a single user or managed later in the Audience menu
For the Password, you can select any password you would like
If you use Default1! as the new user’s password, they will be prompted to change it the first time they log in
Click on the Save Button to complete the action of adding a User
The user has now been created
Creating an Audience
Audiences can be created by statically selecting individuals or by defining a dynamic rule to select individuals for that audience.
To Create A Static Audience
Select the Manual selection of users radio button under the Audience Defined by section.
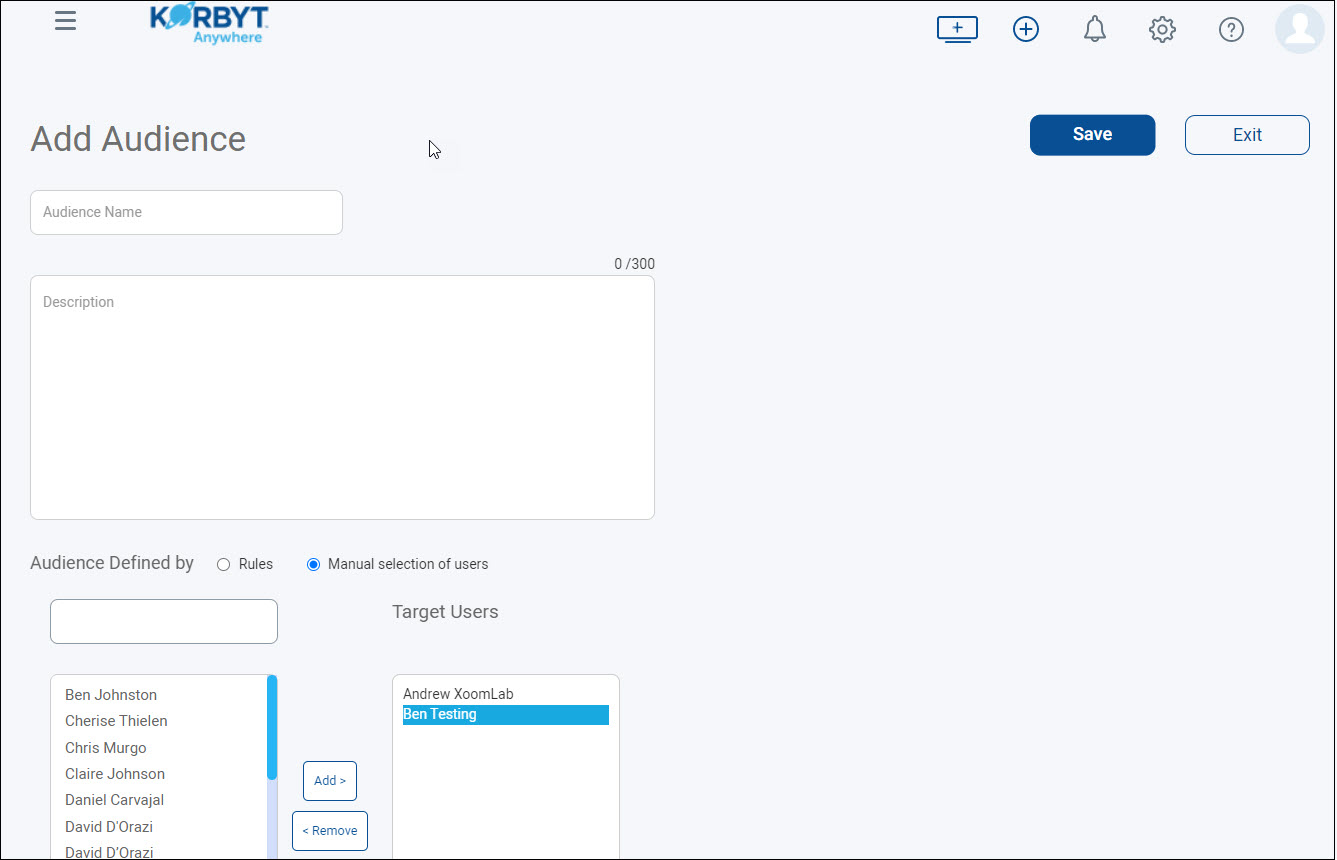
Select the appropriate users.
Click Add to add them to the Target Users column.
Click Save.
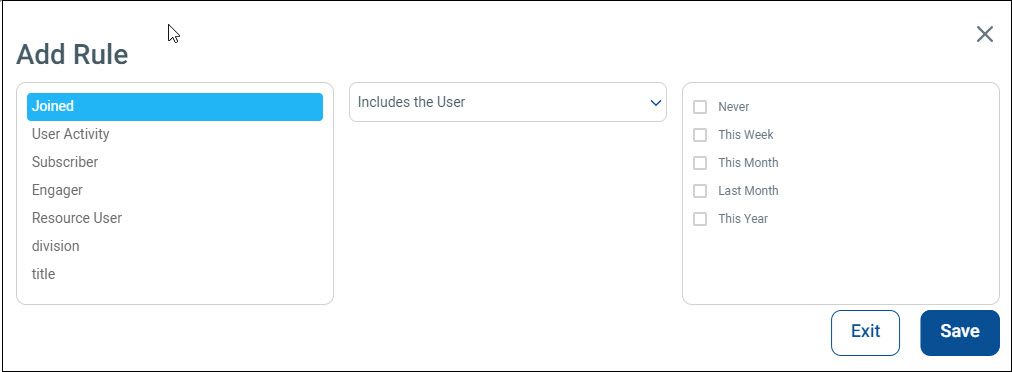
To Create A Dynamic Audience
Leave the Rules radio button selected under the Audience Defined by section.
Click Add Rule in the lower left
Select an attribute (Joined, User Activity, Subscriber, Engager, Resource User, or any user attribute defined in the CMS).
Select includes the User, or does not include the user from the drop-down.
Set additional parameters based on the selected End User Attributes.
Click Save.
Continued Learning on End Users and Audience Management
Creating a News Feed Post
In the Korbty Mobile and Web platform, the primary communication method is through the Newsfeed and the posts that have been published for a user to see based on their Audience membership and Category subscriptions.
There are many options for what type of news feed post to create.
ReviewNewsfeed Posts for all the steps and details
Creating Categories
Categories help communicators organize posts by themes or topics of content. In the Korbyt Anywhere Web Experience, you can discover any curated content that has been shared with you in the Categories page. Subscribe to categories that are interesting or relevant to your role to personalize your news feed.
Categories are optional, but can help users have the most personalized experience, which will increase engagement
For details, seeCategories for Mobile & Web Posts
Managing Your Associated Media
Images and videos you add to posts are stored in the Media Manager, along with any images used as icons for Categories.
You can also upload documents to be used as Resources in the Mobile and Web program, sharing a PDF with users to easily download, for example
Uploading Items into the Media Manager
The Media Manager is the central library where all assets are stored and categorized by folder. Assets can be images, videos, audio, and document files.
To Upload Items
Open the Mega Menu, or use the Sidebar, to locate the Media Manager

1 – View Toggles
Folder View – Shows/Hides the folder list on the left
Filter By Tags – allows the searching of content by tags
List View – Makes content appear as a list
Card View – Makes content appear as large tiles
2 – Asset Type Selection
Let you select a specific type of time to view
3 – Actions that you can take – vary by media type
Click Import Media to open the dialog box.

You can then browse your computer or drag and drop
You can also add Tag information to the items you are importing
Continued Learning on the Media Manager
If you need more information, seeUsing The Media Manager , and Tagging In Korbyt