Quick Start Guide For Digital Signage
This article will take you through the steps to get started using Korbyt Digital Signage.
Written By Ed Kinne
Last updated 4 months ago
There are several sections, and at times, links to other articles for further exploration on a specific topic. This article covers many of the common steps to set up your system, and is not meant to be exhaustive of everything Korbyt can do.
You can use the Navigation on the side to skip to specific sections.
There is also an Introduction Video Available to watch in addition to this article.
Korbyt Platform Introduction and Overview Video
Logging In & Navigating the CMS
To log into the Korbyt Anywhere Content Management System (CMS) navigate to Korbyt.com/login
Chrome or Edge web browser is required for full functionality
Enter your email address and password, or use the SSO service configured for your tenant
When you login you will be viewing the dashboard for your service
Navigation in the system is done through icons at the top of the screen

1 - The Mega Menu in the upper left, click to open all the working sections
2 - The Gear Icon, click to open the System-Wide settings
3 - User Manamagnet, see your own profile and manage others
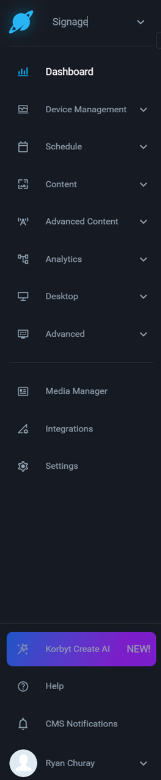
Or in the Sidebar Navigation in the new UI
The Sidebar can be expanded to show full names of sections or collapsed down to just show Icons
Continued Learning on Basic Navigation and User Management
If you need more information on the dashboard, see Understanding The Korbyt Dashboard
If you need more info on the Sidebar Navigation, see Side Navbar CMS Navigation
If you need to add other users, see How To Manage CMS Users And User Groups , and Content Managers (CMS Users) Roles And Abilities
Adding Media Players
Media Players connected to the system receive instructions for what to show based on Playlists. This content is stored locally and then displayed based on the instructions provided by the Playlist. Every 15 minutes, the Player and Service will check in so that the player can download any updates to the content.
Network Setup
For Media Players to communicate with the Korbyt CMS, your network has to allow the devices to reach Korbyt
The Media Player needs to be assigned a DNS server from DHCP or manually.
The Media Player needs to be able to reach a DNS server(step 1) that can resolve our external domain name (*.korbyt.com)
Whitelist Korbyt.com – *.korbyt.com will need to be whitelisted to access subdomains and external sources.
Korbyt Agent Software Installation
Before adding a media player, you may need to install the Korbyt application on the device. The installation process will vary based on the type of device.
For Brightsigns, see Brightsign Configuration Instructions using BSN Cloud
For Windows, see Korbyt Windows Player (KWP) Requirements and Installation
Other systems can be found by searching this Knowledge Base
Adding a Player to your Tenant / Provisioning
Once your player is running its Korbyt Software, if it has not already been connected to your tenant, it will show a blue screen similar to this one
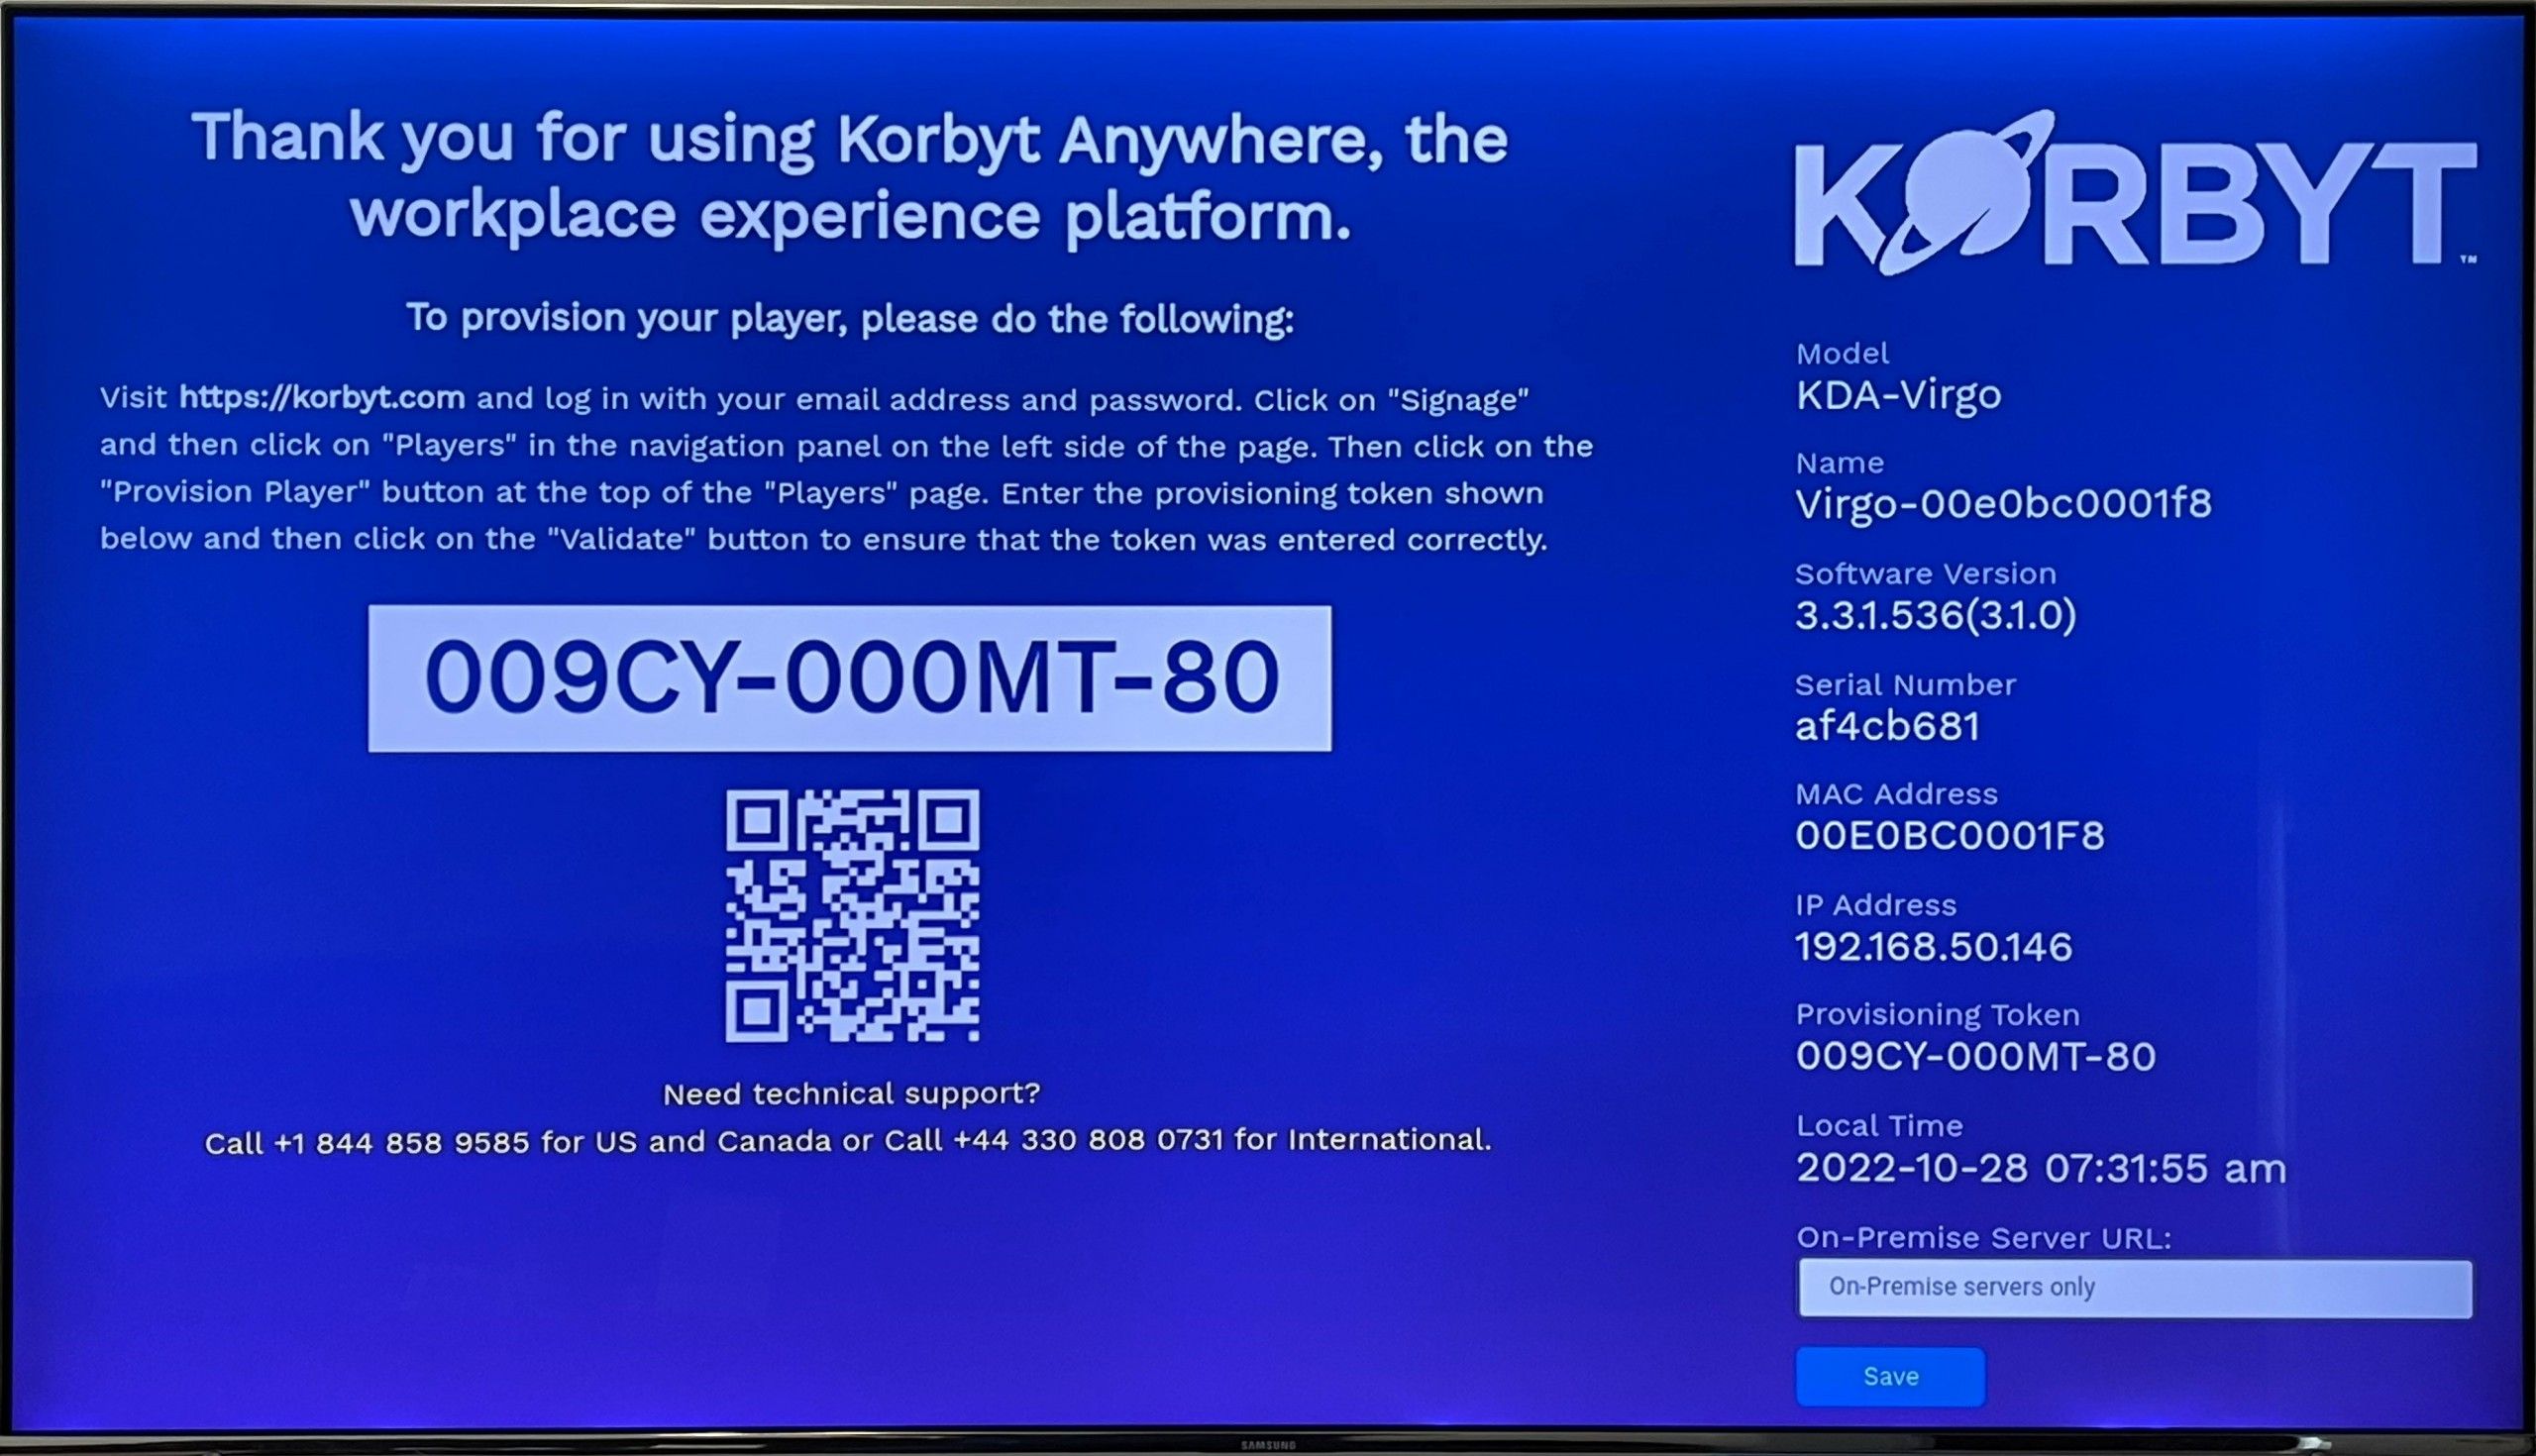
To provision a player:
Navigate to Device Management > Players.
Click Provision Player.

From the Provision Player dialog, enter the provisioning token and click Provision.
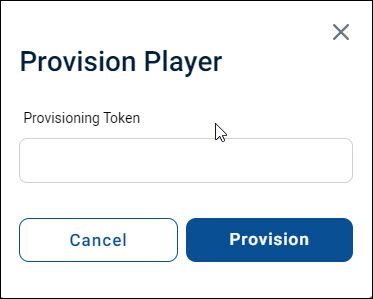
A confirmation message appears.
Click OK. The new player will appear on the Players screen.
The player will have a “Pending” status until the player is done provisioning.
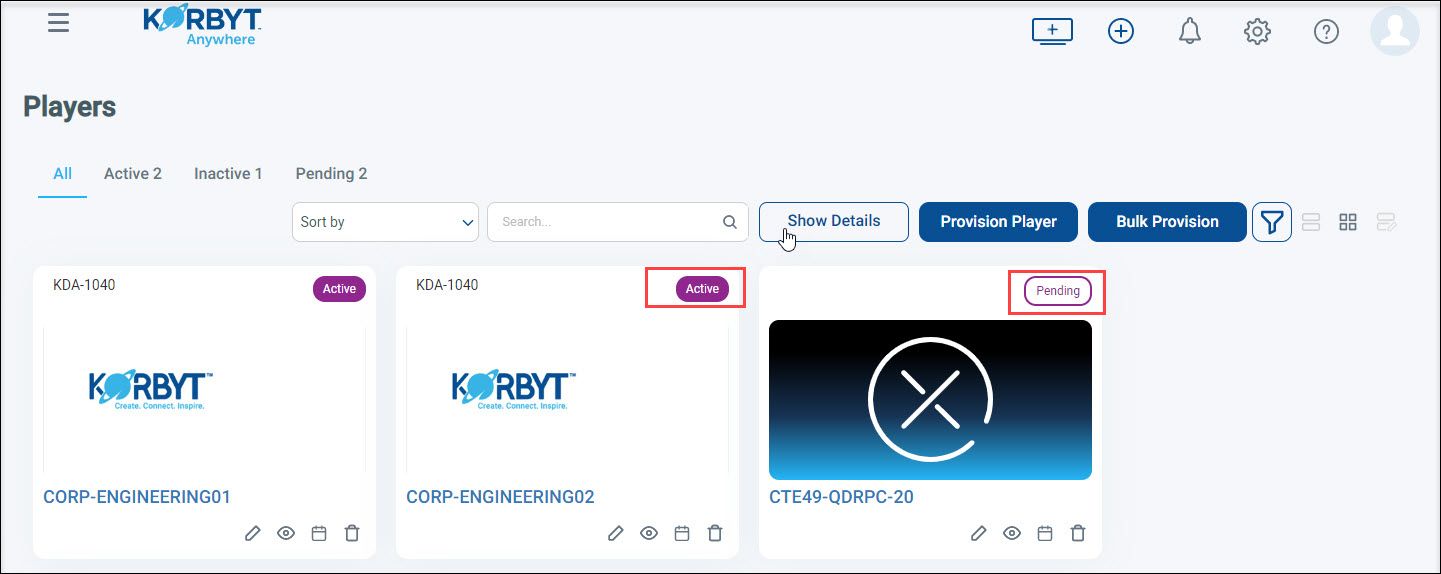
Once provisioning is completed and the player is able to reach Korbyt, the status will change to “Active”.
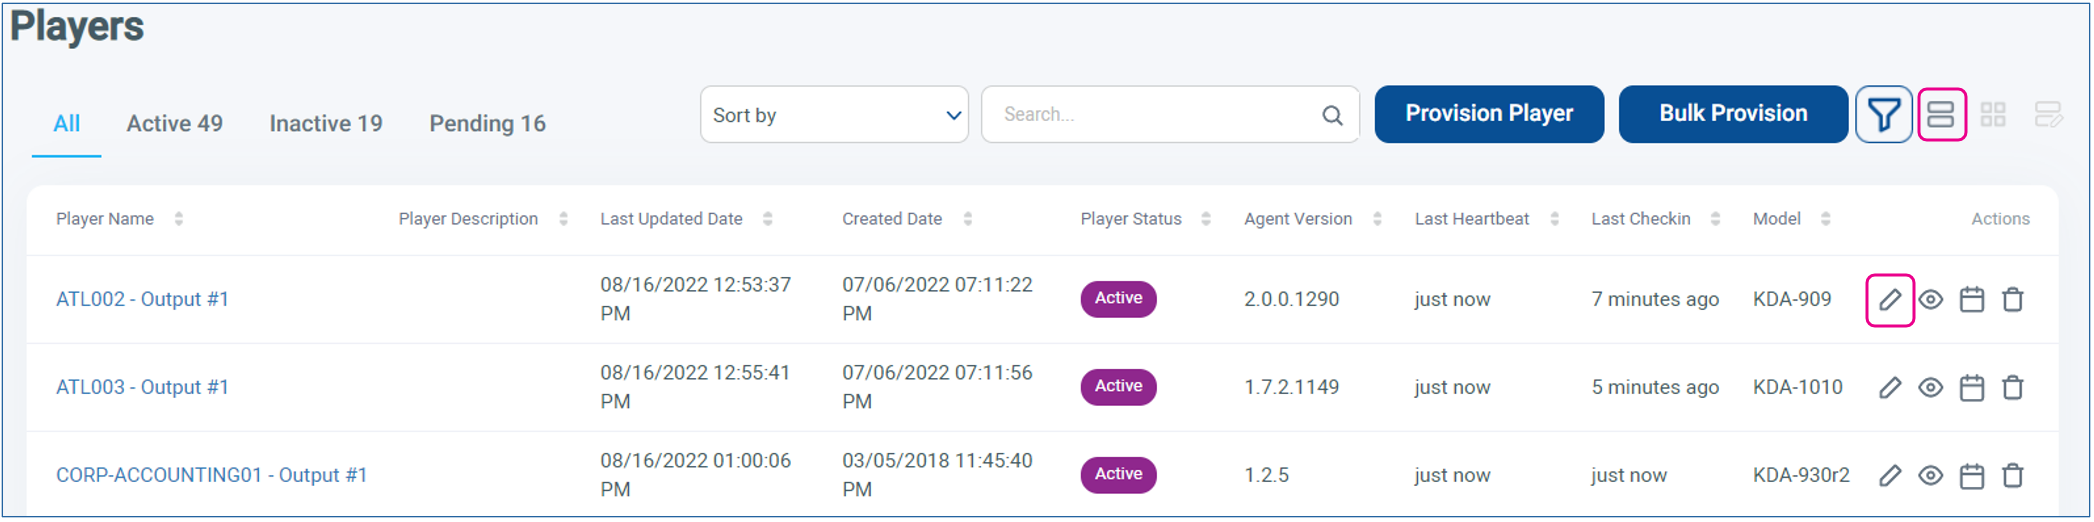
Active Players are those that are regularly communicating with the Korbyt CMS
Inactive Players are those that are having a communication difficulty
Pending Players are waiting to have their first full connection
If you click the Pencil next to a player, you will be able to:
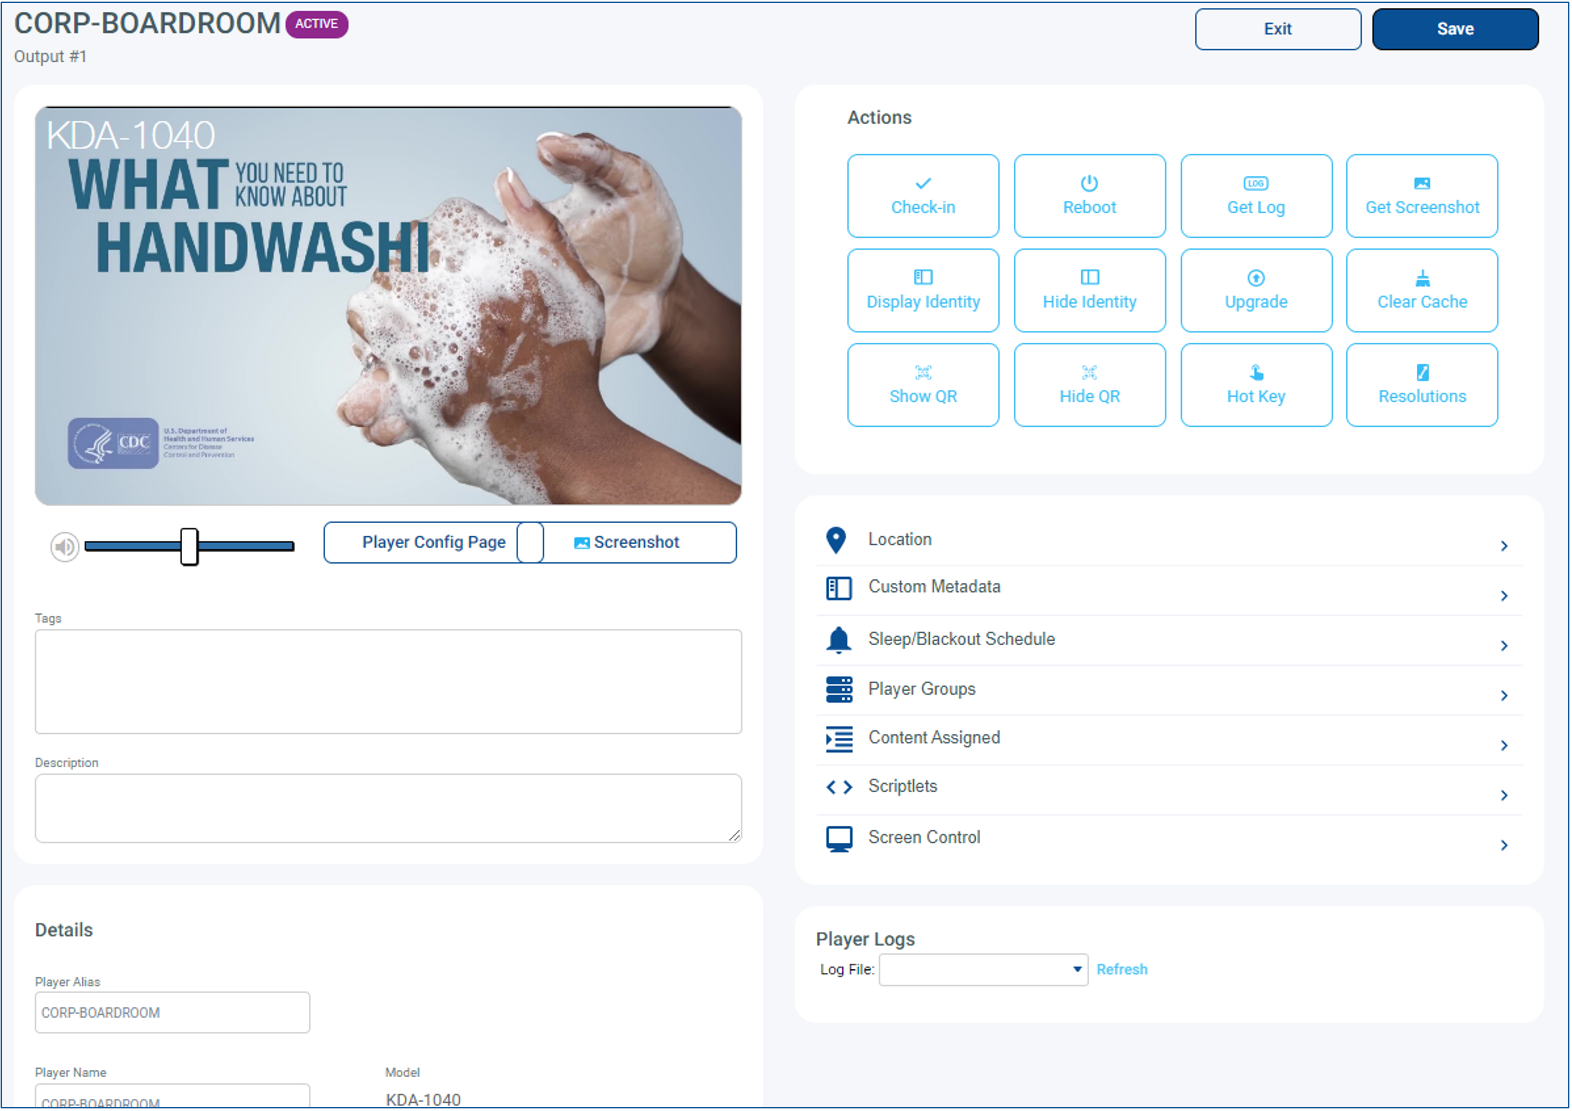
Edit the player’s information, like location and description
Send commands to the player like Check-in, Reboot, and Get Screenshot
Continued Learning on Network and Player Management
If you need more information on the network requirements, see Networking Best Practices For Digital Signage or Korbyt Player Network Connections
If you need more info on the Player Provisioning, see Adding Players to your Korbyt Tenant - Provisioning
If you need more info on managing player details, see Player Settings - Controlling and Configuring Media Players in the CMS
Adding Your Content
Content that is screen-ready in Korbyt is housed in two main ways
Images and Videos that are stored in the Media Manager
Layout Designs in Korbyt in a Published (approved) state
Uploading Images and Videos into the Media Manager
The Media Manager is the central library where all assets are stored and categorized by folder. Assets can be images, videos, audio, and document files.
To Upload Items
Open the Mega Menu, or use the Sidebar, to locate the Media Manager
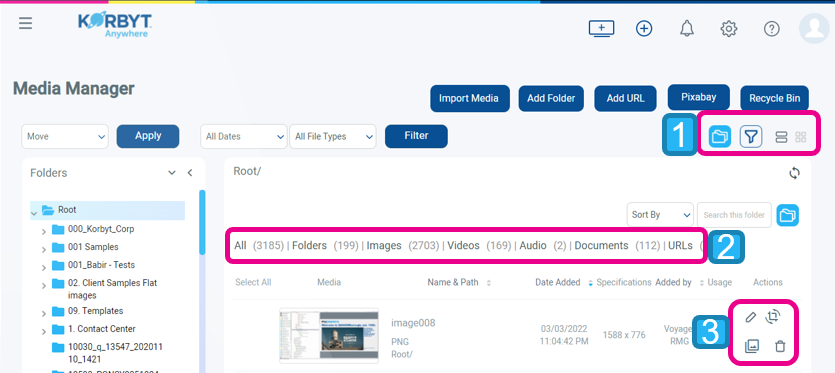
1 – View Toggles
Folder View – Shows/Hides the folder list on the left
Filter By Tags – allows the searching of content by tags
List View – Makes content appear as a list
Card View – Makes content appear as large tiles
2 – Asset Type Selection
Let you select a specific type of time to view
3 – Actions that you can take – vary by media type
Click Import Media to open the dialog box.
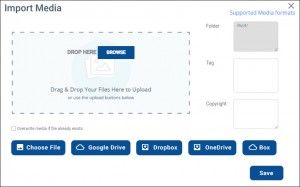
You can then browse your computer or drag and drop
You can also add Tag information to the items you are importing
Continued Learning on the Media Manager
If you need more information, see Using The Media Manager , and Tagging In Korbyt
Creating New Designs (Layouts)
Layouts refer to the highly customized and dynamic signage content that can be created within Korbyt. Layouts combine Images, Videos, Text, Dynamic Date, Time, and Weather, and even live performance data provided by your other operational systems. They can be built to be as simple or as complex as your message needs. Layouts are displayed by being part of a Playlist.
Layouts can be found in the Mega Menu and the Navbar in the Content Section
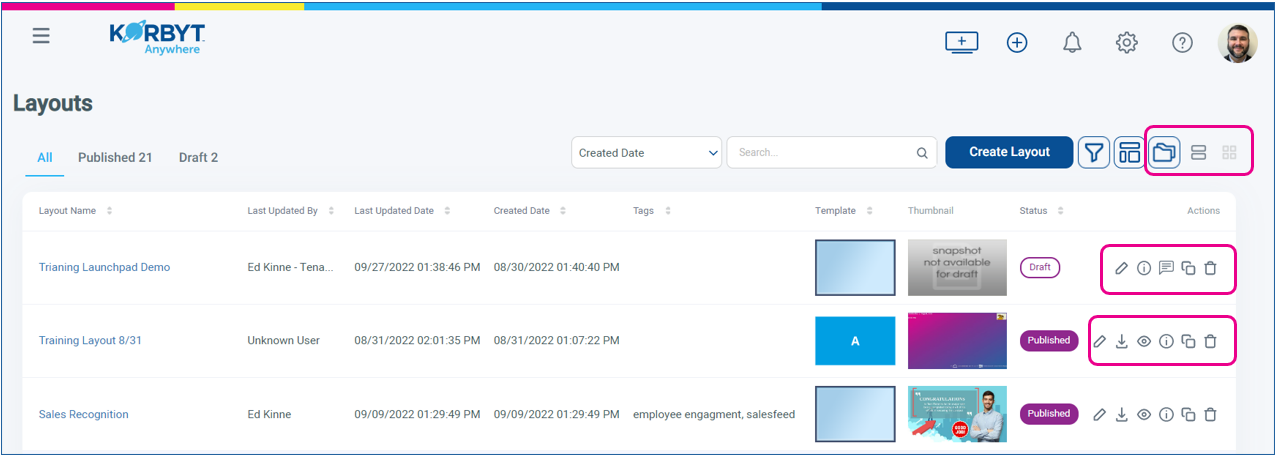
You can change the view of the layouts that already exist by toggling the folder view on and off
You can take actions on individual layouts that exist using the Action Icons to the right
Published and Draft Layouts will have different options
Published Layouts are the ones that will be available to be put on a playlist
A Layout can only be published by Content Approvers and Higher
Clicking Create Layout takes you through the steps to create a new layout based on a starting design.
Creating a New Layout, or clicking the Pencil Icon on an existing one, will open the Builder Tool
Builder Tool
The Builder Tool is the GUI-based design system used to create and edit layouts in Korbyt
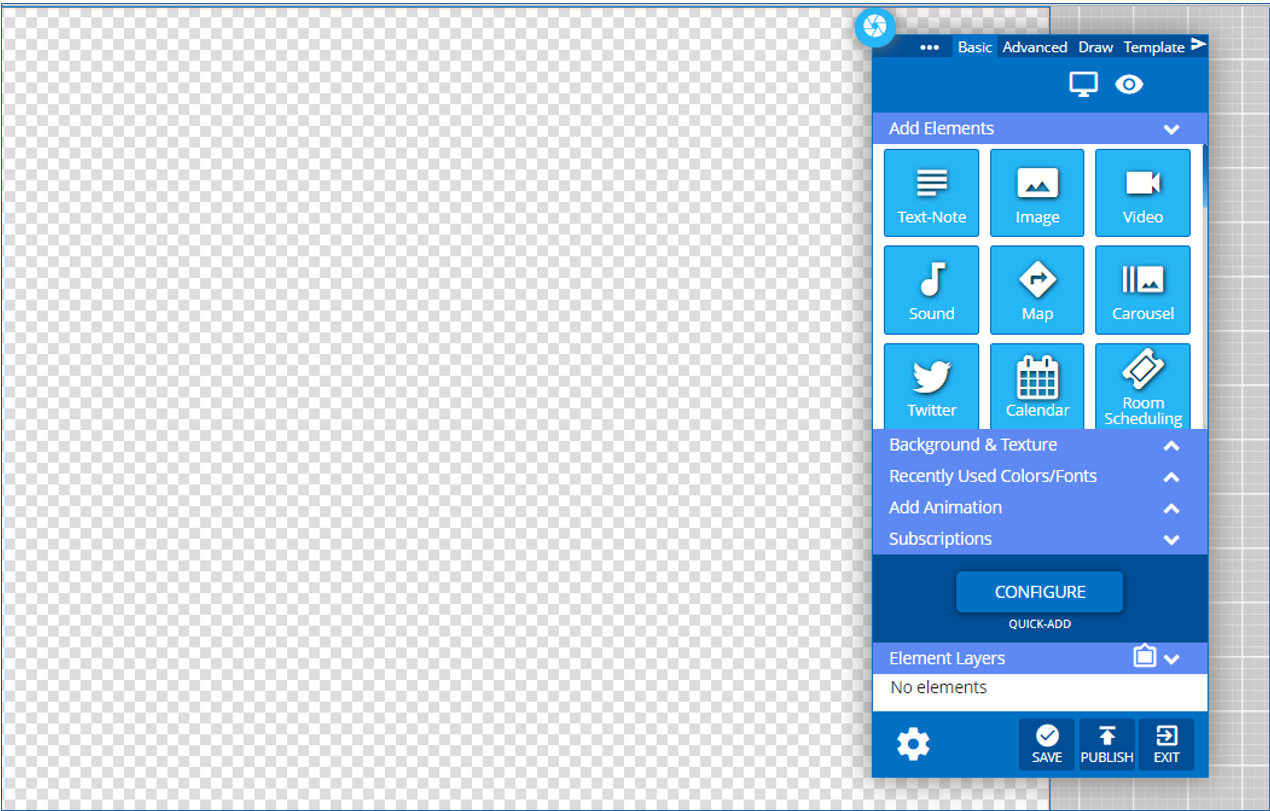
Items are added to the Layout by clicking and dragging them from the Add Elements section of the Control Panel
To add an image to the Layout you would click and drag the blue Image tile to the canvas
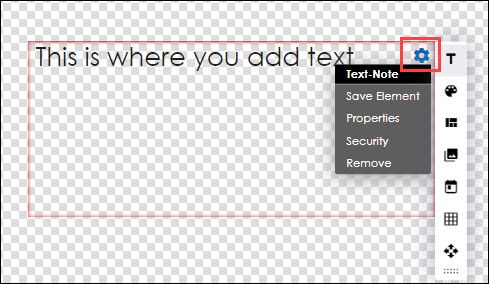
When you add an item to the layout, it will be present in its own space, with a red highlighted border when you are interacting with it.
Items on the canvas can be
Moved by clicking and dragging the item
Resized by clicking and dragging the lower right corner of the item
Edited by clicking on the blue Gear icon in the upper right corner of the item
Continued Learning on Layouts and the Builder Tool
If you need more information on creating new Layouts, see Managing and Creating Layouts
If you need more information on the Layout Builder, see Using The Builder Tool For Layouts Or Messages
Making Content Seen (Playlists)
Playlists are the mechanism in Korbyt that controls which items play on screen, for how long, and in which order.
There are two main types of playlists in Korbyt Standard and Clever.
For all new devices (bought online in the last 5 years), we recommend just using Clever Playlists
Playlists can be found by opening the Mega Menu and then clicking on Playlists at the top of the Schedule section.
You make the choice of which type of playlist you are building when, on the Playlist Screen, you click Add Clever Playlist
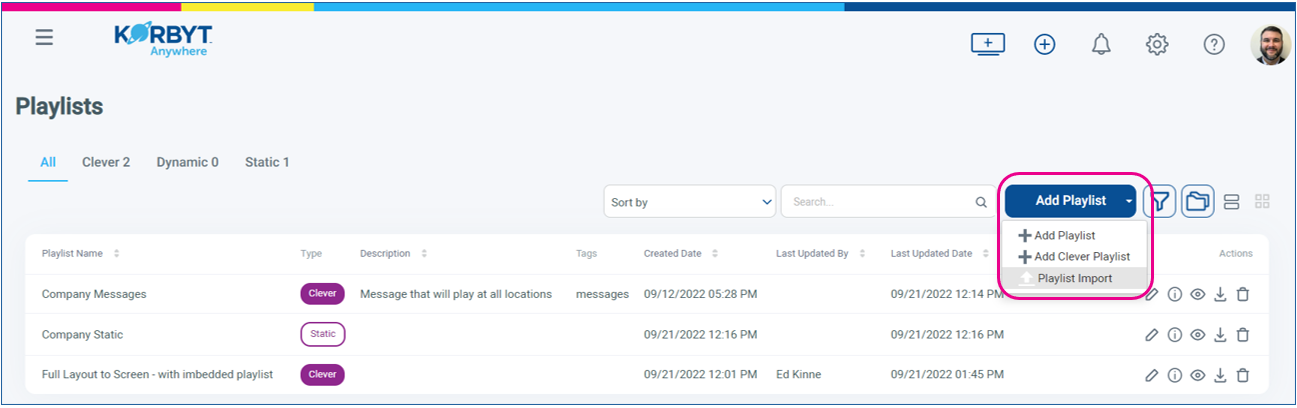
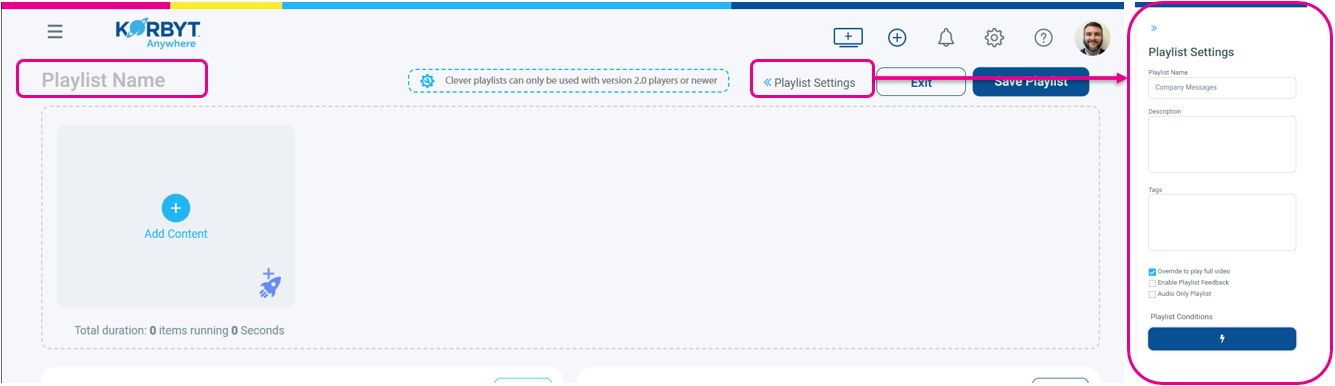
You can now Name the playlist by typing in the upper left, or you can click Playlist Settings (next to Exit and Save Playlist buttons) and provide the following information:
Adding Content Manually
Click the blue Add Content + Button
From the Manage Content section, select from the existing content across the Images, Videos, Layouts, Messages, and URLs tabs or drag and drop local files from your computer.
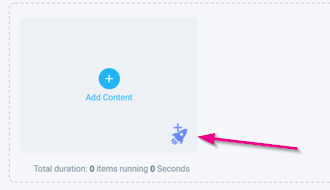
Adding Clever Content
Click on the Rocket Ship icon on the bottom right of the content box to add your Clever content.
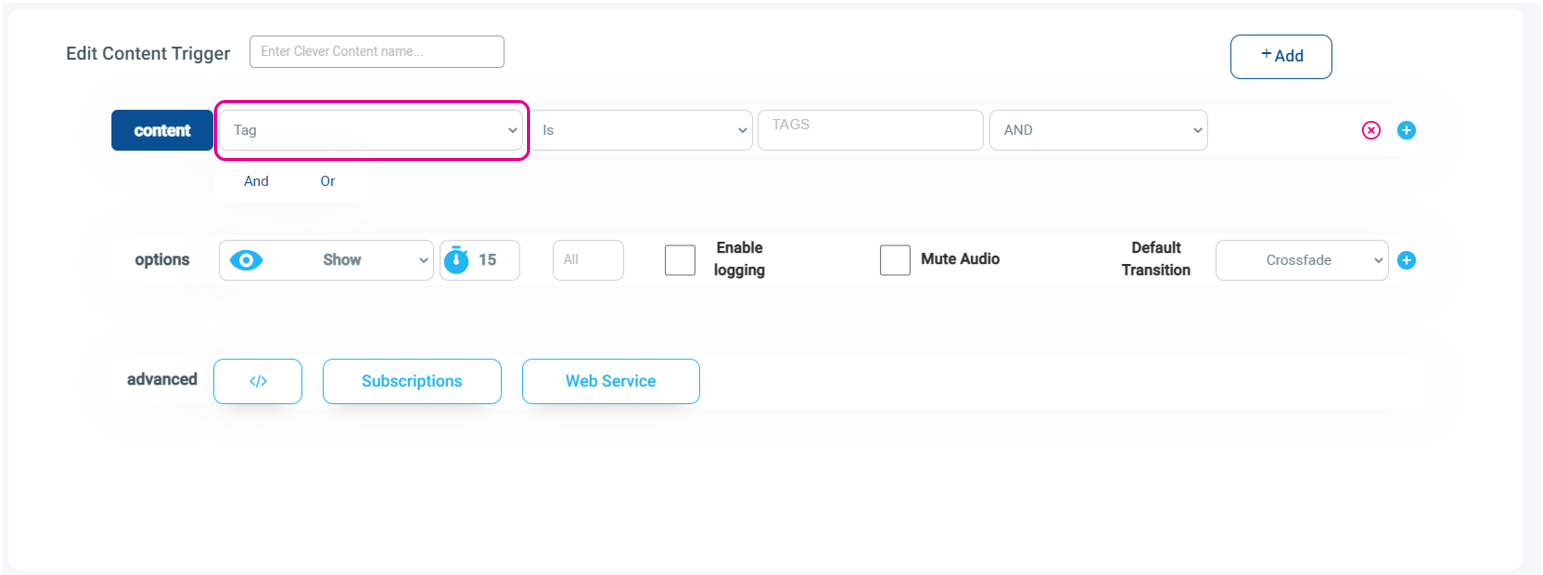
Add a Trigger Name
Add Content trigger rules to select what items are shown
Use the drop-down to select the basis of the rule
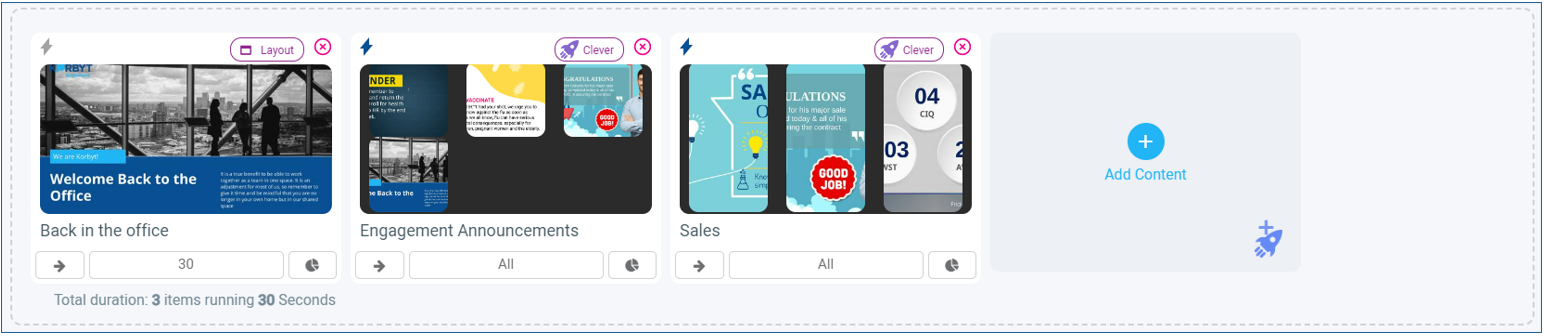
The playlist will show its items working from left to right in the order they appear at the top of the playlist. You can drag items to reorder them.
You can also create duplicate copies of items if you want them to show more than once in each rotation.
Adding Players
If this playlist is meant to be seen directly on a screen, you will now add Players and/or Player Groups that the playlist will be programmed for.

Drag and drop the appropriate players into the Drag Players and Groups Here field.
Once your player is added, your playlist will start playing at its scheduled time on your active player.
Continued Learning on Playlists
If you need more on Playlist, see Creating and Managing Playlists , and Setting Default Content Playlist