Zoom Integration with Korbyt Booking
Written By Ed Kinne
Last updated 9 months ago
Introduction
This document outlines the steps required to configure Korbyt Booking to include Zoom integration. It contains steps needed to be taken by the client (IT Admin) within the Zoom Marketplace App to enable access to the Zoom API, and also for Korbyt teams to configure the front-end application.
Using Zoom integration with the Korbyt Booking Application will allow clients to add Zoom details into bookings created in Korbyt Booking seamlessly and have the relevant information distributed to attendees.
Prerequisites
You have a Zoom account.
You are either the Zoom account owner, account admin, or have been assigned the Zoom for developers role.
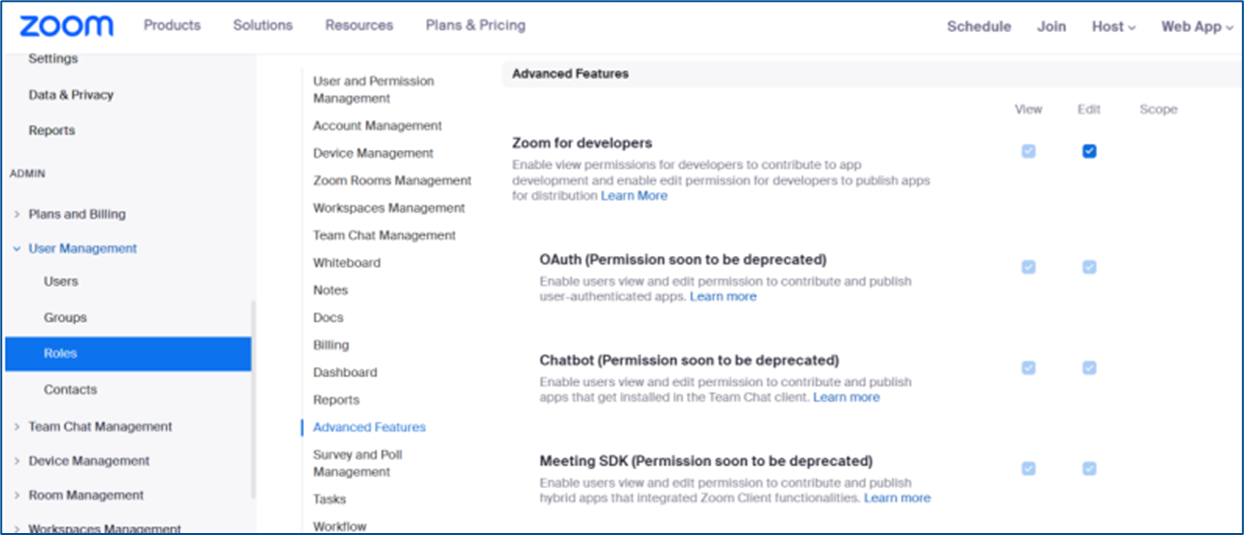
To enable the Zoom for developers role, log in to the Zoom web portal as an admin.
Go to User Management > Roles > Advanced features.
Select the View and Edit checkboxes for Zoom for developers.
Configuring Zoom Using OAuth for Authentication
OAuth 2.0 is the industry-standard authorization protocol that allows applications to obtain requested access to user accounts over HTTPS with the user’s approval. Using OAuth, your app can make API requests for an authorized user.
Setting up App in Zoom
To do this, please follow the steps below. Note that admin permissions within Zoom will be required to complete this setup.
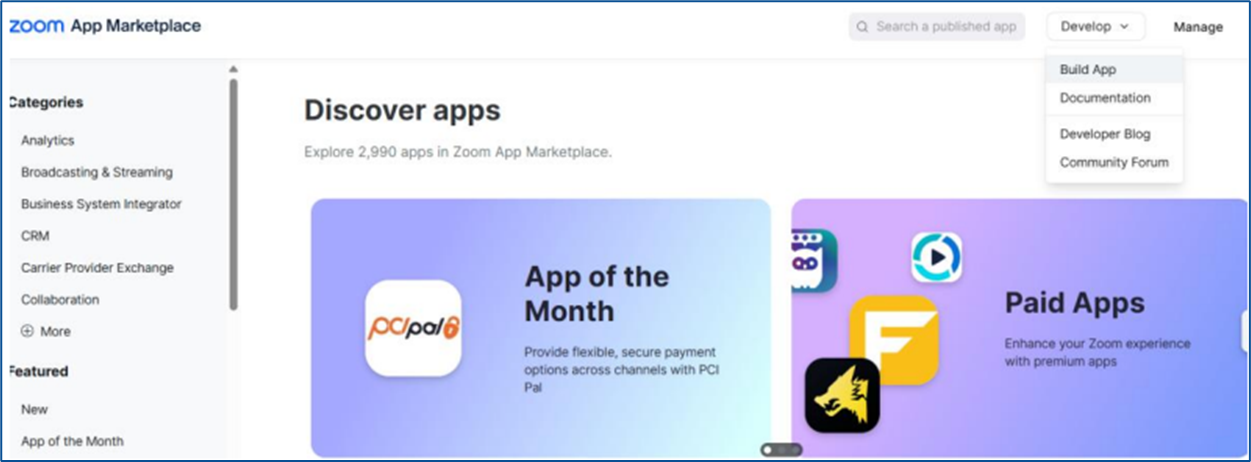
Navigate to the Zoom marketplace at https://marketplace.zoom.us/
In the top right-hand corner, click on the Develop dropdown and select Build App.
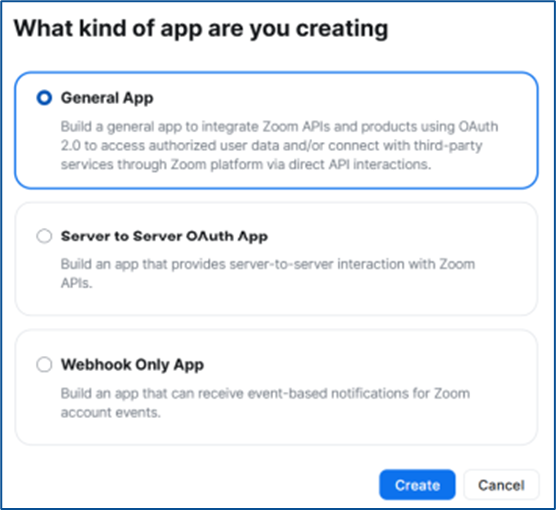
Select ‘General App’ as app type and click Create.
In the Select how the app is managed section, select Admin-managed.
You can rename the app from the top left corner of the page.
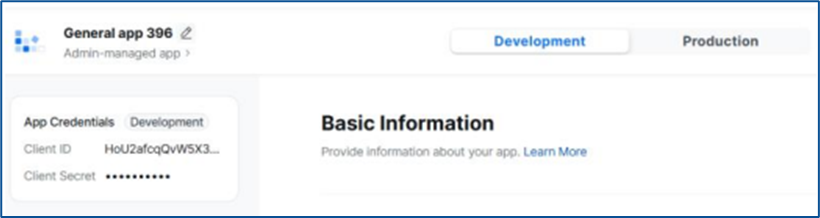
App Credentials - The build flow automatically generates app credentials (client ID & client secret) for your app.
Use development credentials
(App is not required to publish to Zoom Marketplace, so we are using only development credentials.)
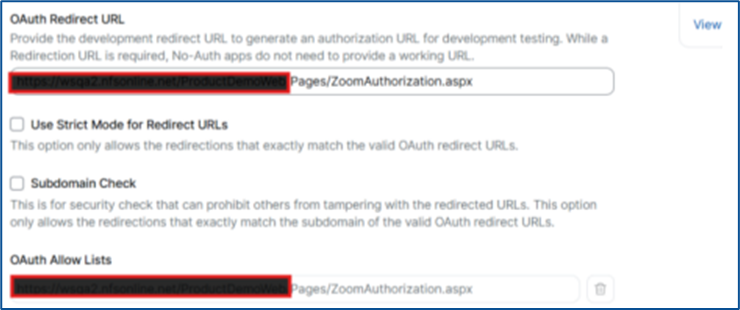
In the OAuth Information section, set up OAuth for your app.
OAuth redirect URL (required): Enter your Korbyt Booking webapp and append ‘/Pages/ZoomAuthorization.aspx’ at the end
OAuth allow lists (required): Add your Korbyt Booking URL into OAuth allow list
Click continue.
In Access, Surface and Embed section no options are required so click continue or go directly to Scopes section.
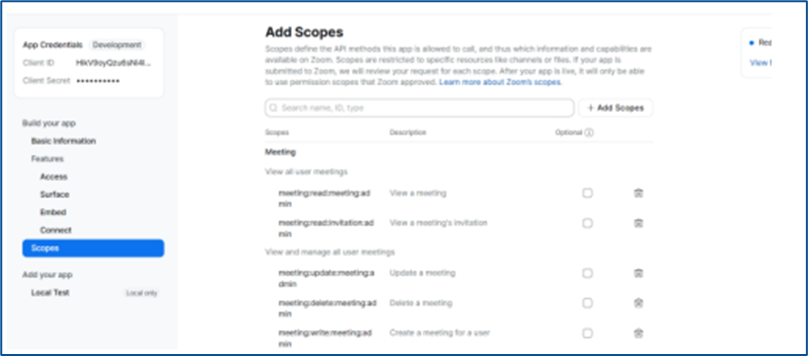
Select scopes (API methods)
On the Scopes page, Select Add Scopes and search and select the below required scopes.
meeting:read:meeting:admin
meeting:read:invitation:admin
meeting:update:meeting:admin
meeting:delete:meeting:admin
meeting:write:meeting:admin
Note: After adding new permissions, a new Zoom token must be generated in Workspace to ensure proper functionality.
In the Local Test section,
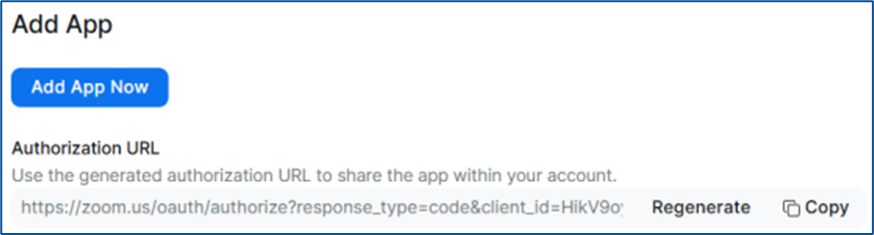
Click ‘Generate’ to generate the authorization URL
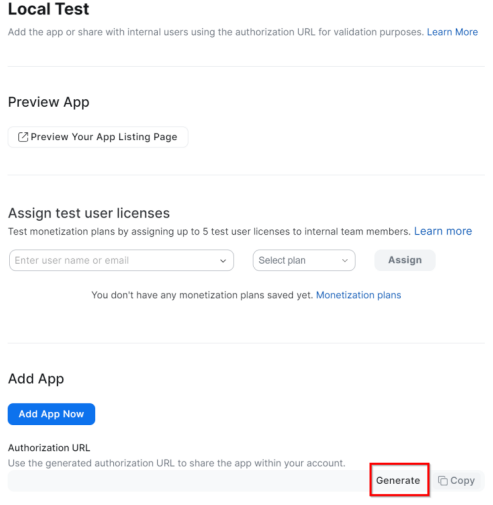
Then ‘Copy’ to generate the authorization URL
Setting UP Korbyt Booking for Zoom OAuth
This section assumes that there is already an active and working Korbyt Booking system set up in the environment being used. It is to be completed by the NFS Tech Team.
Enabling & Configuring Zoom Integration OAuth Settings
The configuration in this section must be completed before enabling Zoom Integration on a room-by-room basis.
Navigate to Global Settings in the Web Application, scroll to the end, and set Collaboration Integration to YES, select Zoom as a protocol, and save.
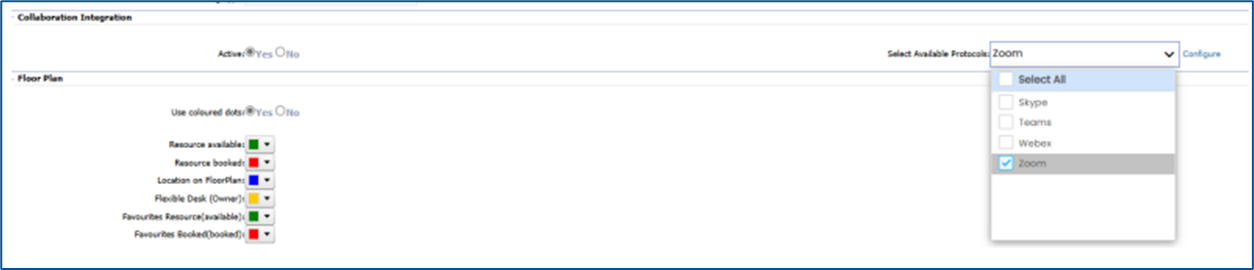
Click on the Configure link.
Configure the Zoom-specific settings: Authentication Type - OAuth
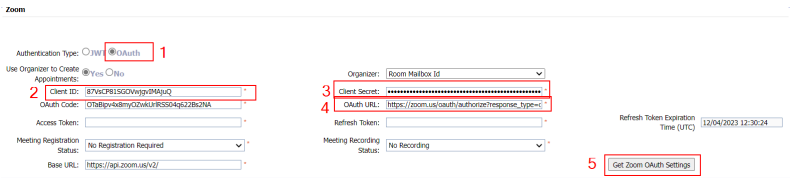
Client ID – A unique id generated when setting up a Zoom OAuth
Client Secret – A unique id generated when setting up a Zoom OAuth
OAuth URL – URL provided by zoom in Activation section of app configuration
Click Get Zoom OAuth Settings
This will open a new Zoom window and will ask the admin to log in.
After logging in, click ‘Allow’
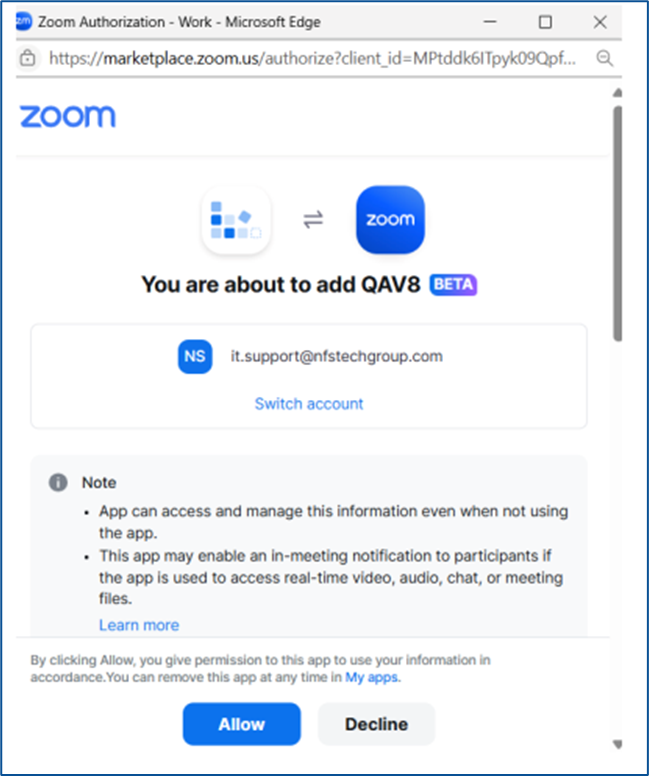
Then click close.

This will fill up the Access Token, Refresh Token, and Token Expiration Fields.
Click Save.
Zoom OAuth Setup is now complete.
Web App Settings in Resource Management
The configuration in this section will enable Zoom Integration on a room-by-room basis.
Navigate to Administration > Resource Management > Resource and select a resource that will be setup with Zoom integration.
Set Is Collaboration Active to YES and select Zoom in the option box.
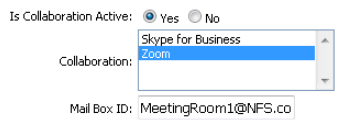
Mailbox ID – Used if the room has its own email address associated with it. The email address in this field should receive an email with the Zoom information every time a booking is created in this room.
Web App Alert Settings
The configuration in this section will add Zoom booking information to alerts that will be sent to hosts and attendees.
Navigate to Administration > Alerts.
Configure the relevant alerts that will be required (Confirmation, Modification, Cancellation, etc.)
Ensure that the collaboration tag shown below is included.

This tag will output a link that will access the Zoom meeting that has been created automatically when the booking is created, along with all standard Zoom information.
Web Application Bookings
This section shows how to activate Zoom Integration when creating bookings within the Korbyt Booking Web Application.
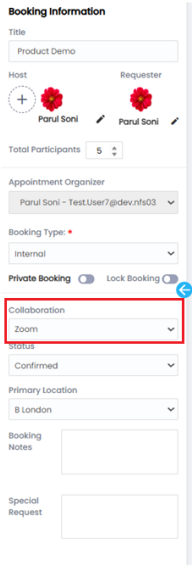
Start creating a booking in a Zoom-enabled room.
If the room being booked is not Zoom-enabled, then the option in the screenshot below will not be displayed.
Set the Collaboration to Zoom to activate Zoom integration for this booking, allowing the system to automatically generate Zoom meetings.
Bookit Bookings
This section shows how to activate Zoom Integration when creating bookings within the Bookit interface.
Start creating a booking in a Zoom-enabled room. a. If the room being booked is not Zoom-enabled, then the option in the screenshot below will not be displayed.
Set the Collaboration to Zoom to activate Zoom integration for this booking so that the system can automatically generate Zoom meetings.

NOTE – When creating Zoom bookings from Bookit, the automatic EWS invite will contain the Zoom meeting details and URL. This is not configurable and will happen automatically.