Tagging In Korbyt
Tagging is when you add words or phrases as metadata to Content(Media, Layouts) and Players. Tags are not visible when the content is displayed, nor are viewers aware they’re being used.
Written By Ed Kinne
Last updated Over 1 year ago
Tags are used for keeping your content organized, making it searchable, automating content distribution, and grouping Players.
Tags can be added to all content as it is being imported to Korbyt
Adding the same tags to all content on the import
Manual and Courier importing can add bulk tags in this way
Once in Korbyt Tags can be added to items, 1 piece of content at a time.
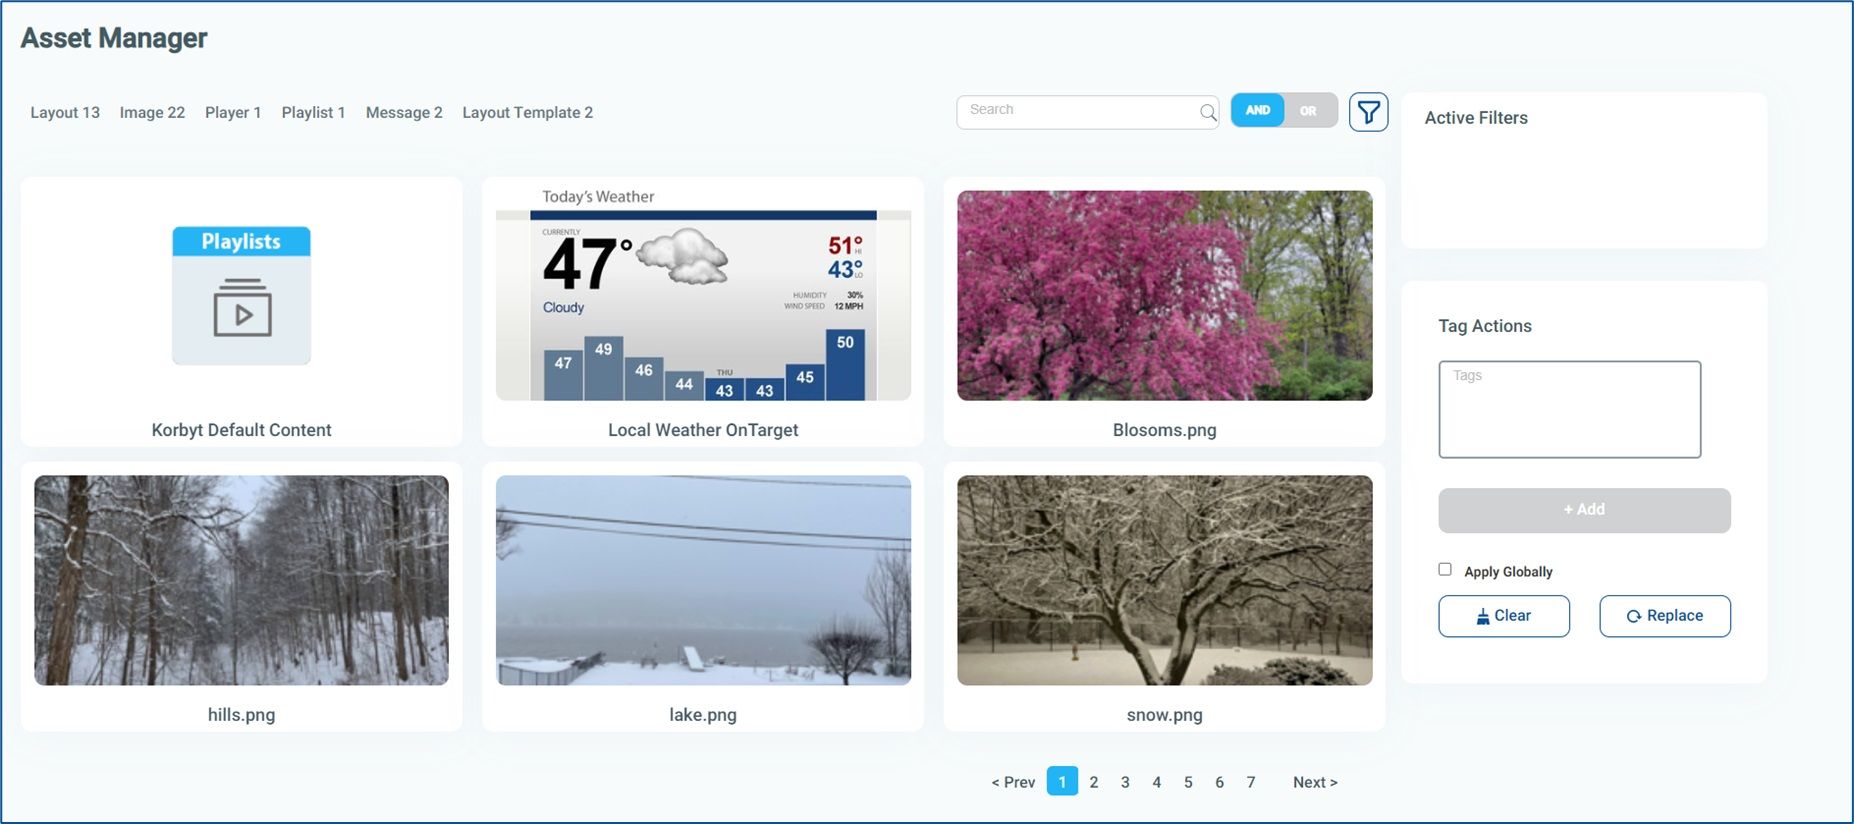
Asset Manager
The Asset Manager can be used to to search for an monitor all areas of Korbyt and the main mechanism it uses to organize items is tags
Search for items with specific tags across multiple item types
See Tags used with an item count for each tag
Edit Tags
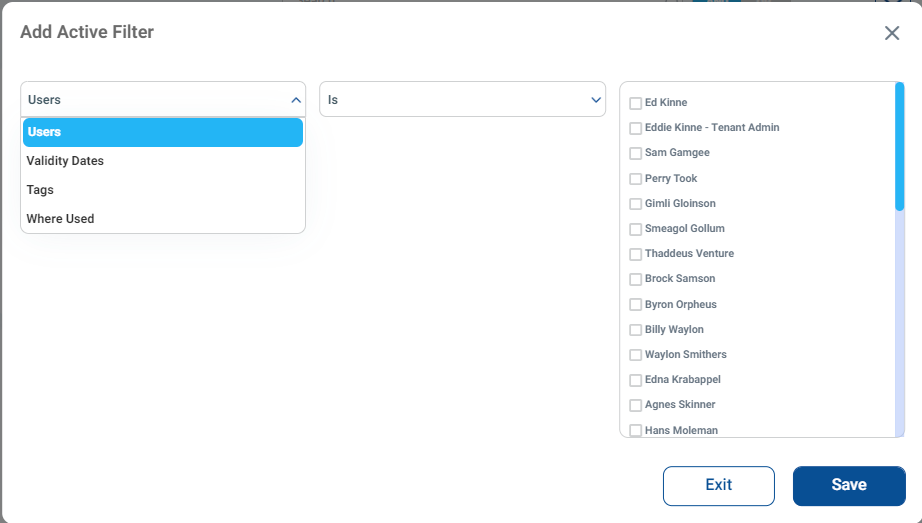
Filter Your Results
To Open the Asset Manager
Click the Mega Menu

in the upper left corner
In the Content column, click Asset Manager
Controlling / Limiting Tags
By default, any tags are allowed in Korbyt.
Meaning that as content is tagged, the person doing the tagging can enter any text they want.
A list of current tags in the system will be suggested based on what is typed, but nothing limits the tags.
Optionally, tags can be locked in the system so that only Tenant Administrators and Administrators have the ability to create the tags.
After they are created, they are available to other users through a Drop-Down list experience rather than freely entering text.
To Engage the option to limit tags
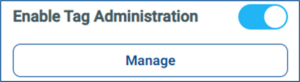
Click on the Gear Icon in the upper right to open Settings
Click on the Signage tab of the settings screen
Then, on the lower left, click the toggle to Enable Tag Administration
You will then see a Manage button
When you click Manage, you will see any tags that have already been used in the system
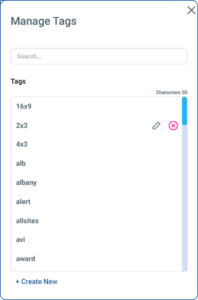
Click the Pencil to edit an existing tag
Click the Red X to remove a tag from the system
Click + Create New at the bottom to add a new tag to the list
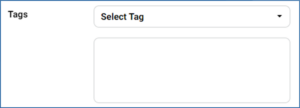
Now, when anyone edits/adds tags to an item using the steps below, instead of seeing a field where they can enter text freely, the user will see a Select Tag drop-down
Tagging In The Media Manager
Manual Import at Tagging
Expand the Mega Menu, in the Content section, click on Media Manager
Locate the folder you would like your content saved to, then click the blue Import Media button to open the Import Dialog box
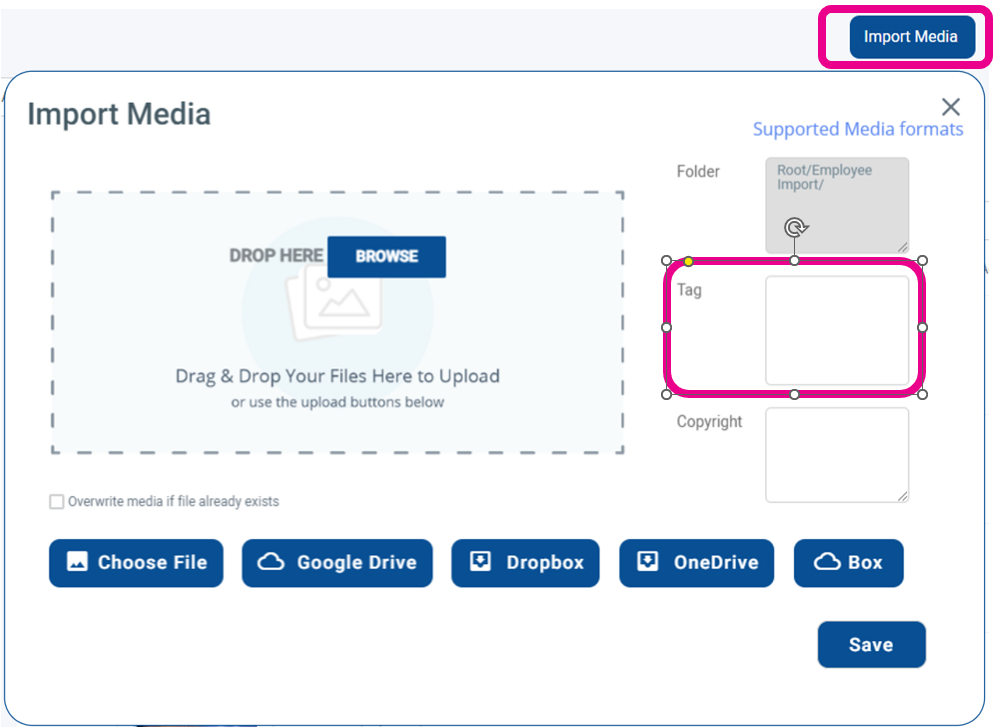
Add the Tags
When you click save, and the items are imported to Korby,t the Tags will be applied to all items in the import
Courier Import at Tagging
Expand the Mega Menu, in the Content section, click on Courier
If building a New Courier, click the blue Add Courier button at the top
If editing the Tags for an existing Courier, click the Pencil Icon to the right of it
The Dialog box will look the same in either situation
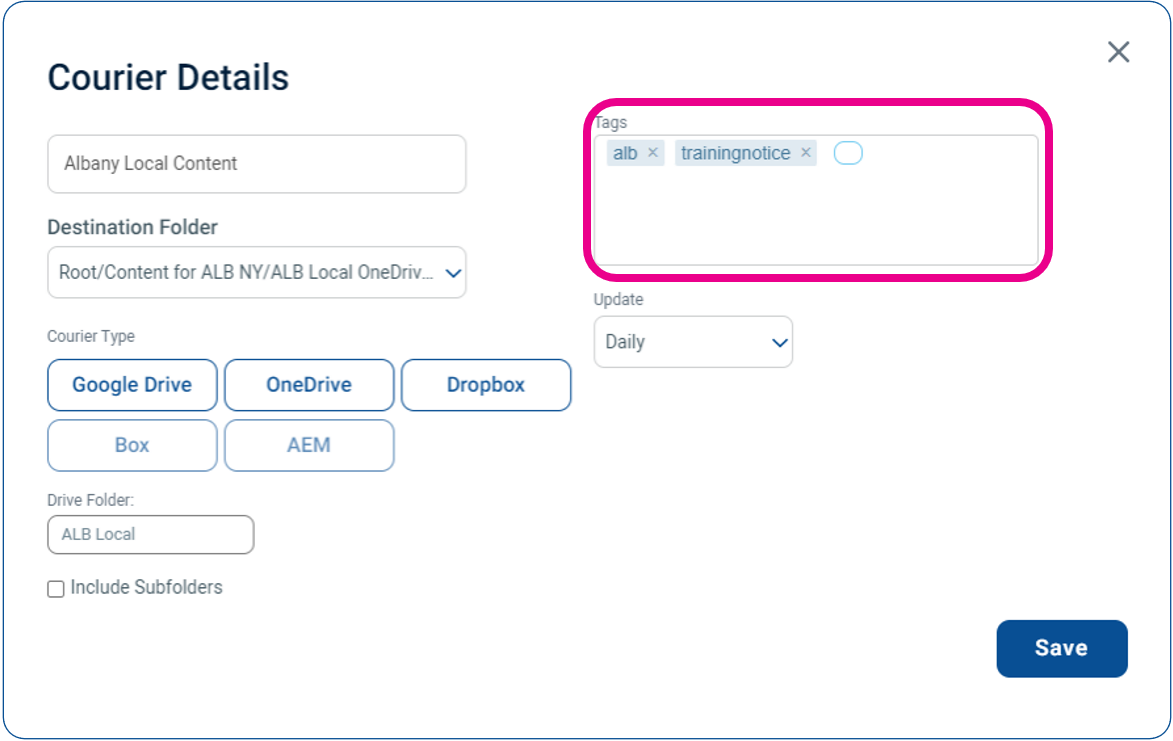
Add the Tags you would like
The tags will apply to all items imported when the Courier runs
How to Tag Individual Content
Expand the Mega Menu, in the Content section, click on Media Manager
Locate the content you would like to tag.
Click the pencil icon next to your content

You will now have an edit window open. Click into the tags field and type your tag, press the comma (,) or tab key after each one for it to be registered as a tag
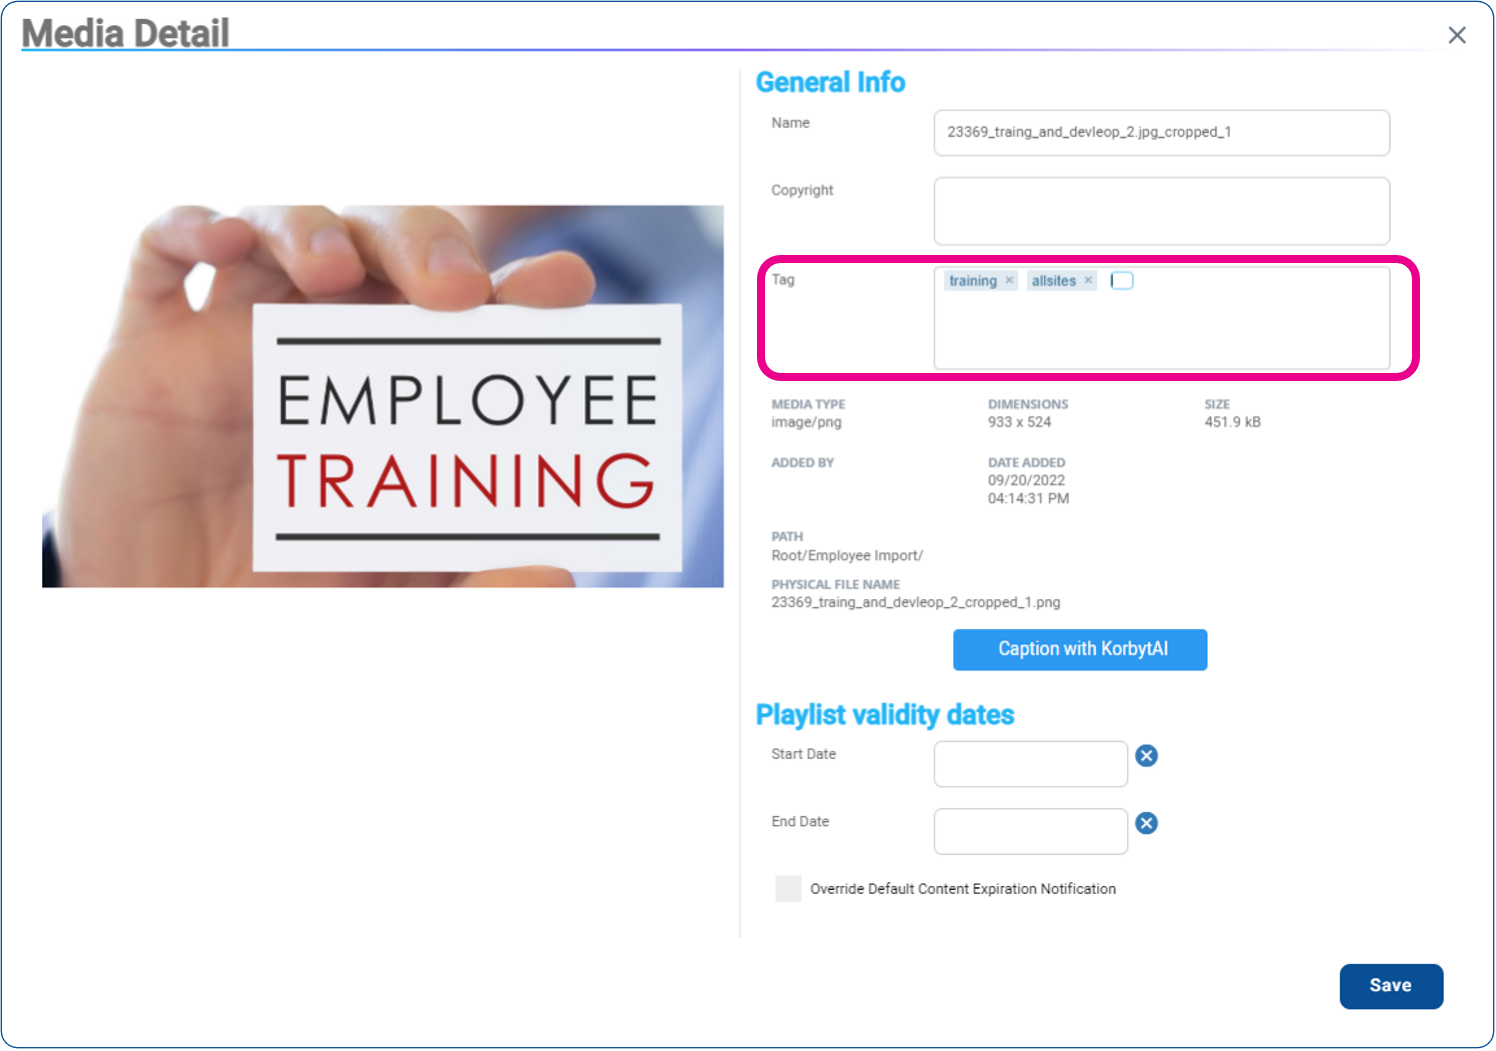
Once you are done entering tags, click the Save button in the lower right-hand corner of the window
Tagging Layouts
Expand the Mega Menu, in the Content section, click on Layouts
If you are Creating a New Layout you have the ability to add Tags in the creation process

If you are Tagging and existing Layout – Find the Layout you would like to tag and click the

( info button) to the right

You will now have an edit window open. Click into the tags field and type your tag, press the comma (,) or tab key after each one for it to be registered as a tag
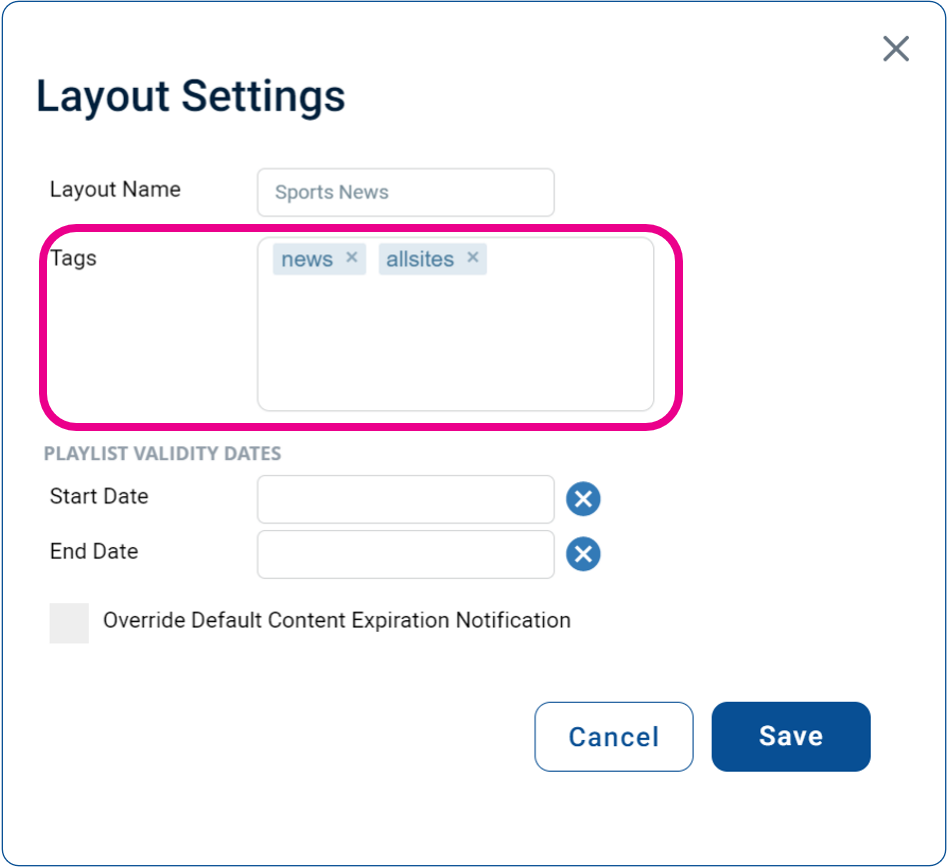
Once you are done entering tags, click the Save button in the lower right-hand corner of the window.
Tagging Messages
Expand the Mega Menu, in the Desktop section, click on Messages
If you are Creating a New Message you have the ability to add Tags in the creation process
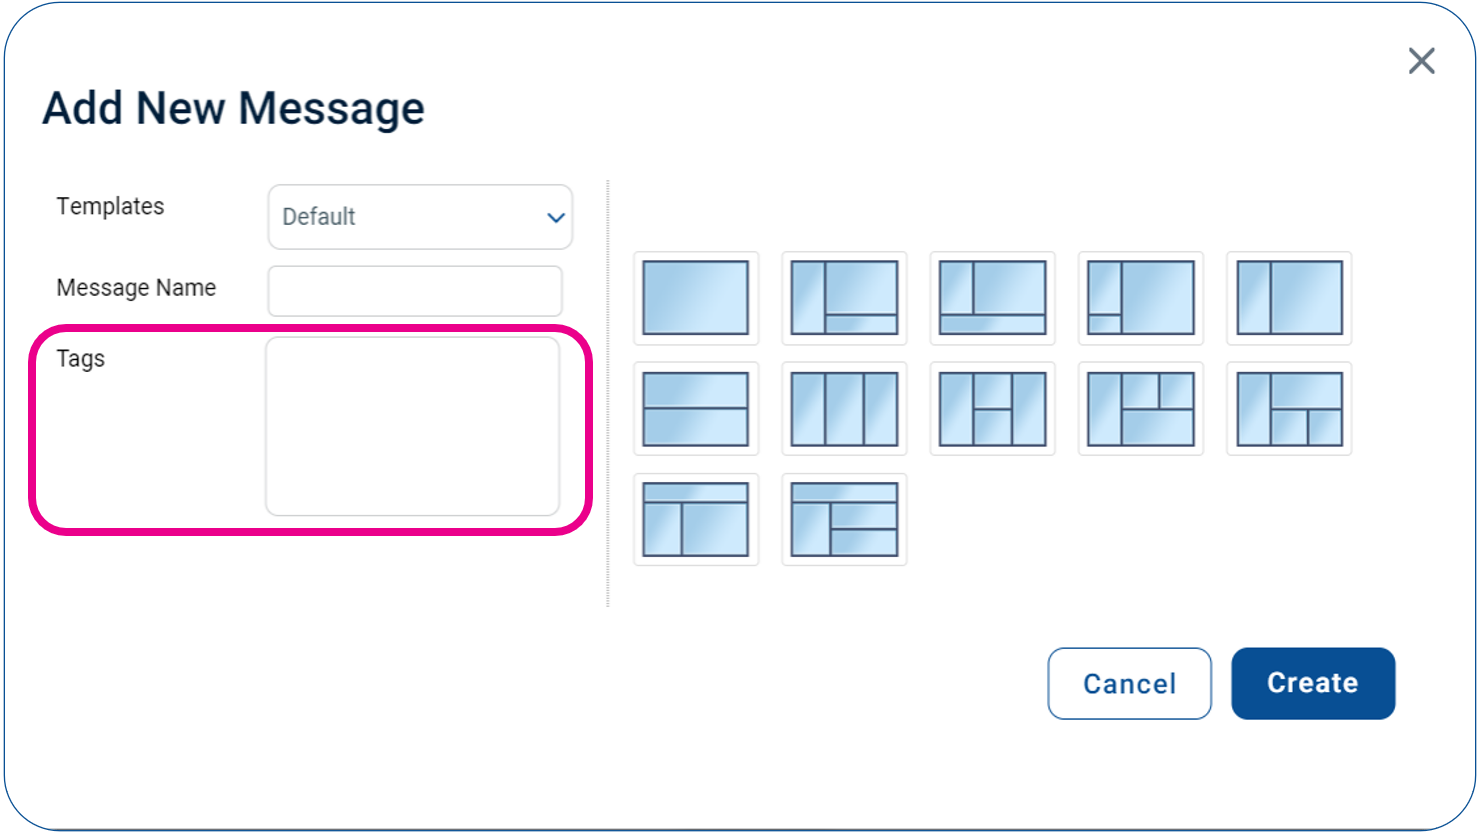
If you are Tagging an existing Message – Find the Message you would like to tag and click the

( info button) to the right
You will now have an edit window open. Click into the tags field and type your tag, press the comma (,) or tab key after each one for it to be registered as a tag
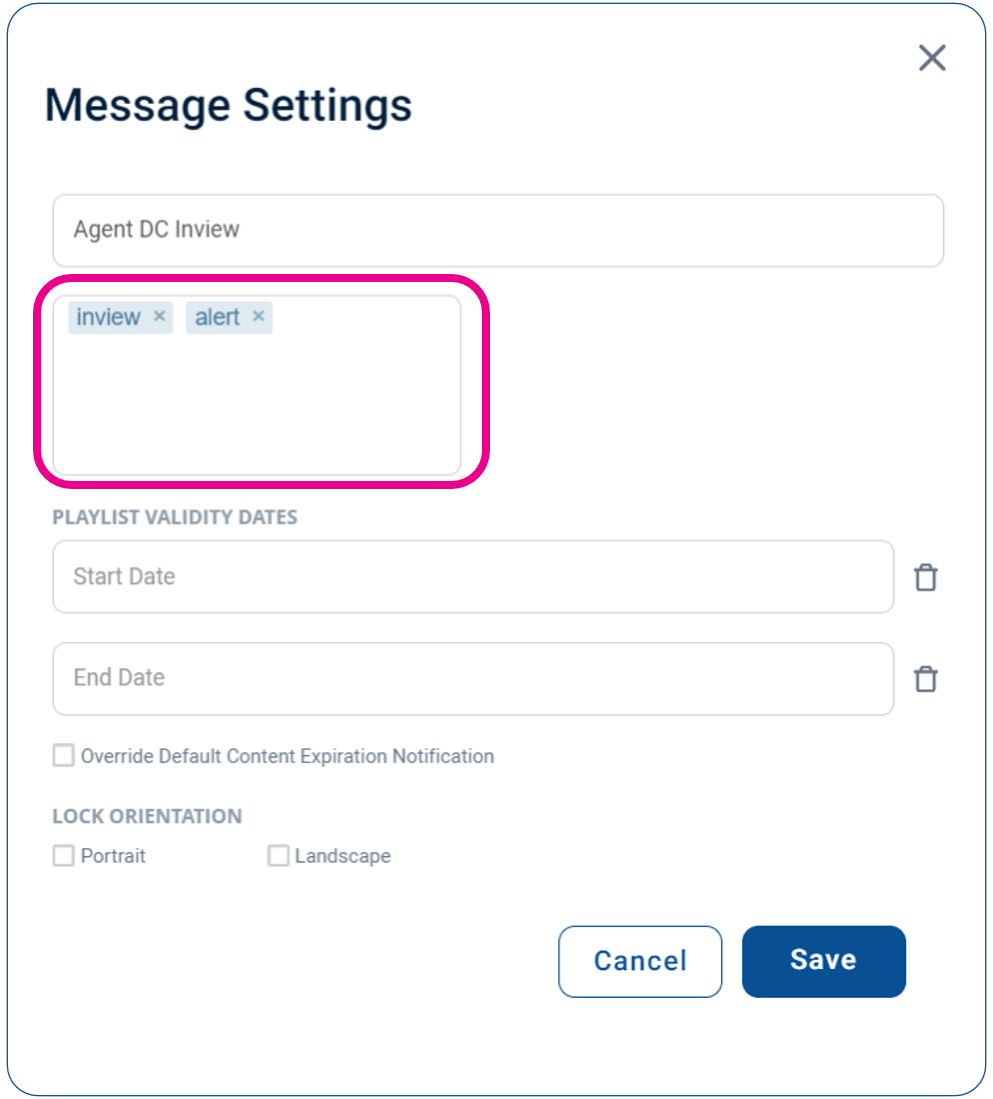
Once you are done entering tags, click the Save button in the lower right-hand corner of the window.
Tagging Playlists
Expand the Mega Menu, in the Schedule section, click on Playlists
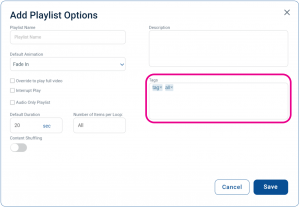
If you are Creating a New Playlist – you have the ability to Add Tags when creating
Standard Playlists show the Tag Option after clicking +Add Playlist
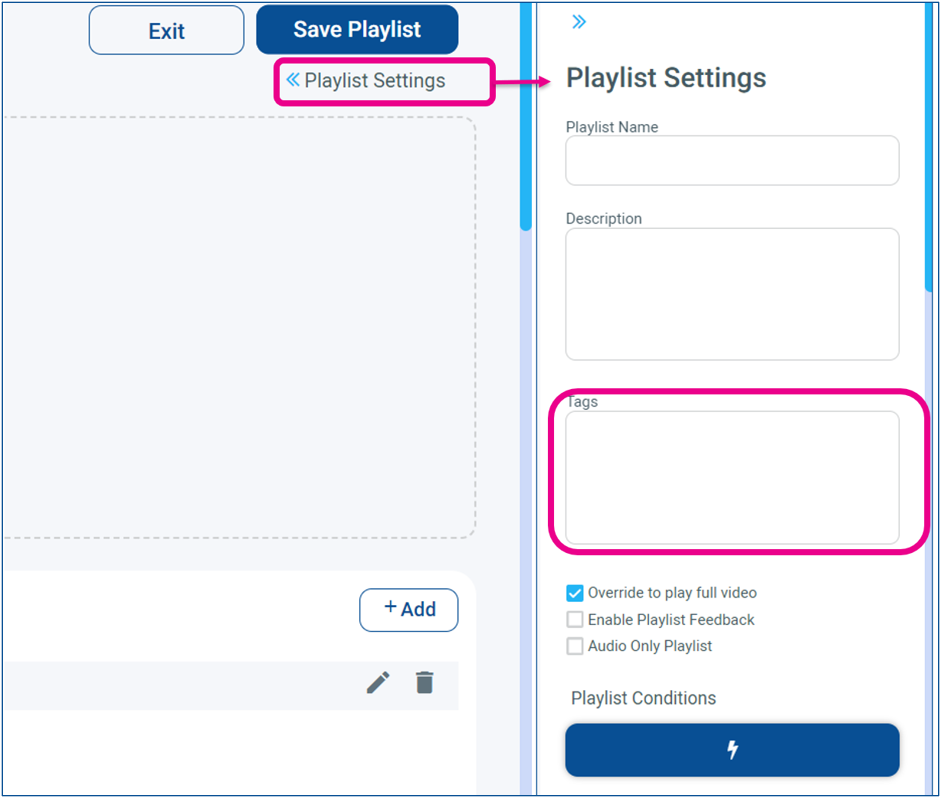
Clever Playlist has a Playlist Settings section that can be expanded on the right-hand side
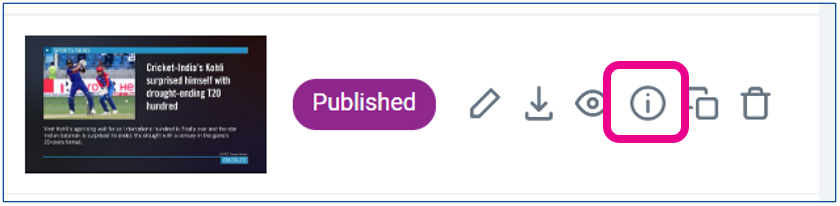
If you are Tagging an existing Playlist – Find the Playlist you would like to tag and click
(info button) to the right
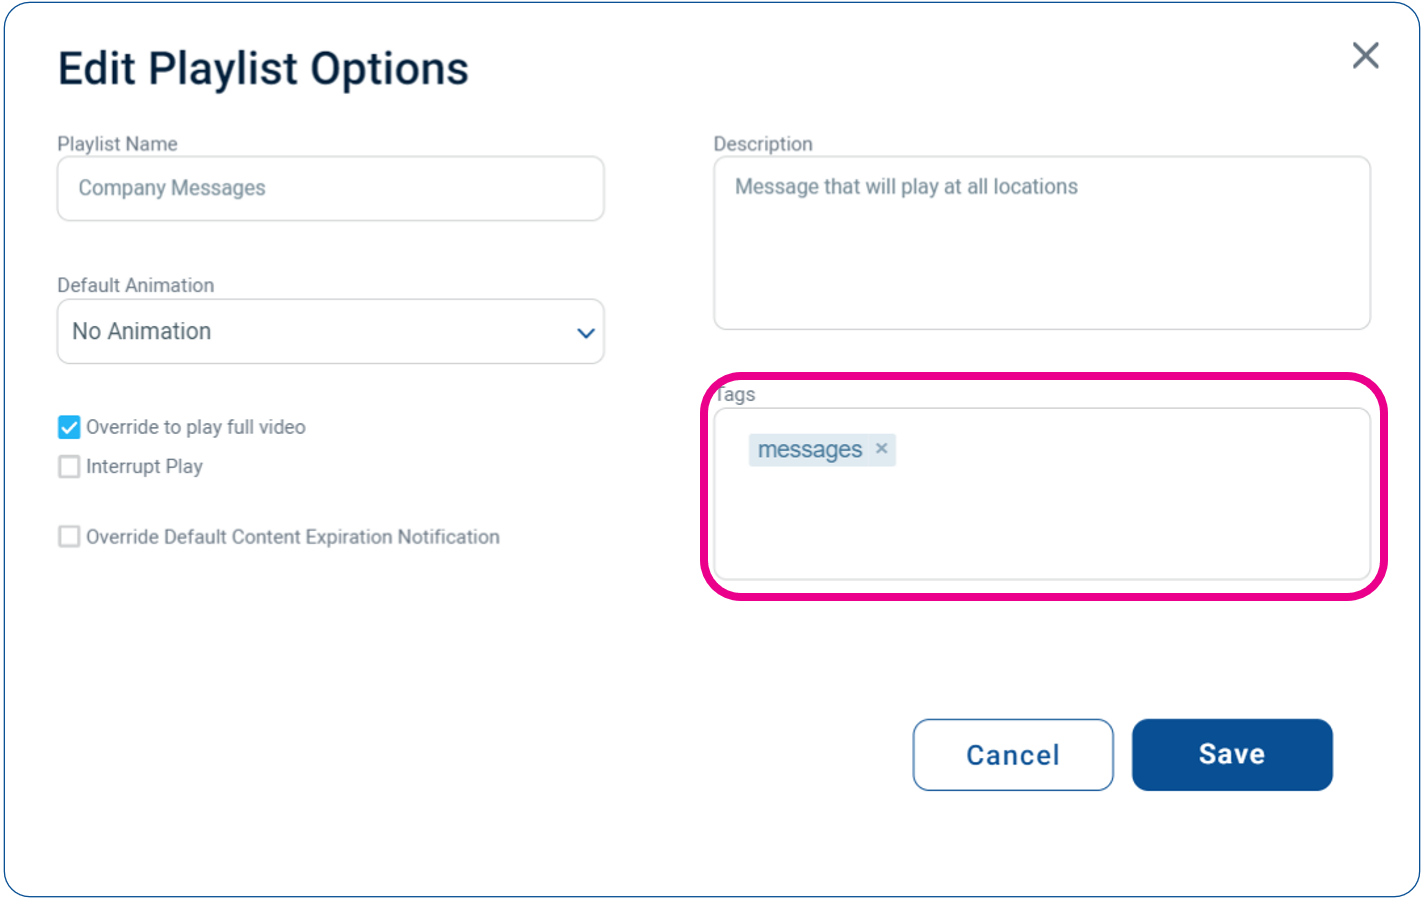
Enter and edit the Tags you would like for the playlist, then click save
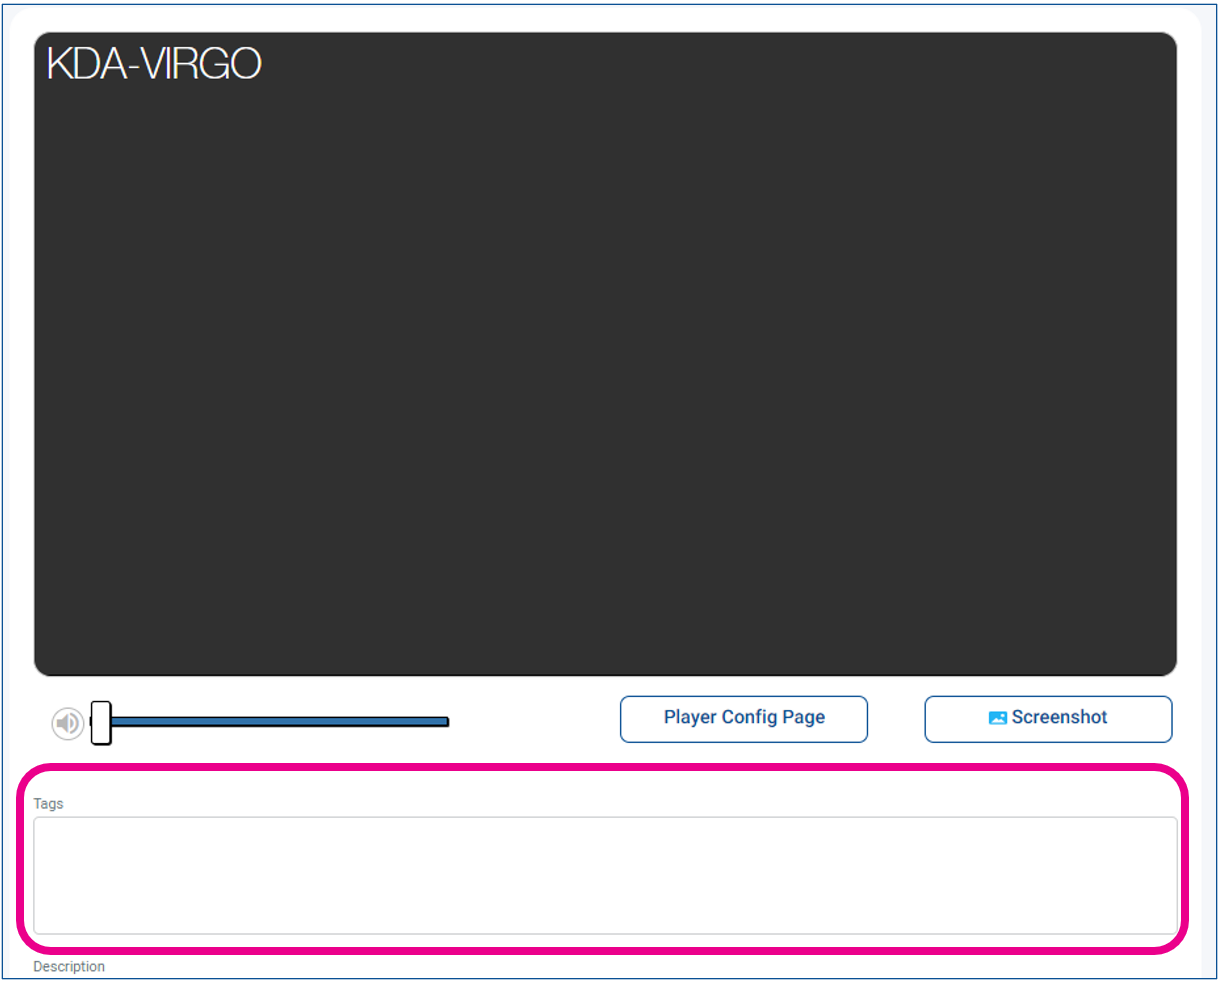
Tagging Media Players
Expand the Mega Menu, in the Device Management section, click on Players
Locate the Player you would like to edit the tags of, and click the Pencil Icon
You will now be able to edit and add the tags associated with that player
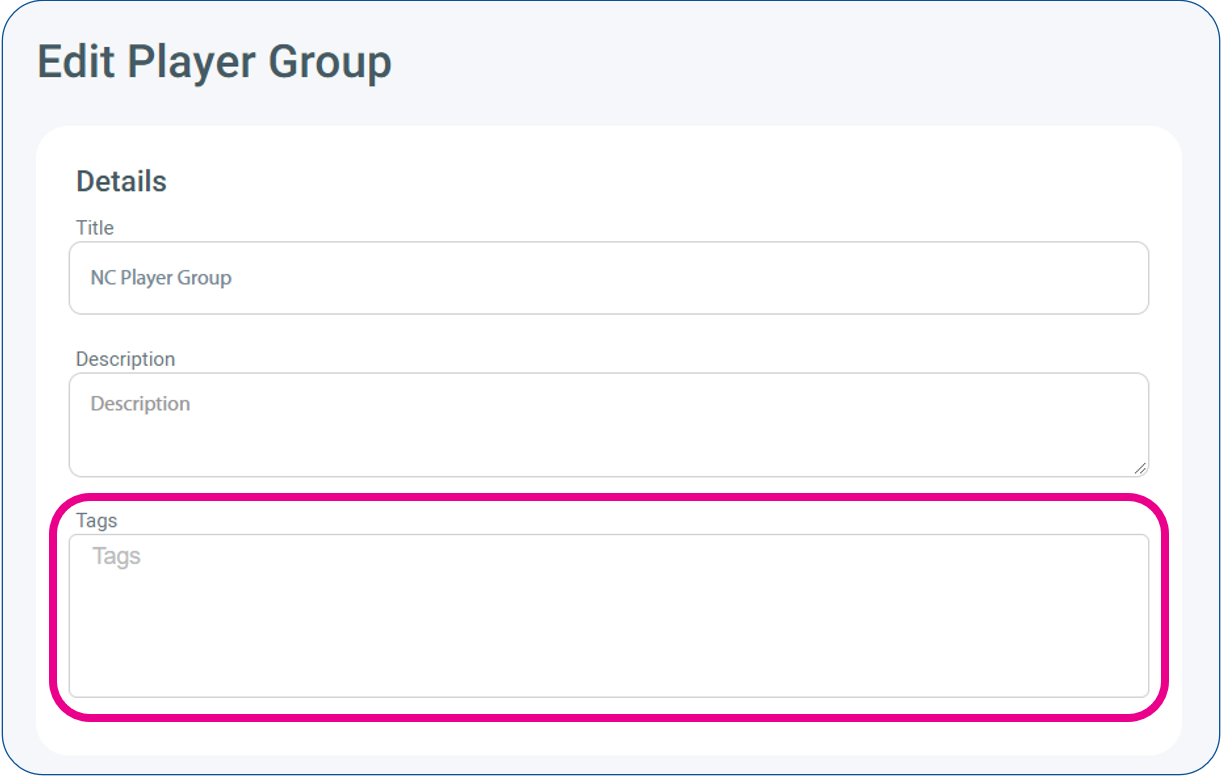
You also can Tag Player Groups
Expand the Mega Menu, in the Device Management section, click on Player Groups
Locate the Player Group you would like to edit the tags of, and click the Pencil Icon