O365 Add-In User Guide
This article reviews how to use the Booking O365 Add-In to create and manage events
Written By Ed Kinne
Last updated 10 months ago
Introduction
The Korbyt Booking Outlook Add-in lets users seamlessly search, select, and book meeting spaces and services directly within Outlook. It streamlines single, multi-space, and recurring bookings while ensuring all updates sync with Korbyt Booking across web, mobile, and Bookit.
Prerequisites
Office 365 Exchange Administrator rights are required to deploy an add-in.
Hosted link for Korbyt Booking web application V8.5.0.0 & above
Web application must be configured with SSL.
A valid manifest.xml file that consists of links of Korbyt Booking web application that will work as Outlook add-in.
Exchange Add-Ins can take up to 24 hours to show in users add-ins list.
How to Launch the Korbyt Booking Outlook Add-in
Open Microsoft Outlook on your browser/desktop (Windows or Mac supported).
Go to your Calendar and click ‘New Meeting’ or open an existing meeting invite.
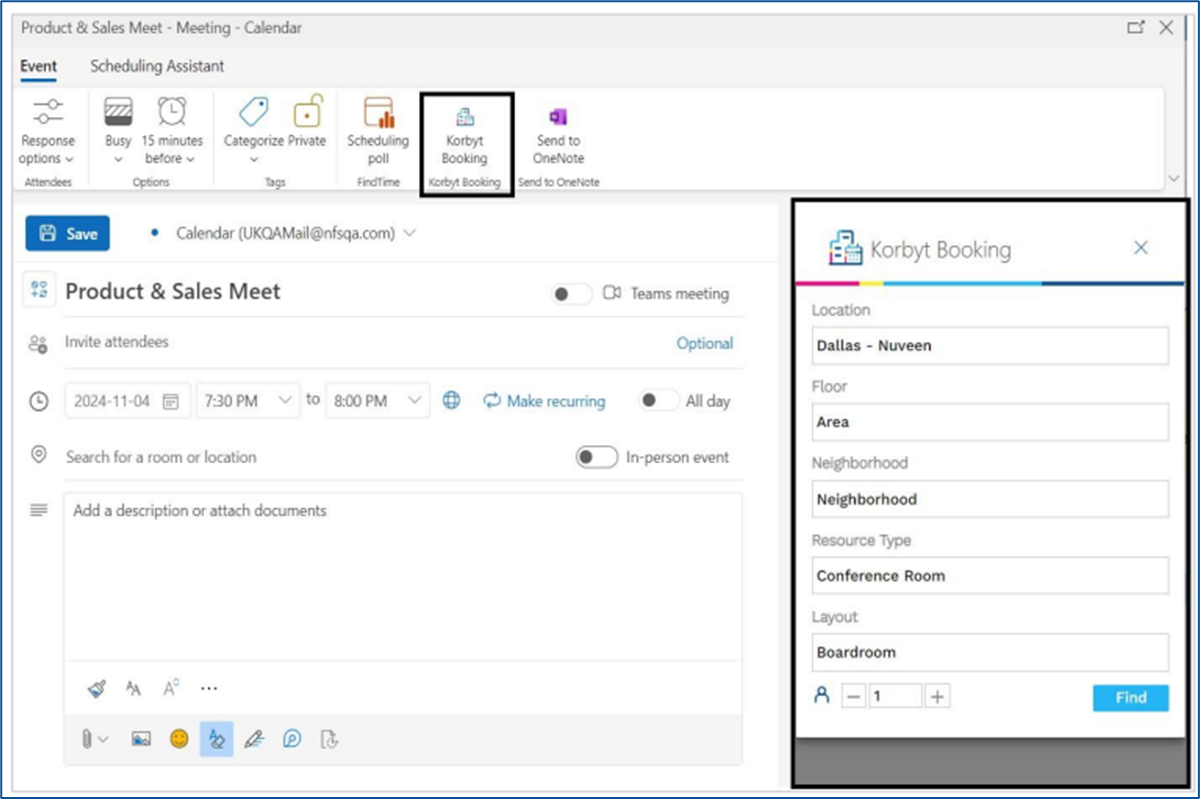
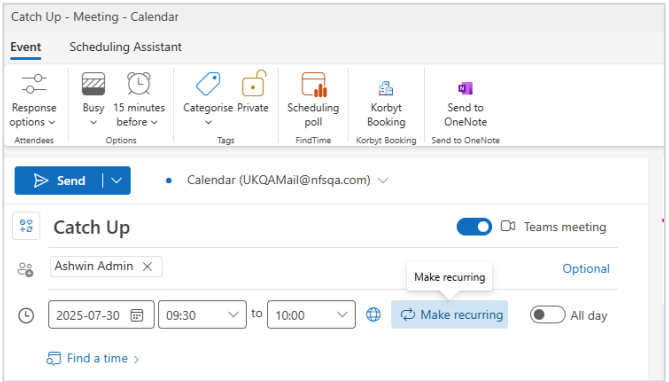
On the ribbon at the top of the window, locate the Korbyt Booking icon.
It may appear under "Apps", "Add-ins", or directly as “Korbyt Booking”, depending on your Outlook version.
Click the Korbyt Booking icon to launch the add-in panel on the right side of your screen.
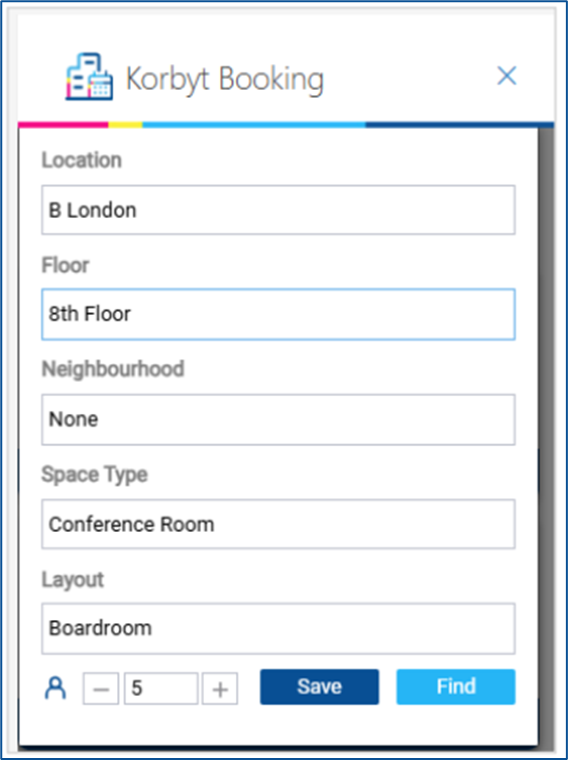
When a user accesses the add-in for the first time, they are directed to the ‘Find’ screen, where primary defaults are brought from the webapp settings . From there, they can either click ‘Find’ to view available rooms or apply filters and ‘Save’ them— allowing the add-in to automatically load results based on those saved preferences the next time it's opened.
The add-in will load your booking interface—starting either from room selection (for new bookings) or booking summary (Edit).
How to Create a Booking
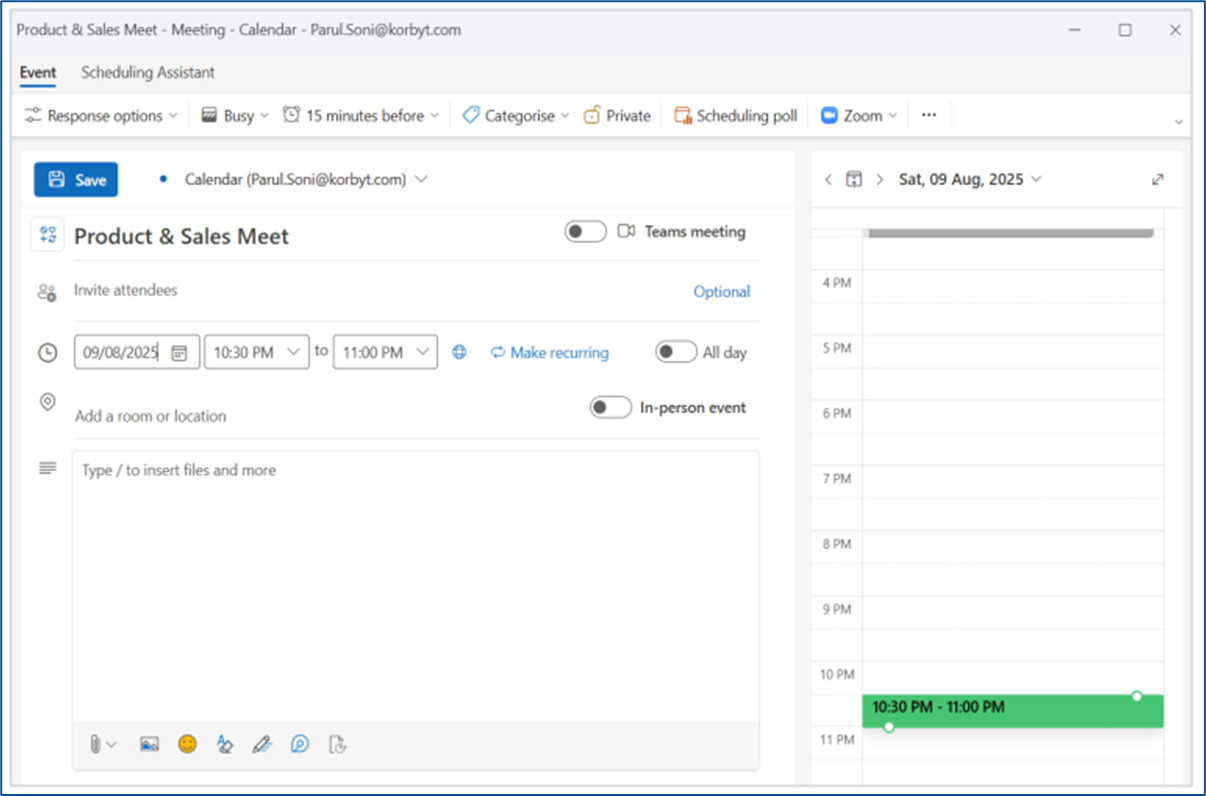
In your Outlook calendar, click ‘New Meeting’ to start a new event.
Fill in the Meeting title, set the Start and End time, and add Attendees if needed.
Click the ‘Korbyt Booking icon’ in the ribbon to launch the booking interface.
Note: If you're launching the Add-in for the first time, you'll be taken to the Find screen to set your default preferences. Otherwise, you'll land directly on the Select Spaces screen.
Note: The attendee count used in your search includes all invitees, plus one for the meeting organizer.On the ‘Select Spaces’ screen
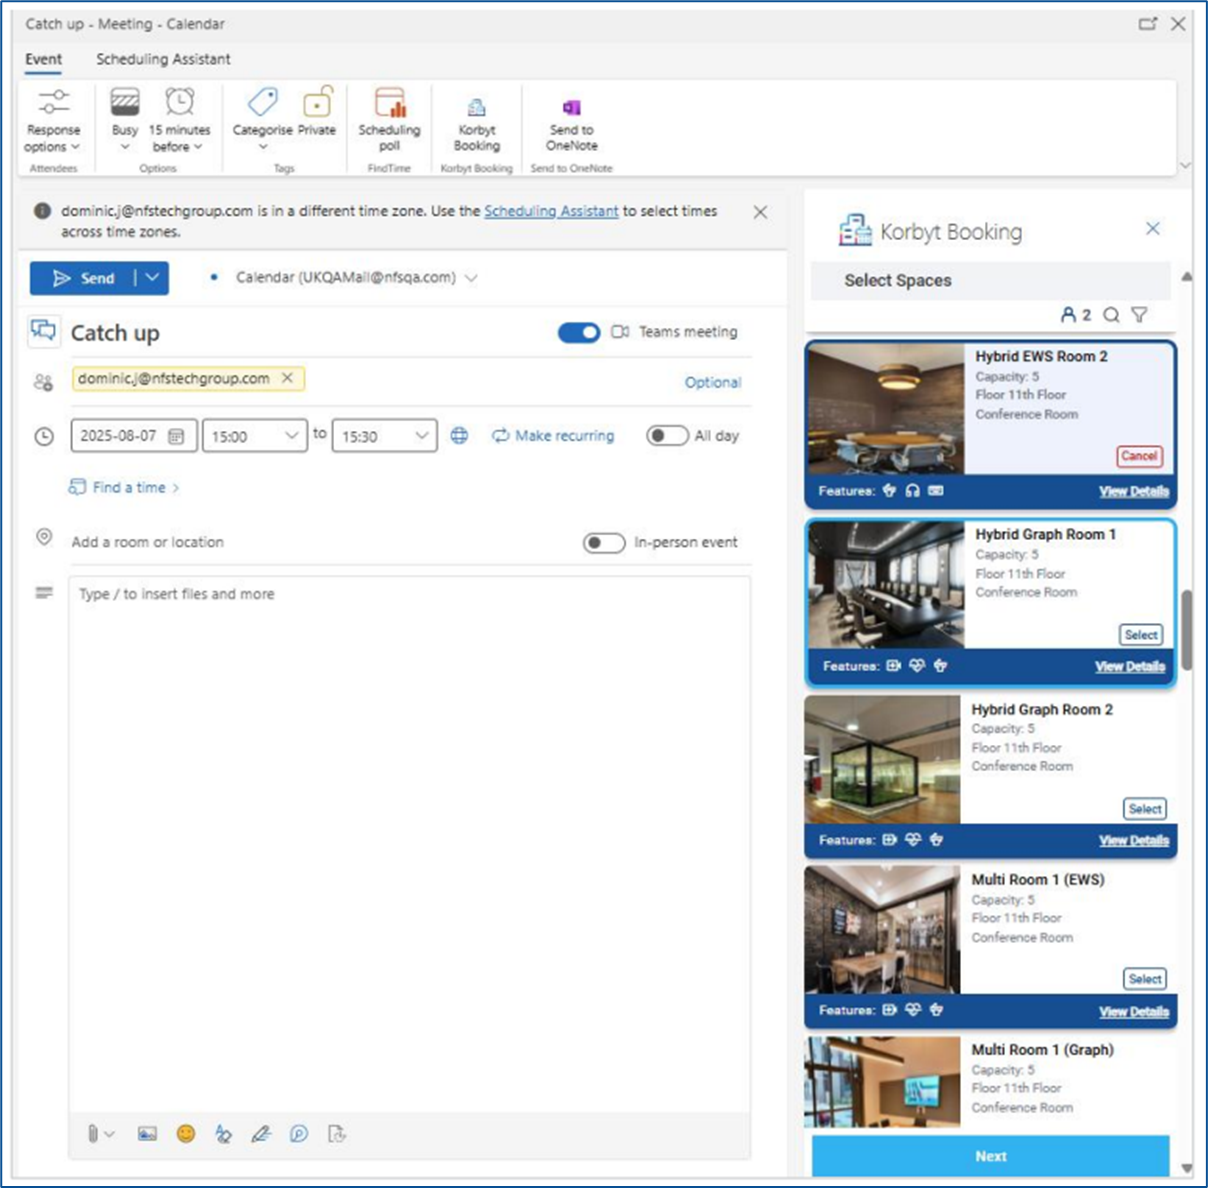
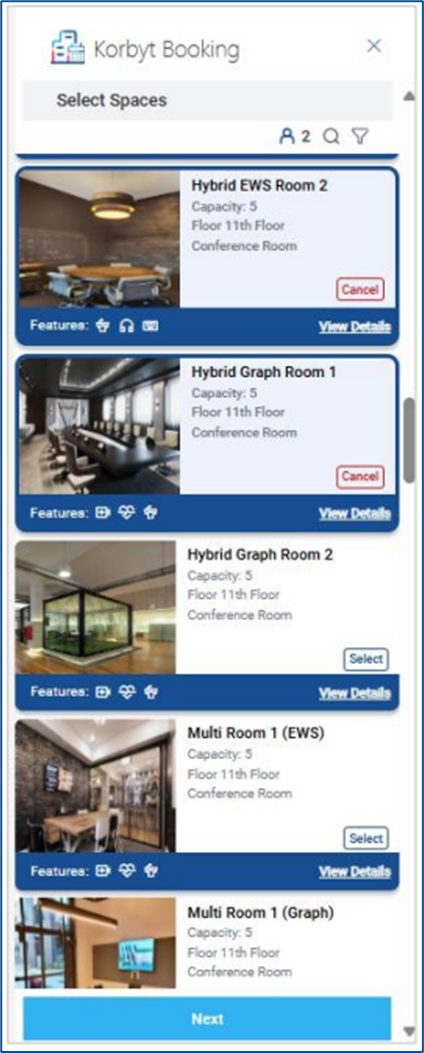
Available spaces will be listed in ascending order by capacity.
You may apply filters as needed by clicking on the filter icon.
Click ‘Select’ on your preferred space card/cards to select spaces for your booking.
Click ‘Next’ to proceed to the ‘Selected Spaces’ screen, where your chosen space is listed.
If the space has services associated with it, an ‘Add Services’ option will appear.
Click ‘Add Services’ to choose requisite services and their quantities for your booking.
Participant-based services will default to the total number of attendees plus one, to account for the booking owner.
After selecting services, click ‘Next’ to go to the ‘Booking Information’ screen.
The default Booking Type will be automatically selected based on the configuration from Global Settings. If multiple booking types are available, you’ll have the option to choose a different one from the dropdown menu.
If enabled, you may also enter ‘Chargeback Details’.
Click ‘Next’ to review your booking on the ‘Booking Summary’ screen.
Review the selected space and services. If everything is correct, click ‘Done’.
You’ll then be directed to the ‘Thank You’ screen, which showcases your booking details.
Finally, return to the Outlook meeting invite and click ‘Send’/’Save’ to finalize and confirm the booking.
How to Adjust the Attendee Count
You need a larger room due to the increased number of expected attendees, but you're not yet ready to list all attendees in Outlook.
Click the Korbyt Booking icon to launch the add-in.
On the Select Spaces screen, click on the magnifying glass icon
In the Capacity or Attendee field, manually enter the number of expected attendees.
This number will be used to filter available rooms.
You don’t need to add attendee email addresses at this point.
Click ‘Find’ to refresh the room list.
The add-in will now show rooms that meet the updated capacity requirement.
Select a new room from the list and continue the booking as usual.
How to Create a Multi-Space Booking
Start a New meeting in Outlook and open the Korbyt Booking Add-in.
On the Select Spaces screen, click ‘Select’ on each space you want to add.
Previously selected spaces appear at the top.
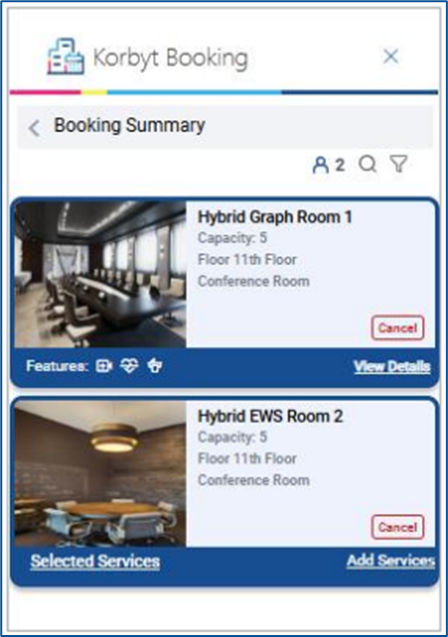
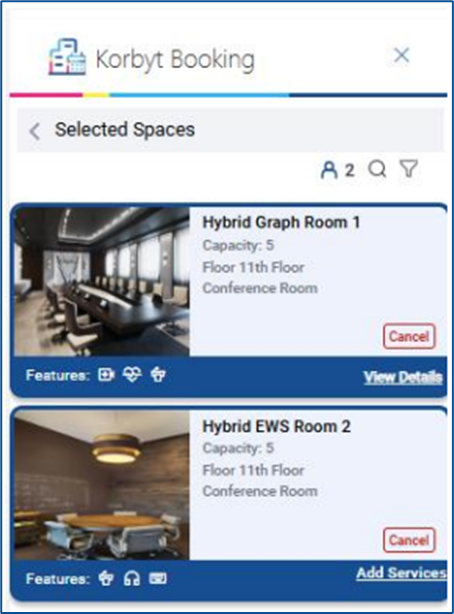
Click ‘Next’ to move to the Selected Spaces screen.
Each space appears as a card with the option to ‘Add Services’ (if available) or ‘Cancel’.
Click ‘Add Services’ for any space that requires catering, AV, or other services.
After completing services, click ‘Next’ to access the Booking Information screen.
Choose the ‘Booking Type’ and fill in chargeback info (if enabled).
Click ‘Next’ to review all space selections and services on the Booking Summary screen.
If satisfied, click ‘Done’ and return to Outlook.
Click Send on your invite to complete the booking.
How to Create a Recurring Booking
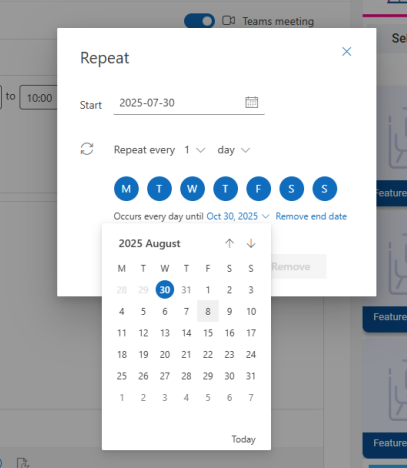
In Outlook, click New Meeting and choose Recurrence.
Set the recurrence pattern — daily, weekly, etc. — and an end date.
Click Korbyt Booking to launch the add-in.
Select your preferred space on the Select Spaces screen.
Click ‘Next’, proceed to Selected Spaces, and add services if needed.
Click ‘Next’ again, fill in booking type and chargeback details.
Review the information on the Booking Summary screen.
Click ‘Done’, then Send in Outlook to confirm the series.
How to Create a Multi-Space Recurring Booking
Open a new meeting in Outlook and set a Recurrence.
Open the Korbyt Booking Add-in.
Select multiple spaces on the Select Spaces screen.
Click ‘Next’ to go to Selected Spaces and add services for each space if needed.
Click ‘Next’ and enter booking type and chargeback info on the Booking Information screen.
Proceed to the Booking Summary and verify all selections.
Click ‘Done’, and don’t forget to click Send in Outlook
How to Edit a Booking
Open the meeting invite in Outlook.

Click the Korbyt Booking icon.
You will be taken to the Booking Summary screen.
To modify existing spaces, click the ‘pencil icon’ on the space card to re-enter Select Spaces.
To add more spaces, click ‘Add Space’.
On Select Spaces, click ‘Select’ on any new space and click ‘Next’.
Return to Selected Spaces and optionally adjust services.
Click ‘Next’ to review Booking Info and Summary.
Click ‘Done’, then click Send in Outlook to finalize updates.
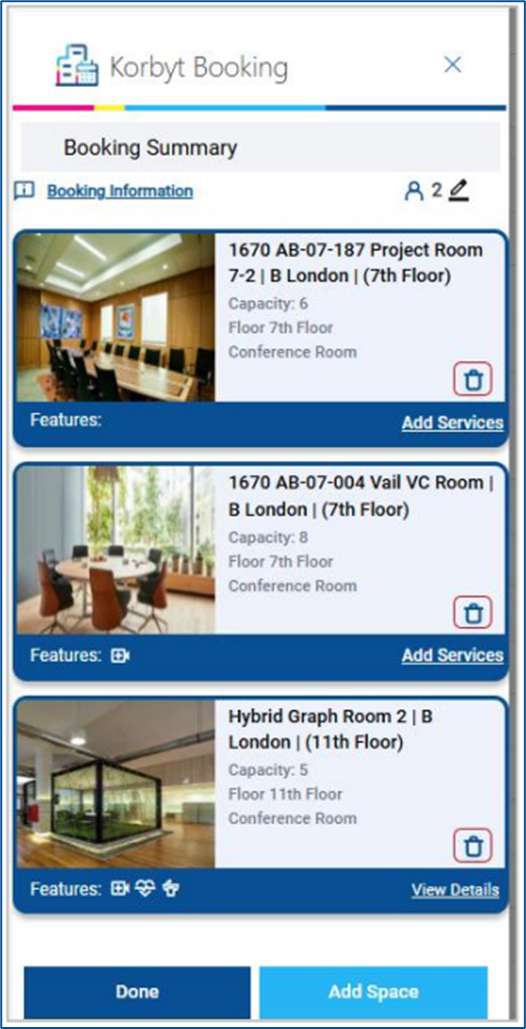
How to Edit a Multi-Space Booking
Open the Outlook event and click Korbyt Booking.
On the Booking Summary screen:
Click the ‘bin icon’ to remove any existing space.
Click ‘Add Space’ to choose new spaces.
Navigate to Select Spaces, add your new spaces, and click ‘Next’.
On Selected Spaces, add or update services as needed.
Continue to Booking Info, then to Booking Summary.
Click ‘Done’ and confirm changes by clicking Send in Outlook.
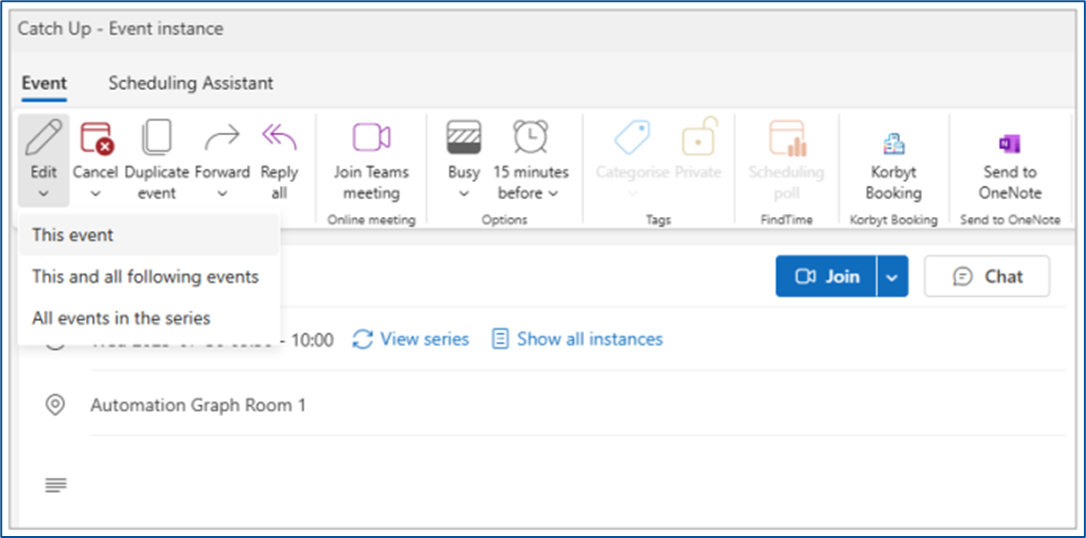
How to Edit a Recurring Booking
Open the recurring meeting invite in Outlook.
Choose ‘This and all following events’.
Click the Korbyt Booking icon.
On the Booking Summary, use the ‘pencil icon’ or ‘Add Space’ to make changes.
Update services, booking type, or chargebacks.
Click ‘Done’ and then Send to save changes.
How to Edit a Multi-Space Recurring Booking
Open the recurring meeting.
Choose whether to edit the series or just one occurrence.
Launch the Korbyt Booking add-in.
Remove spaces using the ‘bin icon’ or edit via the ‘pencil icon’.
Add more spaces using ‘Add Space’, then click ‘Next’.
Modify services, booking type, or chargebacks.
Click ‘Done’, then Send to update the recurring booking.
How to Add a Service
On the Selected Spaces screen, click ‘Add Services’ for the desired space.
A service selection window will appear with available items.
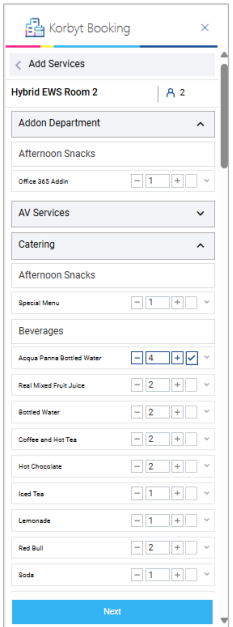
Tick the checkboxes next to the items you need.
Adjust quantities as required.
Click ‘Next’ to return to the Selected Spaces screen.
How to Remove a Service
Go to the Booking Summary screen.
Click Selected Services on the space card.
Click on the ‘Delete’ icon for any service to remove it or reduce the quantity as per the requirement.
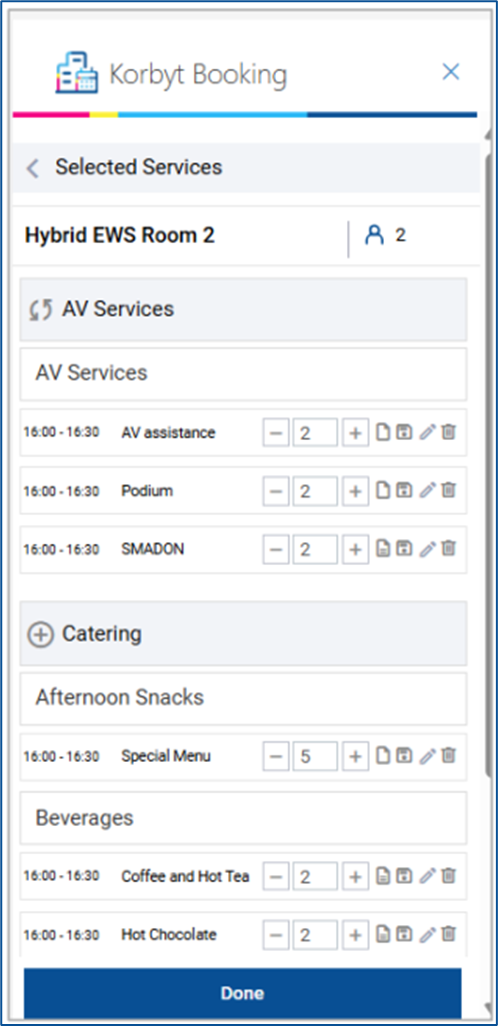
Click ‘Done’ to save changes and return.
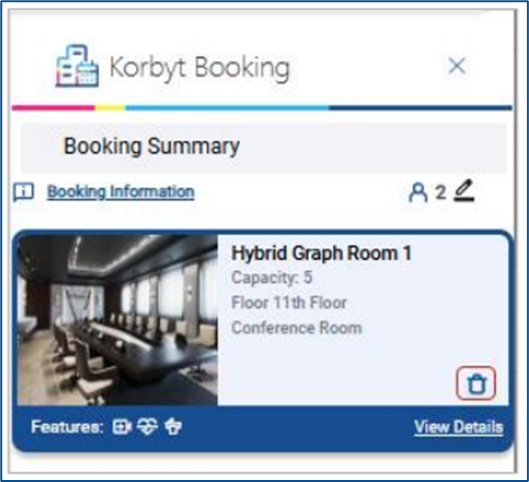
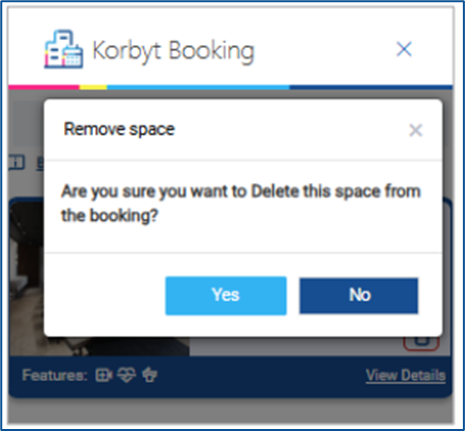
How to Remove a Space from a Booking
On the Booking Summary screen, find the space card you want to remove.
Click the ‘bin icon’.
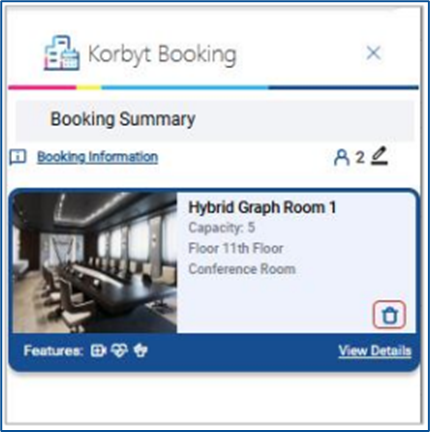
A confirmation popup will appear. Click ‘Yes’ to delete or ‘No’ to go back.
If only one space was selected, you’ll be redirected to Select Spaces.
If it was a multi-space booking, you’ll remain on the Booking Summary screen.
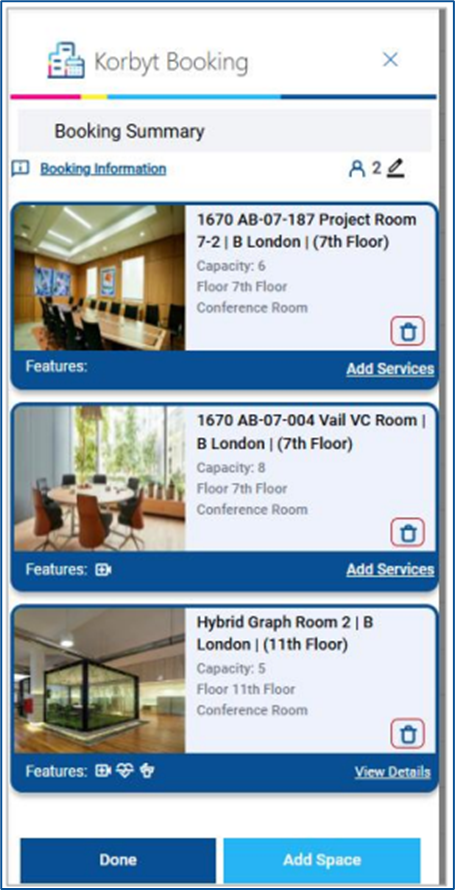
How to Remove and Add Another Space from a Booking
On the Booking Summary screen, delete a space using the bin icon.
After deletion, click ‘Add Space’.
Use filters to search and click ‘Find’.
On the Select Spaces screen, choose a new space and click ‘Next’.
On Selected Spaces, click ‘Add Services’ if needed.
Click ‘Next’ to update Booking Information, then go to the Booking Summary.
Click ‘Done’, then Send in Outlook to finalize the change.
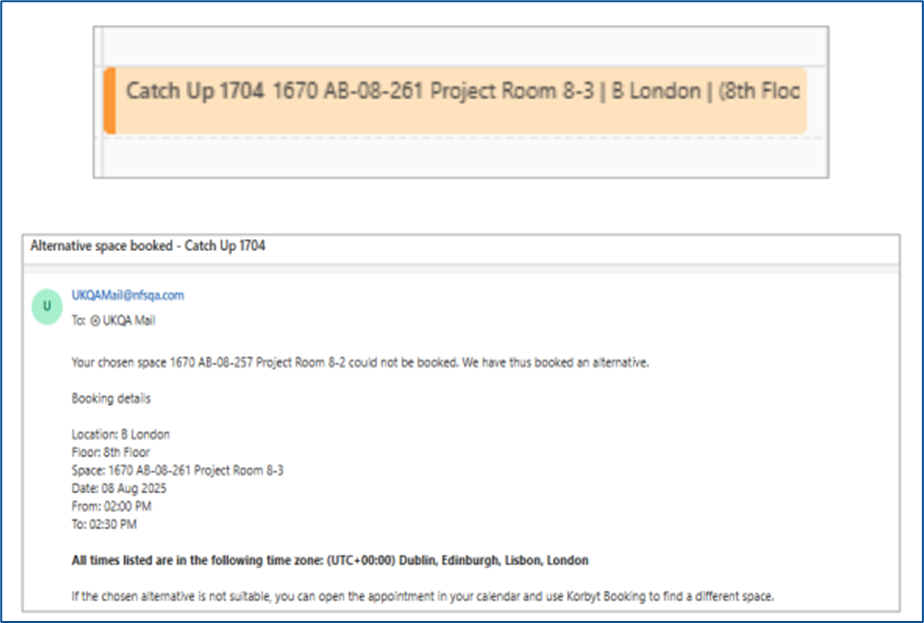
Automatic Alternative Space Search
The Korbyt Booking Outlook Add-in supports an automated alternative space suggestion mechanism that activates only during the edit journey of an existing booking. This feature saves time by finding a suitable replacement space without requiring you to open the add-in manually.
When Does This Happen?
You edit an existing booking by opening the Outlook appointment.
You change the date and/or time of the meeting directly in Outlook.
The previously booked space is no longer available at the new time.
What Happens Automatically?
Outlook detects the change in meeting time and sends an update trigger to Korbyt Booking.
The system checks space availability using the same search filters you originally used (e.g., location, layout, resource type).
If the original space is unavailable, the system automatically searches for a suitable alternative.
An available alternative space is assigned to your meeting—seamlessly and without additional user input.
If no space is found, you will see a notification inside your Outlook appointment, prompting you to make changes manually using the Korbyt Booking Add-in.
How to View Details of a Space
When searching for a space to book using the Outlook Add-in, you can easily view detailed information about each space to help you choose the best fit.
Steps to View Space Details:
Open a New or Existing Meeting in Outlook.
Click the Korbyt Booking icon to launch the add-in.
On the Select Spaces screen, you’ll see a list of available spaces displayed as individual cards.
On each space card, you’ll find a “View Details”.
Click the ‘View Details’ link or icon.
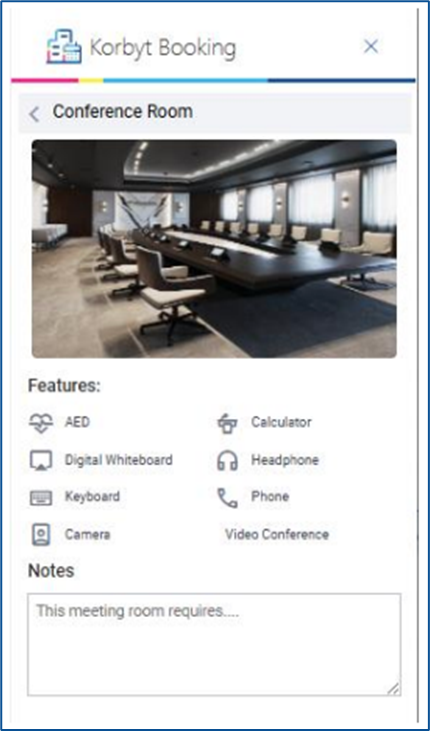
What You’ll See:
Space Name and Image (if configured)
Space Features – AV setup, Teams/Zoom compatibility, whiteboards, etc.
Notes – Any special instructions or equipment notes associated with the space.