Predefined Layouts For Web Based Submission
This article is for creating Predefined Layouts that will be available for others to submit content through a Web Based Interface or Webforms
Written By Ed Kinne
Last updated Over 1 year ago
Web-Based Submissions are submitted from Outside the Korbyt CMS
The Templates can receive input to the templatized sections through web forms
The Korbyt CMS users create a template and share it with others through a web address to the template or by embedding code for the form in another website
This allows individuals who are not Korbyt Users to submit a layout by filling out a web-based form
When someone submits through the form it creates a new layout with their details in Draft status
The Layout can be automated to the right playlist once published by use of clever tags attached to the predefined layout
A Korbyt CMS Content Approver or above would then have to publish the design
Notification emails can be configured to alert the designated content approvers
If you need a more general review of templated workflow options in Korbyt please see:
Introduction to Predefined Layout Templates for Launchpad or Web Submission
Creating New Predefined Layouts and Templates
Adding the Layout
Open the Mega Menu and then under Content, click on Layouts

Click the Predefined Layouts icon in the upper right (between filter and files).

Click Add Predefined Layout.[Add screenshot]

Configure your Template:
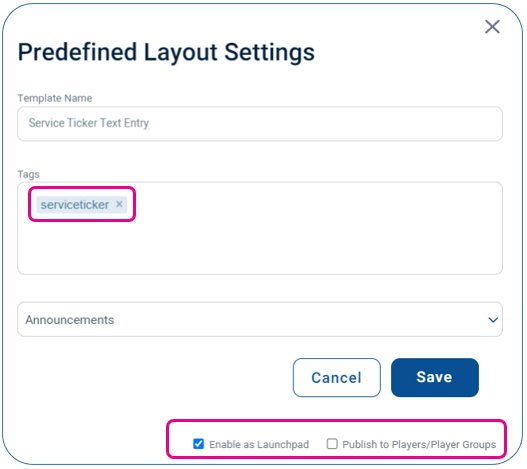
Provide a unique name
Optional – Add a Unique Tag, this will be used later in the Playlist to automate the content
Optional – Category Drop Down for Launchpads, will select a launchpad category
Category will only have effect if the layout is also set as a Launchpad
Configuration Check Boxes
Both checkboxes are related to Launchpad functions
These options can be edited after the initial creation of a predefined template by clicking on the edit info icon (lowercase i in a circle)
Click Create.
Configuring Elements in the Builder Tool
Once in the Layout Builder add elements as normal.
Any element that is meant to be editable by the end user will need to have it’s attribute properties set
Use the Layout Builder to add placeholder text, images, and videos:
Drag the element icon from the Controls dialog onto the canvas.
Add the necessary content.
Click the gear icon in the upper right of the square field and select Properties.

Click the Attribute tab.
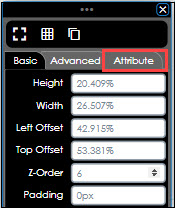
Add a Lable
This will be the name of the field in the submission form
Select the Templated checkbox.
This will make it a space that a user can enter a value into
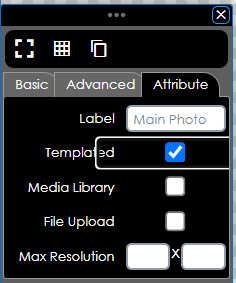
If it is a Media space (Image or Video) you will have the option to define where the media item has to come from
Leaving neither checked will allow the user to either Select from the Media Manager or upload new content without restriction
Checking Media Library will force the user to select an item already uploaded to Korbyt
Checking File Upload will for the user to upload a new media item from their computer
After all customizations have been implemented, click one of the following buttons at the bottom of the Controls dialog:
Save: Allows the layout to be saved on the fly to ensure that no changes are lost.
Publish: Makes the Template available to others for use based on the settings
Predefined Layout Options
Tenant Administrators can set system-wide preferences for how Predefined Layouts are managed
Click on the Settings Gear

in the upper right, then click on the Predefined Layouts tab
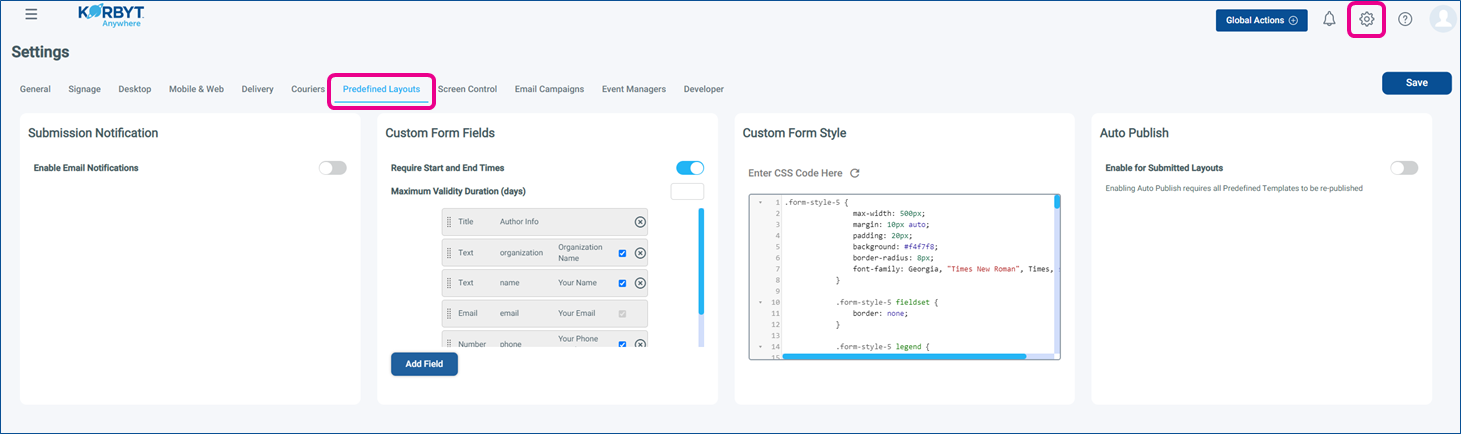
Submission Notification – who gets notified when new content is submitted
Turning it on will then allow you to select Korbyt CMS Users who should be notified when new items are submitted using the URL or Embed code
Custom Fields – what fields are present on the web form the end user fills in
Require Start and End Times forces the end users to define when the item should start and stop being seen
Disabling will then also reveal the option to HIDE start and end date fields if you wish
Maximum Validity Duration sets a max number of days that content can be shown
Disabling Require Start and End Times will hide this option
Other Fields that can be removed or added
Custom Form Style – editing the look of the submission form
Changing the code to style the URL or Embed code appearance and formatting
Auto Publish – no approval required
Enabling this option will make it so that submitted content automatically goes to a published status
The default behavior is that submitted content is in Draft status until a Content Approver or higher publishes it
Sharing Options and Submission Notifications
Now that a Predefined Layout is published it will be available to others to fill in and create content.
The Layout can be shared as URL or Embed web code in three different ways
Sharing a URL or Embed Code for 1 specific Layout
Locate the Specific Layout you wish to share in the Predefined Layout List
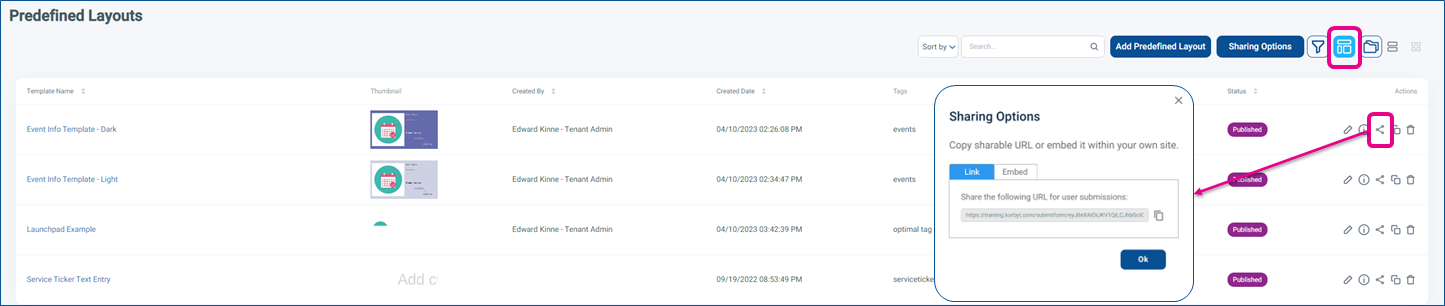
This will use the Tenant wide sharing and notification options set in the step above
Sharing access to ALL Templates
End users use a drop down to select specific template to use
Click the Sharing Options button at the top of Predefined Layouts list
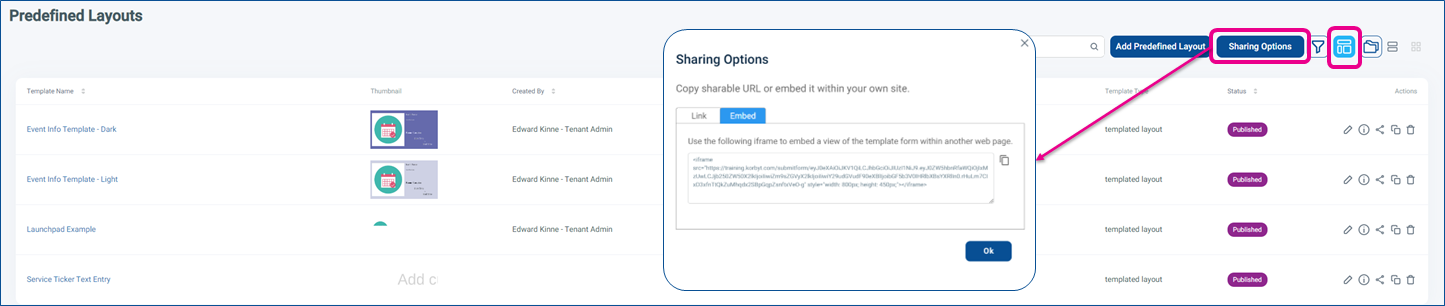
This will provide the URL or Embed Code that will share all available Layouts
The end user will use a drop down to select the template they want to use
This will use the Tenant wide sharing and notification options set in the step above
Sharing a URL or Embed Code to a Specific Folder of Templates
End users use a drop-down to select the specific template to use from within the folder
On the Predefined Layouts turn on the Folder View

To the Right you can now use the three dots to create new folders

Drag and drop Layouts to the folder you wish to have grouped in that folder
Now you can use the folder controls (three dots) next to your new folder to share the Layouts within that folder

This will show the shared ULR and Embed Code for the folder and provide ways to customize more than the standard sharing options
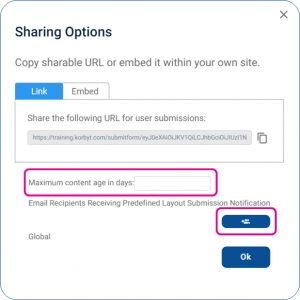
Notification and Max Validity Options in Folders
In the Folder sharing options you can
Set a Maximum age for content
Specify Email Recipients if a submission comes in from one of the templates in the folder
If you create folder structures to house the templates within Predefined Layouts the system will create a matching folder structure for the submitted forms to be housed in the normal layout screen
Content Approval Steps
After an end-user submits a completed template form
CMS users who have been set to be notified of new submissions will receive a notification email as well as have the notification in the CMS
The design the end users created will be saved in the normal Layout list in Draft status
To be available to be seen on a screen a Content Approver or higher must publish the design in the CMS
if your admins have set the Tenant to Auto Publish predefined layout the new layout will be Published status
For the Content to be Seen on a Screen the Content Approver or Higher in the Korbyt CMS will then add the Layout to a Playlist to make it seen
or if previously created playlists have automation at the folder or tag level then those playlists will automatically make Published Designs seen
End User Experience
When end users interact with the URL or Embed Code that has been made available to them they will enter their information and design choices
Sections 1 and 2 can be customized in the Predefined Layouts Options (see above)
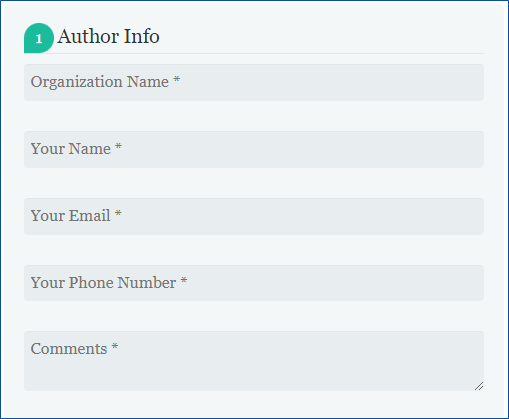
Section 1 - Author Info
Who is submitting the design
Section 2 - Playtime Info
Validity Dates for when the design should be shown

Section 3 - Template Info
The template is filled in and the templated elements
These fields are decided by the design of the template and the labels used for each area
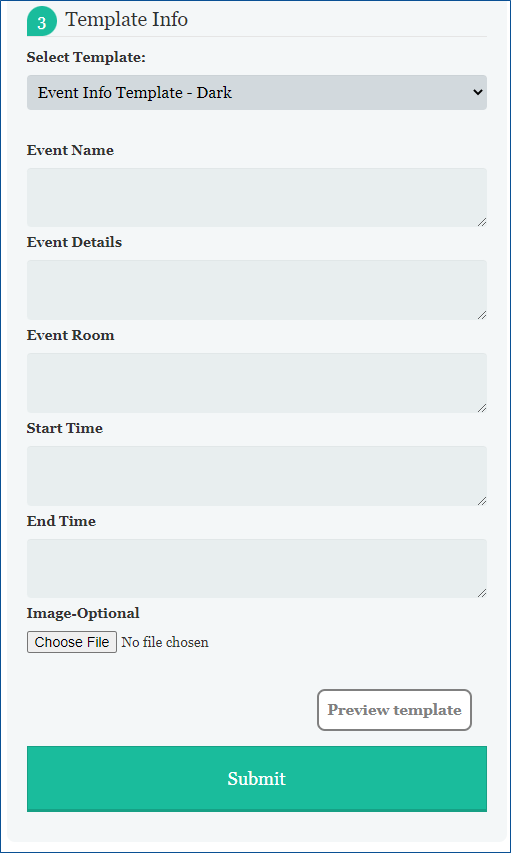
After Configuring the end user can Preview the Template and finally Submit
Once Submited, the design will be a draft layout in the CMS and require approval by a Content Approver or higher