How To Setup a SharePoint Office 365 Documents Adapter
Written By Ed Kinne
Last updated 5 months ago
Korbyt can connect to SharePoint Office 365 to import items from the SharePoint Document library, and depending on your needs, automate common information through the values associated with the document.
This article reviews a specific data adapter. For more general information see
Step 1 - Azure Configuration
The first step in connecting SharePoint to Korbyt is configuring your company’s Azure to allow the connection.
To perform these tasks, you need to be an administrator in Azure.
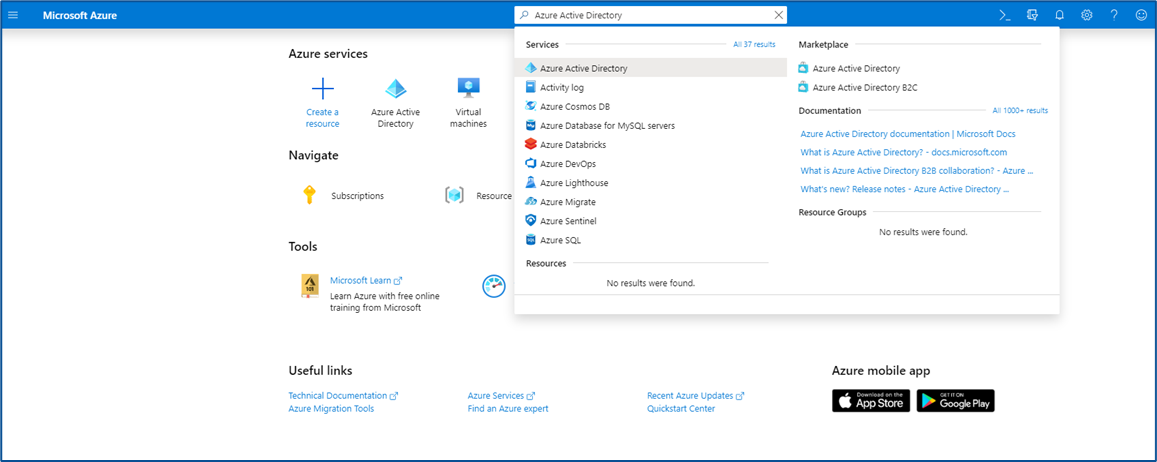
Navigate to https://portal.azure.com and log in with valid credentials.
Use the search bar to bring up “Azure Active Directory.”
From the left sidebar,
select “App Registrations”
Then select “New Registration” at the top of the main workspace.
On the Register an application screen
Enter the name for your App
Make sure Supported Account Types is set to “Accounts in this organizational directory only (Single Tenant)
Set the Redirect URI
Set the drop-down to “Web”
Set the URL field to “ https://www.korbyt.com/oauth/sharepoint_adapter_redirect ”
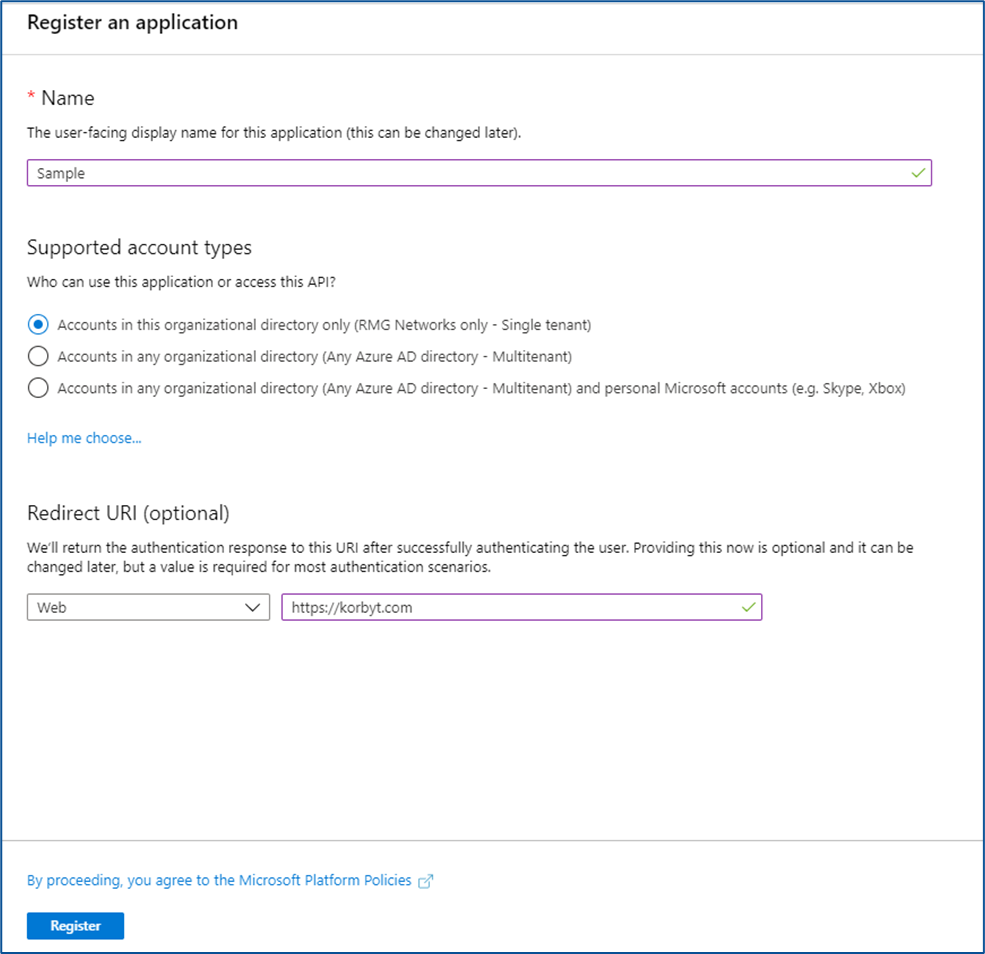
Click the Register button
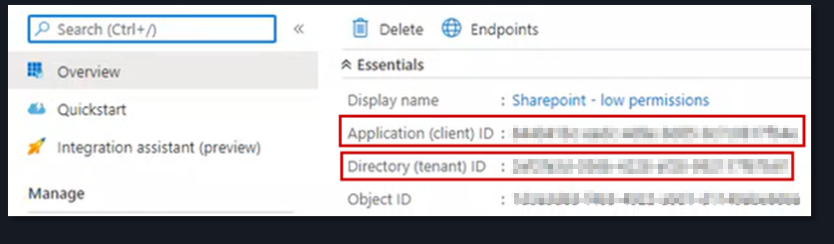
Find and Capture the Following information from your SharePoint Service
They will be needed to configure you adapter in the Korbyt CMS
Application (client) ID and Directory (Tenant) ID
Go to Azure Active Directory->Properties.
Client Secret
This will only show once
Create a new secret and caputre it immediately
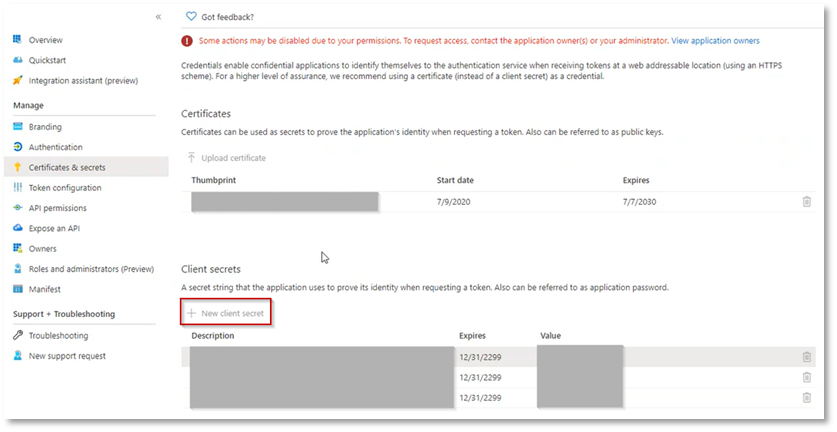
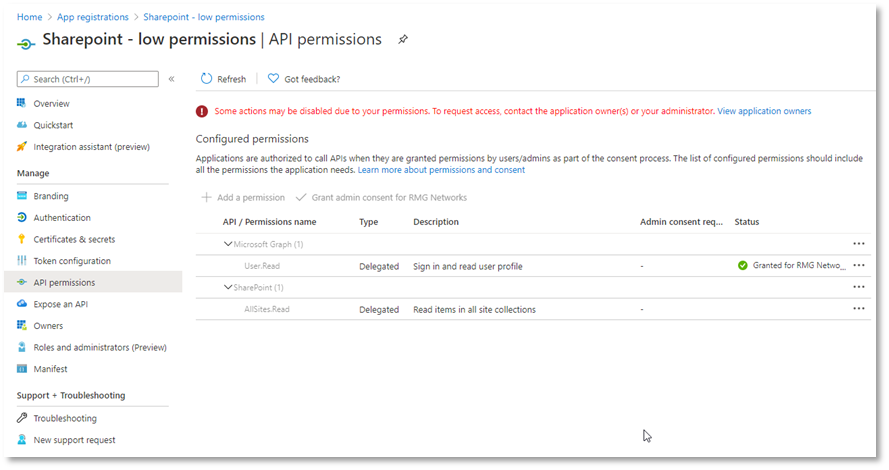
Permissions
Find APP Registrations, go to API Permissions, and verify Microsoft Graph has User.Read and Sharepoint has AllSites.Read with Type Delegated. Add if not listed.
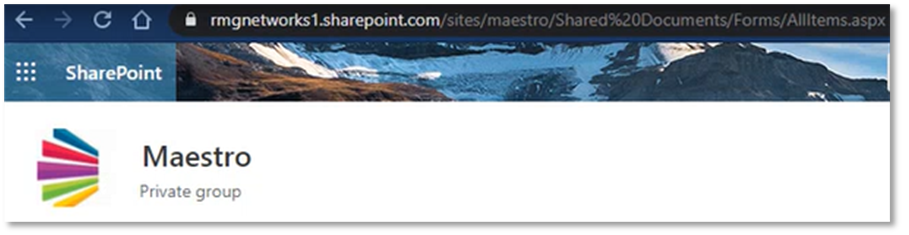
SharePoint Server URL
The first portion of the URL address for your SharePoint site
In this example, it would be rmgnetworks1.sharepoint.com
Folder Path
Find the SharePoint Sites & Folders Key for the folders you want to connect to
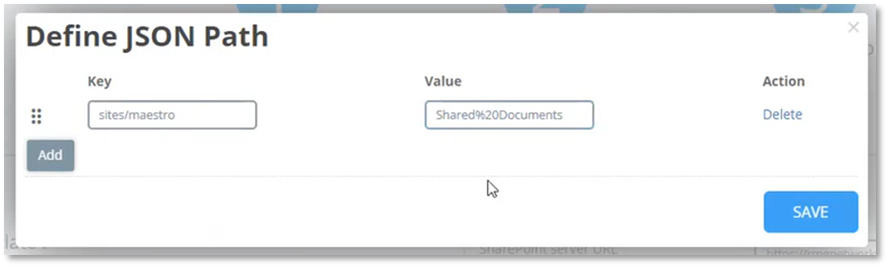
Find the JSON Path Key and Values you want to use.
In this example, they would be
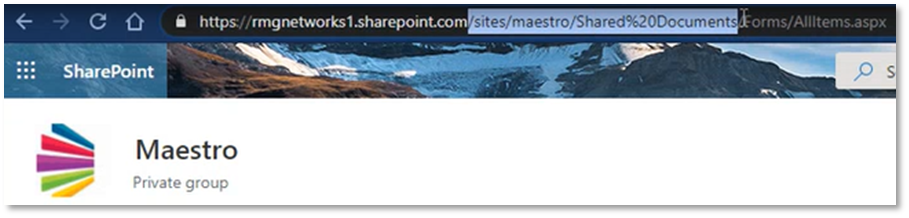
Key: sites/maestro/
Value: Shared%20Documents
For subfolders, the folder path might appear at the end of the URL.
This is an example for a subfolder called Development inside the shared documents
https://rmgnetworks1.sharepoint.com/sites/maestro/Shared%20Documents/Forms/AllItems.aspx?viewid=8ac61218%2D2fcd%2D4c31%2D8436%2Def4ff38237ba&id=%2Fsites%2Fmaestro%2FShared%20Documents%2FDevelopment
You will want to capture the Key and Value for all folders you wish to map in the adapter
You will also want to populate any folders you are connecting with at least 1 peice of content to ensure that the folder connection is built properly when the adapter is created and turned on.
Step 2 - Korbyt Content Management System Configuration
Guide to creating the adapter in your Korbyt tenant:
Navigate to your Korbyt Tenant
Open the Mega Menu, and then in the Advanced section click on Data Integration
Click on the Create Adapter Button.

Type in an Adapter Name into the Adapter Name field and Select Template as the Adapter Type
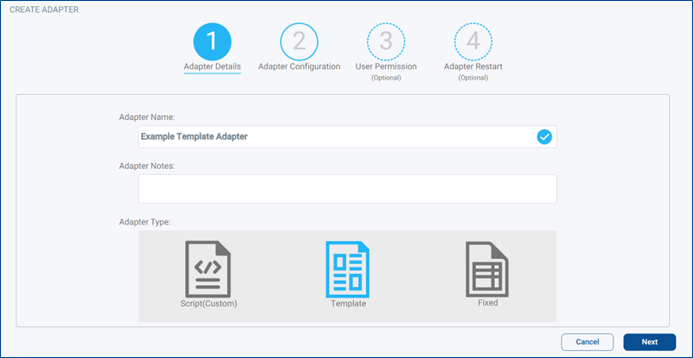
Then click the “Next” button in the lower right-hand corner of the Create Adapter Screen.
On the next screen, you will fill in the information to configure the SharePoint Adapter
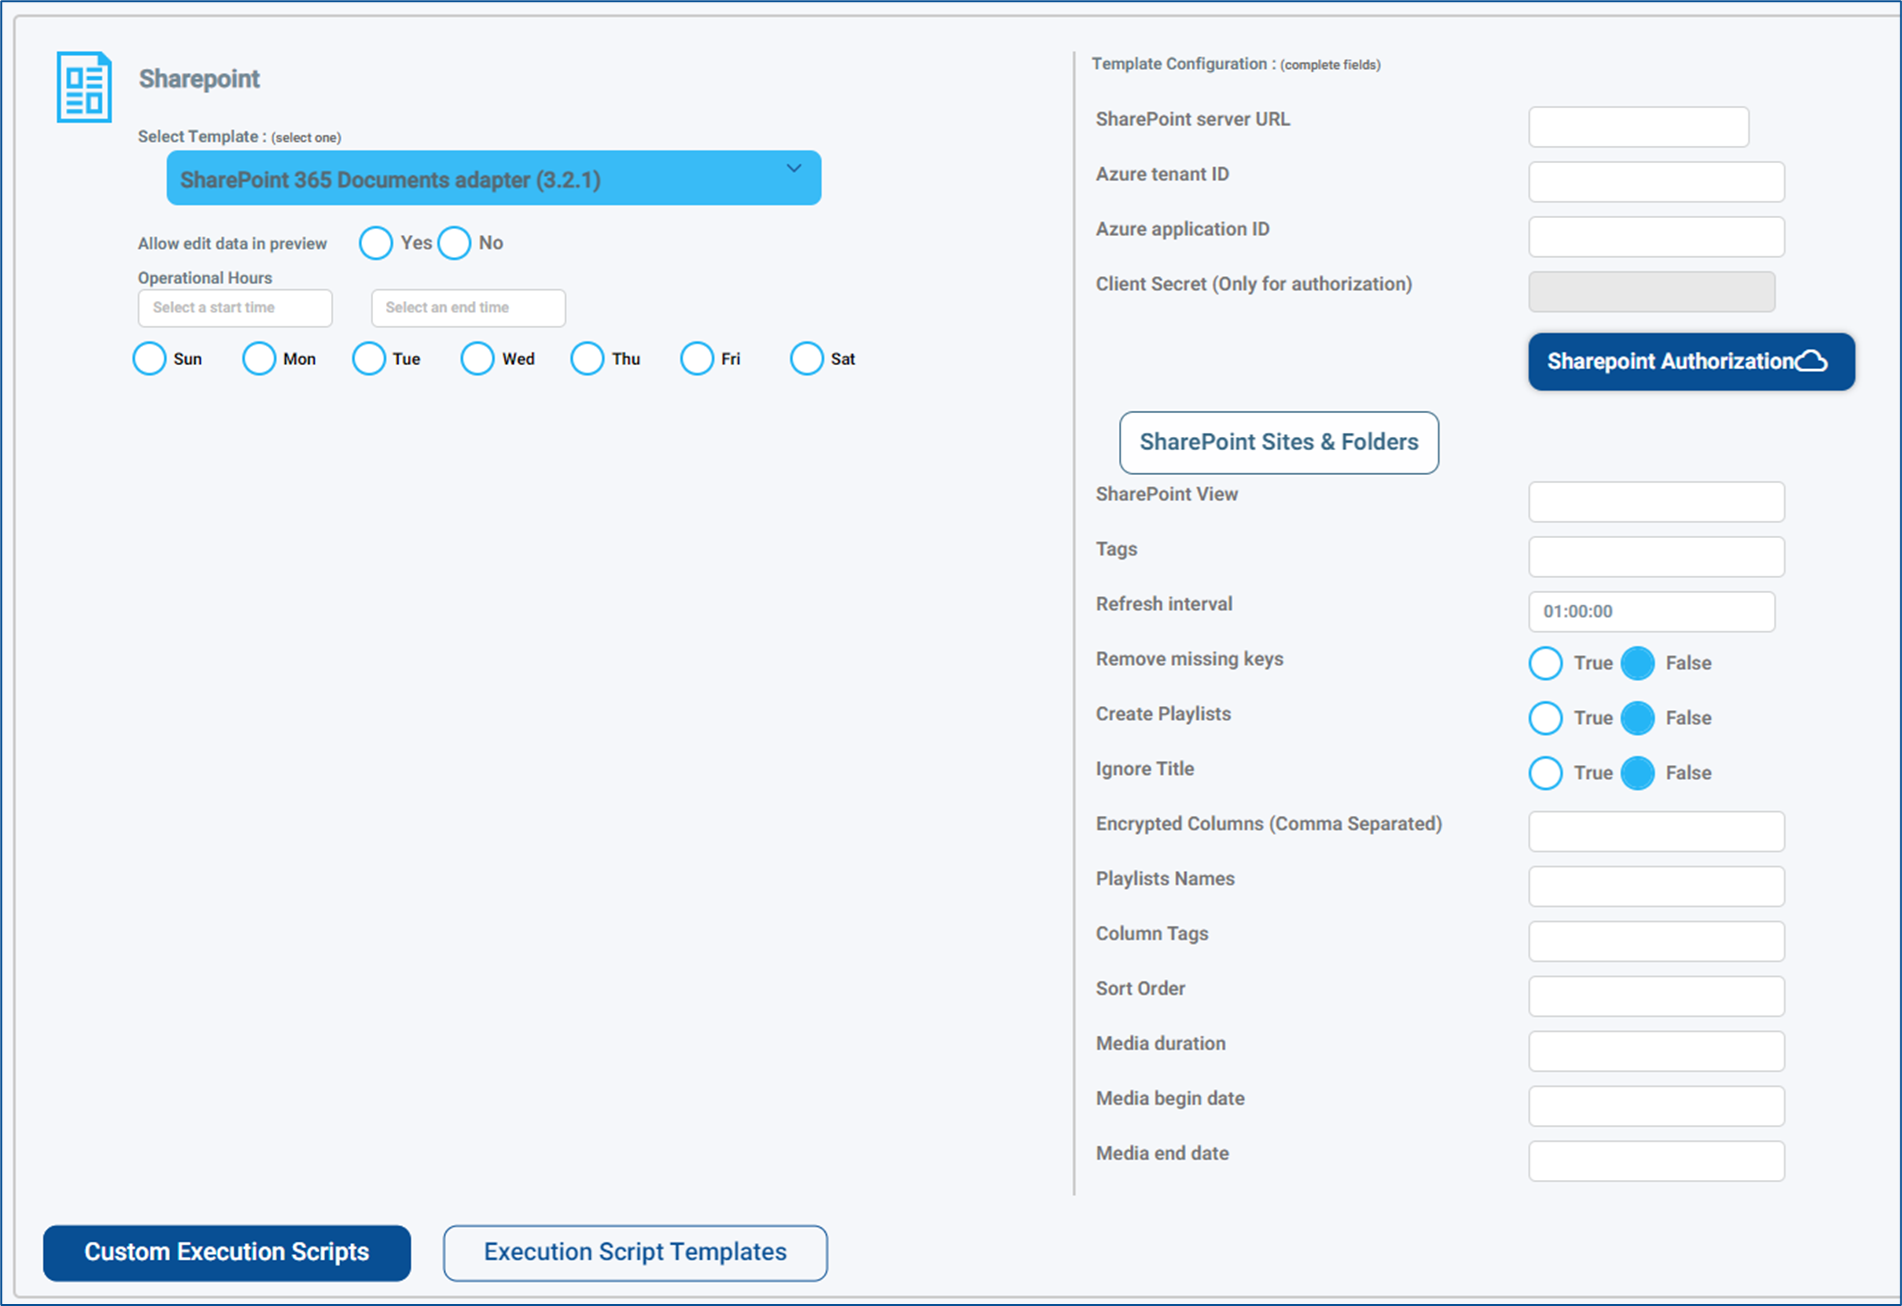
Enter your SharePoint and Azure credentials collected when you configured your Azure
SharePoint server URL
Azure tenant ID
Azure application ID
Client Secret
Click the blue SharePoint Authorization button
The client will sign in, if possible, using a Service Level account
Click SharePoint Sites & Folders to configure the JSON path for the Key and Values for the document library
Add Key/Value pairs that match the URL for the Desired folder that you captured earlier
SharePoint View – If a unique view of the library has been created, it can be entered here
Tags – Specify any tags that should be applied to ALL items imported through the adapter
Refresh Interval – The frequency with which the adapter should check for content changes
Remove Missing Keys – True will remove missing key values, False leaves them in place
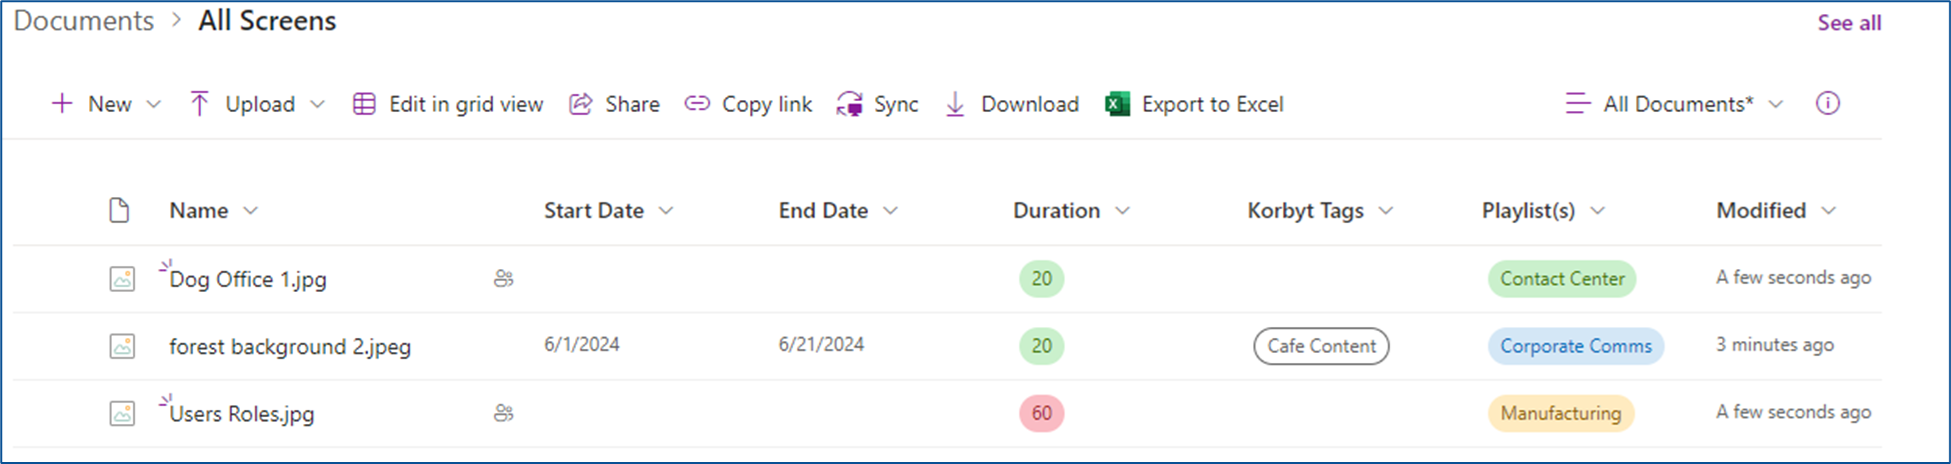
The other options in the list will use values stored in specific columns of the SharePoint document library.
In this example document library, you see columns already named with clear values, but Korbyt can read the information from any column specified
Create Playlists toggle – True will enable the Korbyt system to create new playlists and name them based on a specific data field
If the adapter is creating the playlist, other columns of information can control viewing details at the bottom of the list of mapping options
Media duration data field – specify a field to be used to set the view time for an item.
Media begin date data field – specify a field to be used to set a validity start date for an item
Media end date data field – specify a field to be used to set a validity start date for an item
Ignore Title toggle – Set to true to ignore the title of the documents
Ignoring the title will direct the adapter to use the actual filename when imported rather than the name that is listed in SharePoint
Encrypted Columns data field – used to specify columns of information to be encrypted
The columns listed will be encrypted using PostgreSQL Encryption and then decrypted when called to be rendered to the user
This adds additional security to the values in the columns only
The actual documents being imported go through standard encryption
Playlist Names data field – specify the fields that should be used to create playlist names. Separate multiple names with a comma. Requires that Create Playlists be set to True
Column Tags data field – specify the fields that should be used to reference a value to turn into a tag. You should separate multiple tags with a comma.
From our example folder structure, if we set the Column Tags to “Korbyt Tags” then the value in that column would be used to create a tag for that item in Korbyt
In our example, the image forest background 2 would be tagged “Cafe Content”
These tags can be combined with Clever Playlists to automate imported content into a playlist
Sort Order data field – specify a field to be used to set the Sort Order of the files. Used to control playback order if Create Playlists is set to True
Once the Adapter is configured, click the blue Save & Create button at the bottom right to complete the adapter
Once activated, barring any errors generated due to incorrect settings, you can click on the Eye icon to see the collected data in the adapter.
