Data Integration and Data Adapters
Written By Ed Kinne
Last updated Over 1 year ago
Data Adapters and Data Integration is a powerful function that allows you to ingest data from external data sources into Korbyt.
This data, once integrated, can then be used to create real-time visuals on screen, and even have those visuals adapt to the real-time information about your business.
Some common uses of adapters include:
Events and Schedule data,
Monitoring and Displaying Key Performance Indicators (KPIs) for Call Center, Manufacturing, Sales, Service, and more
Custom News or Weather feeds
Employee Service Milestones
Safety Alerts
And More!
Data Adapters and Data Integrations are subscription features that may or may not be included in your Korbyt Services. If you are unsure if you have a Subscription to Data Adapters, you should contact your Korbyt Account Executive
This Article reviews how to create and manage the Data Adapters that will bring information into Korbyt, for instruciton on how to show data on the scree see How To Add A Data Subscription To A Layout Or Message
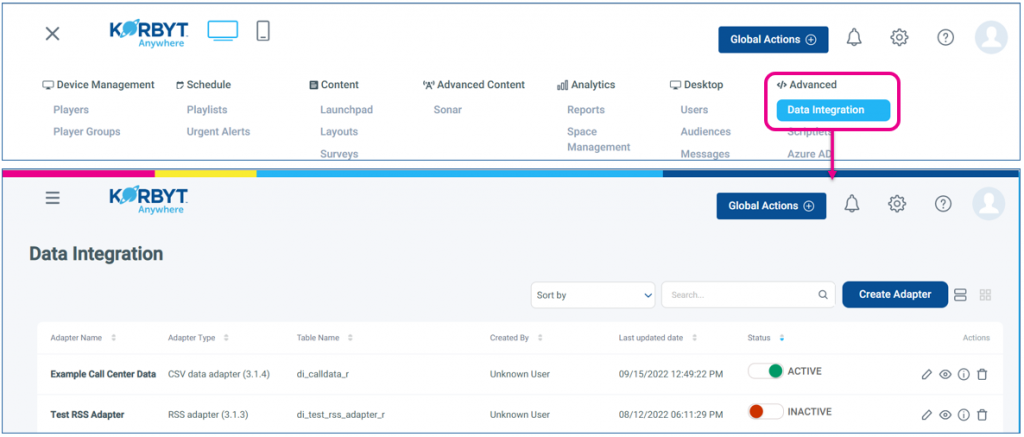
Adapters are found in the Mega Menu under the Advanced section, then click Data Integration
Here, Individual Adapters can be viewed and Managed, and new Adapters created
Your individual User Role inside of Korbyt will affect your ability to interact with Data Integration and Data Adapters
Data Adapter Types, and Creating them
There are 3 Main Adapter Types that you can create
Script(Custom) Based Adapters
An adapter that is created by writing a custom code to integrate your data source with Korbyt
The most complex and technical
Template Based Adapter
An adapter that is created by filling in sections of required information to link your data source with Korbyt
There are extensive Template adapters available to link with services like JSON, XML, CSV, JDBC, RSS, Salesforce and more
The complexity of the adapter setup varies based on the information needed to connect to each service
If a Template is not available, it would require a Custom Script Adapter
Fixed Data Adapters
A data table created and managed manually inside Korbyt
Script (Custom) Adapters
Custom Script Adapters involve writing the detailed code to connect to the data source, and should be used if Adapters do not exist or do not function for some specific reason in your case.
To Create a Script(Custom) Adapter
If not already in the Integration section, open the Mega Menu, then in the Advanced section click Data Integration
In the Upper right click Create Adapter
You will be required to Name your Adapter (description is optional, but can be helpful to other users if the name is not clear)
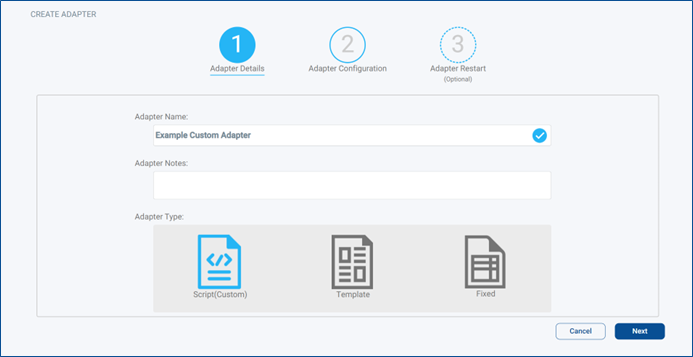
And click the Script(Custom) icon on the left, and click Next
On the next Screen, Adapter Configuration, you will be able to start configuring and writing your Custom Adapter

At the top of the Adapter you can configure
Allow edit data in preview (yes/no)
Yes, will allow for manual adjustment of the final data table inside of Korbyt
If the adapter continues to run, these edits will be overwritten when the adapter updates
Operational Hours
The days and times the adapter will run to gather new data from the source
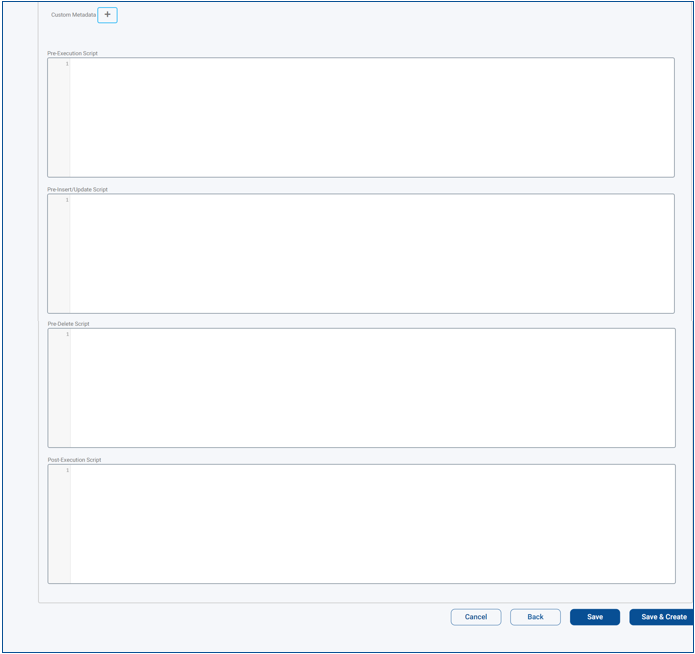
The First open section is where the custom code for your adapter goes
As you scroll down you will find specific sections to add (as required)
Custom Metadata
Pre-Execution Script
Pre-Insert/Update Script
Pre-Delete Script
Post-Execution Script
the Save and Save & Create Buttons
When you click Save & Create you will see a dialog box that will tell you the progress of starting up the Adapter
Template Based Adapters
Template Based Adapters allow you to select from the dropdown list of available templates, and then populate the predefined fields with the information on your specific instance of that type of data source.
To Create a Template Adapter
If not already in the Integration section, open the Mega Menu, then in the Advanced section click Data Integration
In the Upper right click Create Adapter
You will be required to Name your Adapter (description is optional, but can be helpful to other users if the name is not clear)
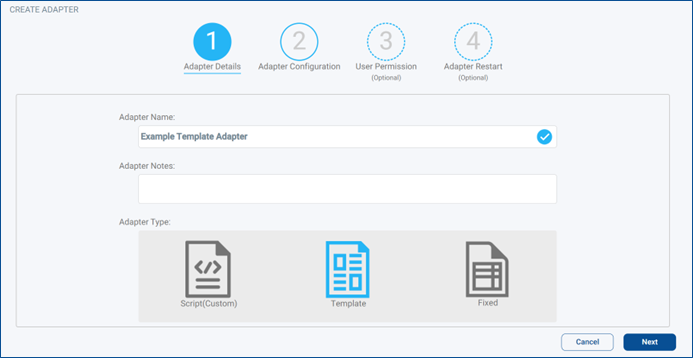
And click the Template icon in the middle, and click Next
On the next Screen, Adapter Configuration, you will have a Left and Right Side
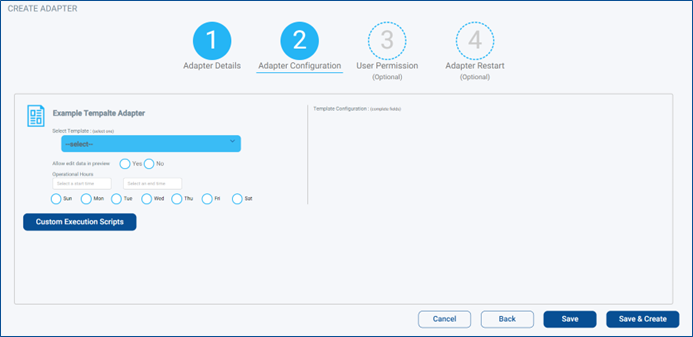
Left Side
Use the Drop Down to select the specific Template you want to use, templates available based on subscription configuration in Korbyt Account
Allow edit data in preview (yes/no)
Yes, will allow for manual adjustment of the final data table inside of Korbyt
If the adapter continues to run, these edits will be overwritten when the adapter updates
Operational Hours
The days and times the adapter will run to gather new data from the source
Customer Execution Scripts
Adding any required, Pre-Execution Script, Pre-Insert/Update Script, Pre-Delete Script, Post-Execution Script
Right Side
Changes based on the selected adapter on the left
Will have the required and optional fields used to define that specific type of templated adapter
This is an example of a CSV Adapter Template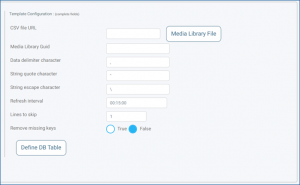
Optional Steps include Configuring Users’ Permissions and Adapter Restart by clicking those steps at the top
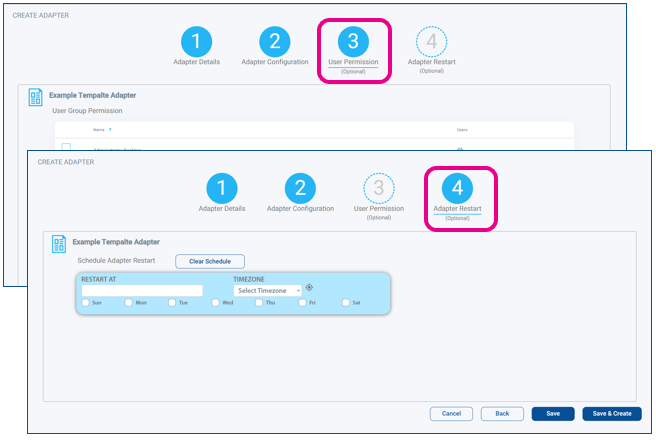
Once Configured, click Save & Create, you will see a dialog box that will tell you the progress of starting up the Adapter
Fixed Data Adapters
A Fixed Data Adapter is a Table that is built and manually managed within Korbyt
To Create a Fixed Adapter
If not already in the Integration section, open the Mega Menu, then in the Advanced section click Data Integration
In the Upper right click Create Adapter
You will be required to Name your Adapter (description is optional, but can be helpful to other users if the name is not clear)
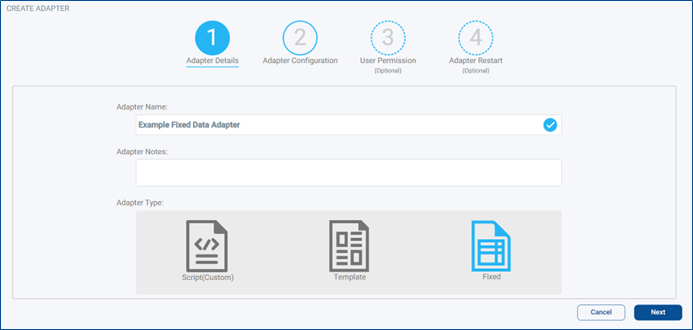
And click the Fixed icon on the right, and click Next
The next screen Adapter Configuration, will start being mostly blank with only the Define DB Table button

Click Defining the DB Table to create the structure for your database
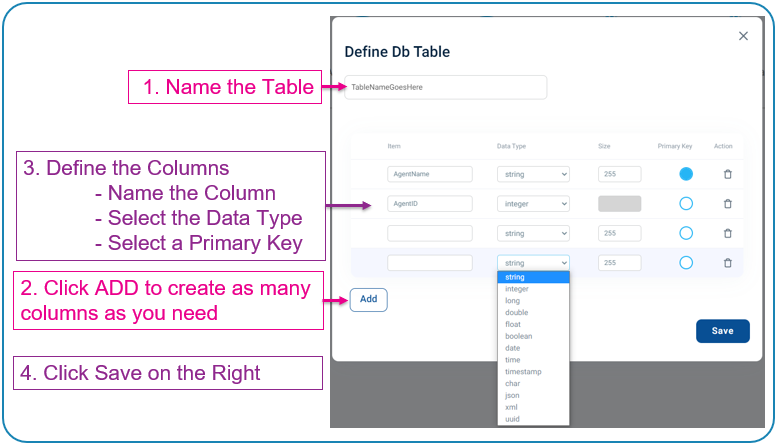
When you click save, you will see that the Define DB Table has gone green
Optional Steps include Configuring Users’ Permissions and Adapter Restart by clicking those steps at the top

Once Configured click Save & Create you will see a dialog box that will tell you the progress of starting up the Adapter
You have now created the framework of your Fixed Data Adapter,
to add rows of data please see the Manual Entry of Information Into a Data Table section of this article under Managing Existing Data Adapters
Managing Existing Data Adapters
This section of the article is going to review
Viewing All Data Adapters
If not already in the Integration section, open the Mega Menu, then in the Advanced section click Data Integration
There are two different Views that you can switch between List and Card both shown here.
They can be toggled between using the controls next to the Create Adapter button
In either view, you will be able to see information about the Adapters
Adapter Name
Adapter Type
The Table Name(s) for the data tables created
When making data seen, you will need to reference the Table Name that holds the data
Who Created It – Created By
Last Update (List View Only) the last time the adapter was edited
Status
Green and Active is Running

Bright Red and Inactive is stopped

Can be toggled back to active
Light Red and Inactive means the adapter has not been fully programmed

Can NOT be toggled to active, needs to be edited
Fixed Data Adapters do not have a Status to report because they are fixed and not automated
Actions that you can take on a Data Adapter are represented by the icons
Pencil = Edit the Data Adapter
This will be a similar interface that was seen in Creating the Different Adapter Type
There will also be action Icons in the upper right after clicking on the pencil, these operate the same as clicking the action directly from the list or card view screen

Eyeball = Live Data View to Examine the Data Table of information the adapter is creating
For more info see the next section Viewing the Data Tables that Adapters have Created
This is also the first action for Manual Entry of Information into a Data Table
Lowercase i = Status Details to see any messages on the adapters status
for more info see the Troubleshooting Adapters Section
Trashcan = Delete removes the adapter
Viewing Data Tables that Adapters have Created
You may wish to view the Data Tables that have been created by an adapter to:
Verify that data is being imported to Korbyt
Confirm the Table Name
The Table Name is used in coding and programming, which sets of data is seen
Confirm the Column Names in the Data Table
The Column name is the second most important element to making data seen after the table name
Data points are defined by which Column they are in
Manually Enter Data into the Table
This will need to be done for a Fixed Data Table
Can be done on any Data Table that has been set to allow it
More on Manual Entry of Information in the next Section
After clicking on the Eyeball icon for Live Data View you will be able to see the Data Table
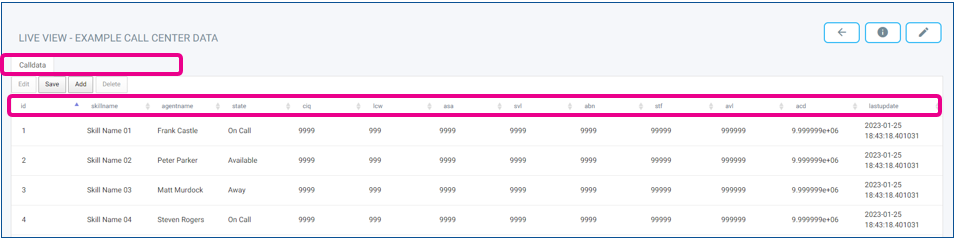
At the top you will be able to see the Table Name(s) associated with this Adapter.
If there are multiple Tables associated, you can switch between viewing themby clicking on the name, like a tab
On each Table, the next section are the Column Headers
These Column names and the data value they will hold have been defined in the Data Adapter
Below the Headers are rows of the actual data retrieved
There may be multiple pages of data that you can page through at the bottom of the list
Each column can be sorted ascending or Descending order by clicking on it
Manual Entry of Information into a Data Table
The ability to manually enter data into a Data Table is available on Fixed Data Adapters and other Adapters that have been set to Yes for Allow edit data in preview in their configuration.

For non-fixed data adapters, any manual edits of table information will be overwritten then next time the data adapter refreshed the information from it’s source.
Start by clicking on the Eyeball icon for Live Data View you will be able to see the Data Table
Select the Correct Tab / Table that you want to edit
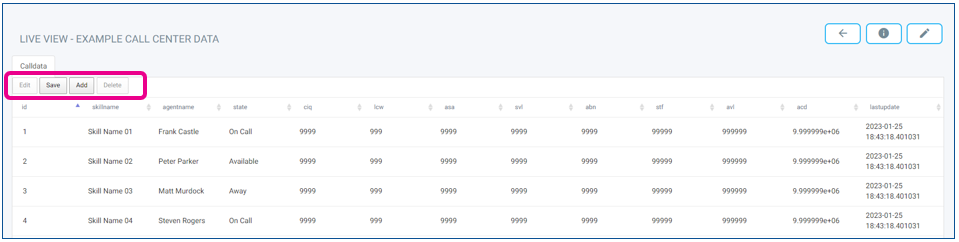
Through this interface you will be able to Add or Edit the Data Rows
To edit the Columns, you will have to edit the adapter
To add a new row, click the Add button
This will create a new blank row at the bottom where you can manually enter the values for each column
After entering the values, to lock in those value,s click the Save button
If you have decided not to save, you can click the Cancel button, which will have appeared where the Edit button was
To edit a value/row, first click anywhere on the row you want to edit
You will then be able to click the Edit button
This will open the row for editing the values
After entering the values, to lock in those values, click the Save button
If you have decided not to save, you can click the Cancel button, which will have appeared where the Edit button was
To delete an entire row, first click anywhere on the row you want to delete
You will then be able to click the Delete button
this will not ask for confirmation, so be sure that you want to delete a row
Troubleshooting Adapters
Troubleshooting a Data Adapter might involve multiple steps. Some of the steps have already been reviewed
Confirming that the Data Adapter is pulling information by Viewing the Data Tables to confirm that data has been collected
If the Data has not populated to the table, you may want to view the Adapter Details
Click the

Lowercase i = Status Details to see any messages on the adapter’s status
If there are Errors listed, they will give you some insight into what is causing the issue