Creating and Managing Playlists
Playlists and how they are used
Written By Ed Kinne
Last updated 3 months ago
Introduction
A Playlist is a collection of content (Images, Videos, Layouts, URLs) that are bundled with display order and duration instructions.
A playlist is how a Media Player knows what to play and when to play it.
This article does review several types of playlists and options, you can skip to a specific section using the On this page section to the right
Playlist Types
In Korbyt, there are three types of Playlists available, the type is decided when the playlist is created
Clever Playlist
Clever Playlists are the newest type of playlist and can be configured with both statically chosen items and clever rules
Clever Rules, or Triggers, are built using a menu of dropdowns to program dynamic content based on Tag, Folder Structure, or File Name
and potentially set restrictions for where and when that particular rule’s content will play
Because of their power, Clever Playlist requires that the Media Player running them is on Korbyt Agent Software 2.0 or newer
With their Options for both Simplicity and Complexity in one Playlist, it is suggested to start with Clever Playlists whenever possible
Standard Static Playlist
A playlist that can only have manually selected content
With its simpler instructions, they are a good fit for low bandwidth or low power Media Player deployments
Standard Dynamic Playlists
A playlist that only has dynamically updated content based on programmable Tag rules, no other factors
A way to have automated content that uses less processing than Clever Playlists
The Playlist Screen
The Playlist screen can be accessed by clicking on the Mega Menu, then in the Schedule column, click on Playlist
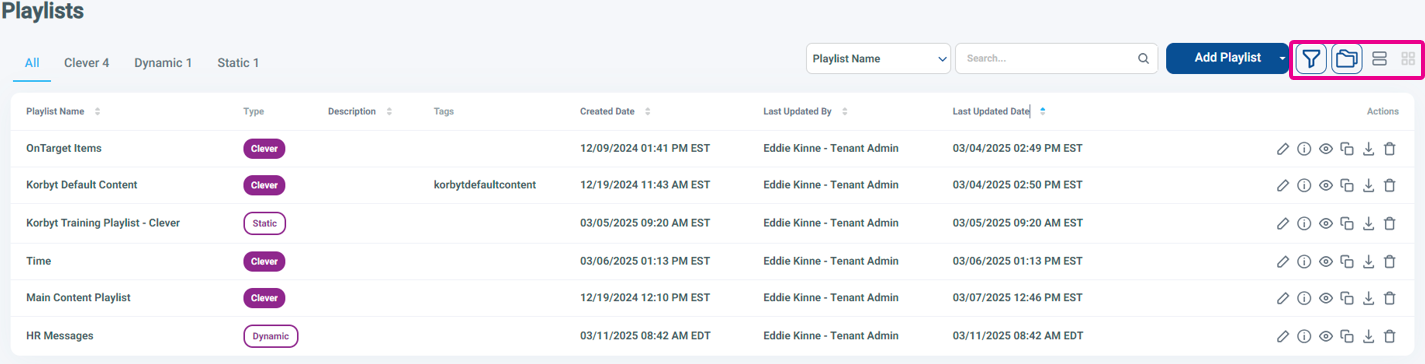
In the upper right of the Playlist screen you select your view (List or Card), as well as filter by tag or show the folder view.
In list view, you can sort any of the informational columns
If you search for a name or partial name, you will only see matching playlists
Working with the Playlists that exist is done with the Actions icons to the right
Creating and Editing a Clever Playlist
A Clever Playlist can contain multiple rules and triggers, giving you one playlist to manage what will be seen and only where it is relevant across multiple displays.
Clever Playlists allow you to automate your signage playlists by adding both statically chosen items and items that are added based on Clever dynamic rules. The rules that select the clever content can be based on more options, and can also control when/where content is seen when compared to options in a standard playlist.
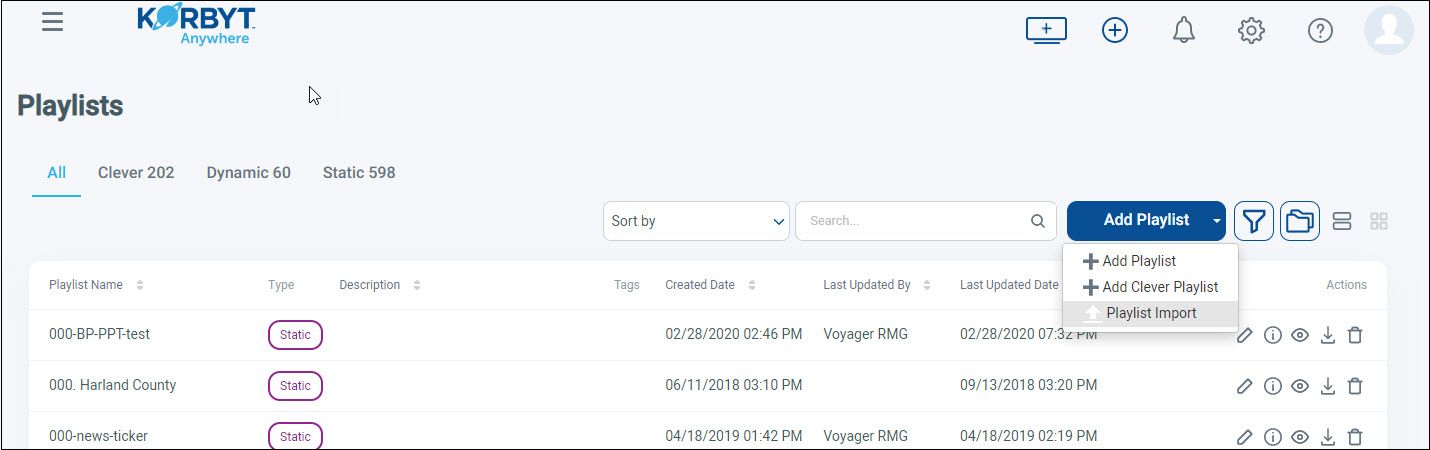
Click Add Playlist > Add Clever Playlist.
You can now Name the playlist in the upper left

Playlist Settings (next to Exit and Save Playlist buttons) lets you set optional information
Playlist Name: Name of the playlist.
Description: Details about the playlist that will appear within the CMS.
Tags: Metadata used to identify your playlist.
Override to play full video: Ensures that any video within your playlist will play for the entire duration instead of playing for the default duration.
Enable Playlist Feedback: Allows for automatic playlist recommendations.
Audio Only Playlist: Indicates that the playlist only contains audio content.
Playlist Conditions: Click the Lightning Bolt to set Clever Rules that will affect the whole playlist – we talk more about rules in the next sections
Controlling Static Content in a Clever Playlist
Clever Playlist can have both Static and Clever Content
Content can be selected manually, and then affected by the optional rules that control when it is displayed
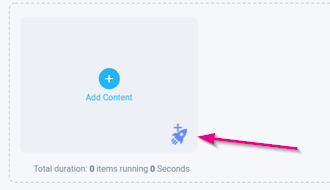
Click the blue Add Content + Button
From the Manage Content section, select from the Images, Videos, Layouts, Messages, and URLs tabs or drag and drop local files from your computer.

Select the checkbox for the corresponding file.
The number of files selected will display next to the Add button.Click Add button.
The selected files will now display at the top of the Playlist Edit screen.

Optional Click the Lightning Bolt icon to add trigger rules to control When and Where an item is seen
Optional Click the arrow to select a transition type
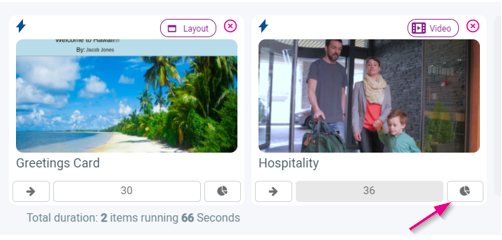
Optional Click the time in the center to adjust the display time for the item
Optional Click the Pie Chart to add/adjust Playlist Weighting
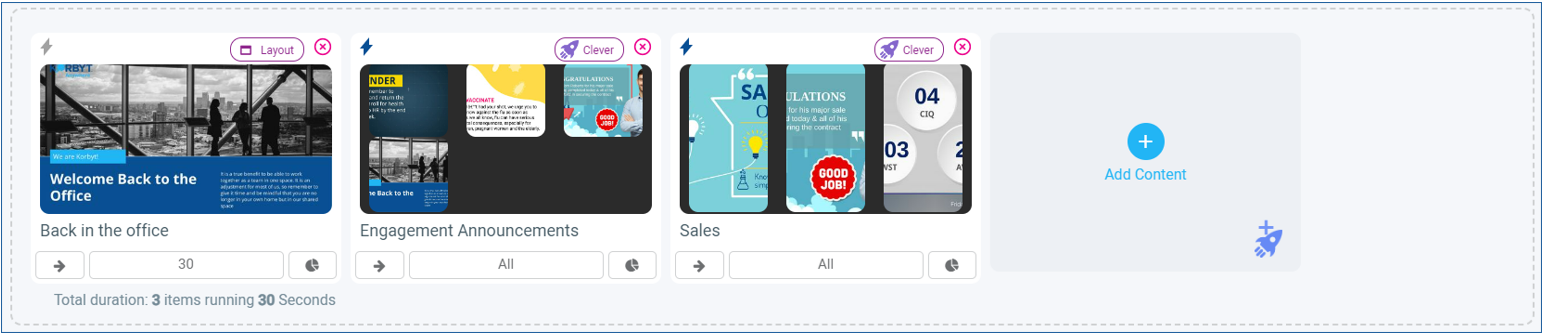
Controlling Clever Content in a Clever Playlist
Content that is brought into the playlist based on a rule created to trigger its inclusion
Click the Rocket Ship icon on the bottom right of the content box to add your Clever content. If the Clever item already exists, clicking its Blue Lightning Bolt opens the rule
This will open the screen to Edit Content Trigger
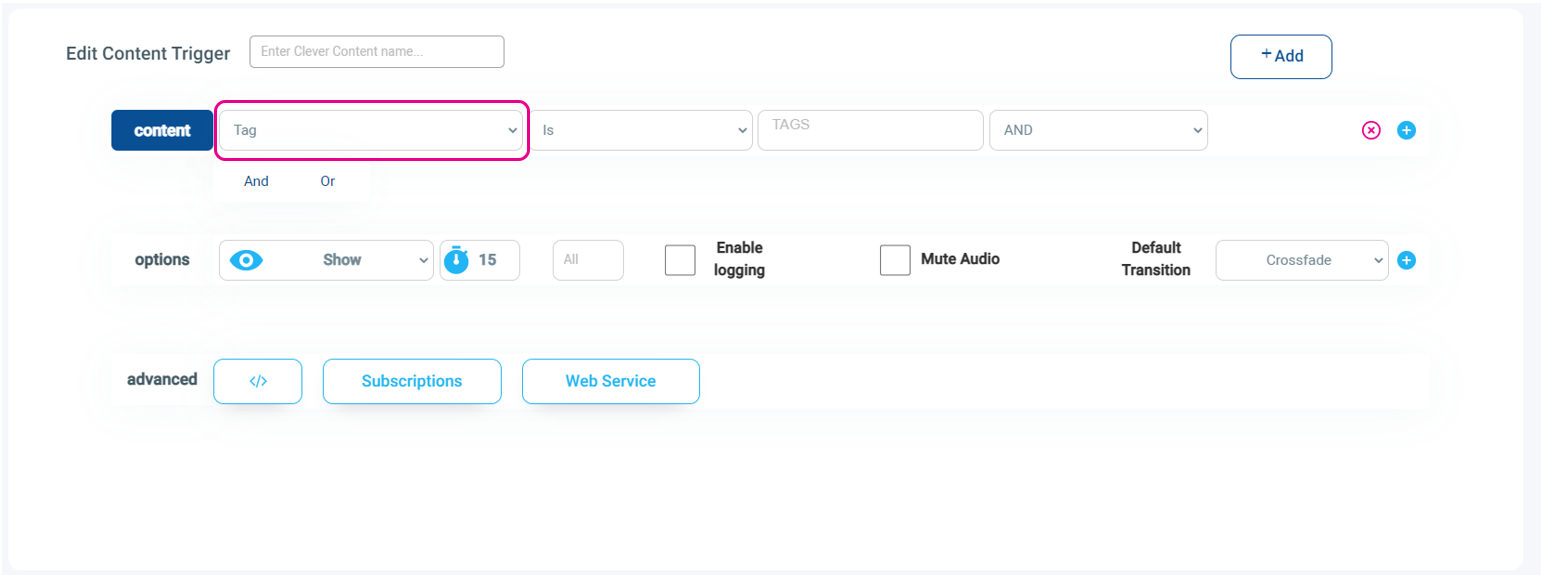
Add a Trigger Name
Add Content trigger rules to select what items are shown
Use the Drop Down to select the basis of the rule
Tags Based Rules= Includes content with the tags that you can add to any content in Korbyt, for more information, read Tagging In Korbyt
Folder Based Rules = Includes the contents of a specific folder within the Media Manager
Content Metadata = Includes files with a specific file name, or part of a specific file name
Static = Manually select items that should be part of the rule
Optional – Add more Content selection rules by clicking the small blue plus to the right

These additional connections use AND or OR logic conditions to join them
In this example, the Trigger will show content that is Tagged “Open Enrollment” or the file name contains “Open Enrollment
Optional – Set display Options for the time for each item, the number of items, select logging, and the Default Transition

More About these Options Sections below
Click the +Add button to save. and a new item will appear in the content list
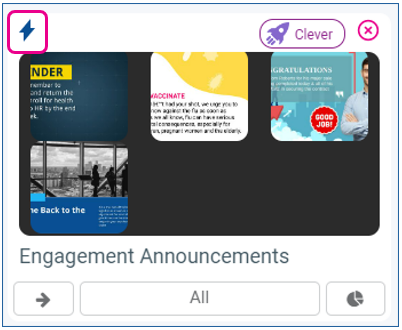
There will be previews of the items included from the rule
The thumbnails only ever go up to 9 due to space
If no items display it means there are no items that match the selected criteria at this time
If you need to edit the rule after saving, click on the blue Lighting Bolt icon on the item
The time shows “All” when the display options were set to show all
If you set a specific time and number of items, the time shown will represent that number of items times the time per item (45 if the rule options select 3 images for 15 seconds each)
Editing the Display Options for Clever Rules
By default, the display Options will show all items that are included based on the rule with a default transition of Crossfade. You can change these options

Show or Hide – The standard version is to use the rules to select what to show, but can be used to hide items
Display Time per Item – The default is 15 seconds
Number of Items – The default is All, but can be set to a specific number of items to show each time this rule comes up on the playlist. this can be useful if you have a large number of items that are part of the rule
Enable logging – Logs information about the items shown
Mute Audio – Will mute any audio element pulled in
Default Transition – How the new items will transition in
Optional Content Type, Order, and AgeIf you click the first blue + button, you will expose additional controls to select
Content Type = Image, Video, Layout, Message, or URL. This can be helpful if you are using tags, but want to only have the rule affect specific item types with that tag
Content Order = Random, Recent to Oldest, Oldest to Recent, A-Z (file name), Z-A (file name)
Age = the Specific age of the item
Adding Rules that control When and/or Where an Item is Shown
In this section, we will review optional rules that can control when and where content is shown by adding more rules
The condition for WHERE content plays is controlled by the Player’s Metadata.
For more information on setting a Player’s Metadata see Player Settings - Controlling and Configuring Media Players in the CMS
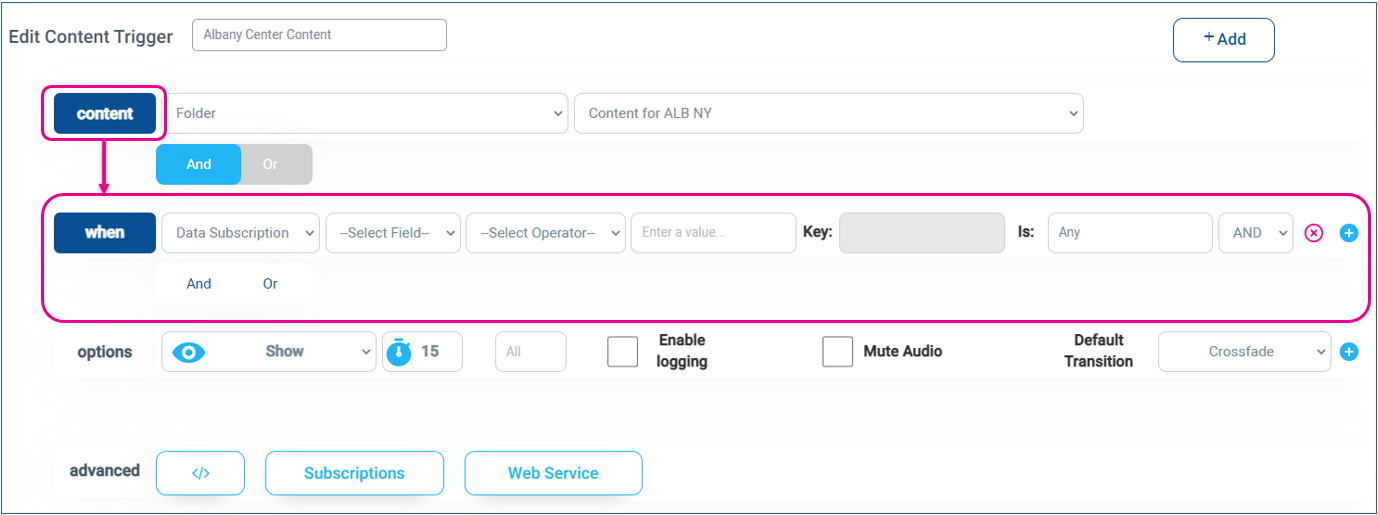
To add rules to a Trigger for when content shows, click on the blue Content button, which will show the When section
To add When conditions to a single static item, click its blue Lightning Bolt
With this section now exposed, use the first drop-down to select what the rule will examine

Data Subscription = Examines a Data Subscription within Korbyt for a value that controls when the item is shown
Metadata = Examines the Player’s information such as location, or other assigned value to only show specific content in specific locations
Webservice = Examines information from a web-based API
Date = Select a Date Range or Days of the Week
Time = Sets to only show during a specific time of day
Optional – Use the small plus button to the right to add additional rules or use the And and Or button to add additional rules

This example would limit the items to only play on Weekends OR Evenings
Click the +Add button to save.
Player and Schedule Settings
Adding a Schedule to a Playlist
The default schedule for a Playlist is Normal priority and running Daily, All day.

A normal playlist will play in rotation with other playlists also assigned to the player
The most recently updated playlist will play first, followed by the second most recently updated, and so on until all playlists play
Other playlist Priorities are available to control how multiple playlists interact with each other
For more details, see Playlist Priority Scheduling - Interrupt and Override
Clicking the pencil will allow you to edit the schedule to be more limited.
Date Range = Allows the playlist to only be shown during a specific range of dates
Advanced = Allows the playlist to be shown during a specific range of dates, days of week, and time of day
Adding Players to a Playlist
If this playlist is meant to be seen directly on a screen, you will now add Players and/or Player Groups that will receive the playlist.
In the Lower Left
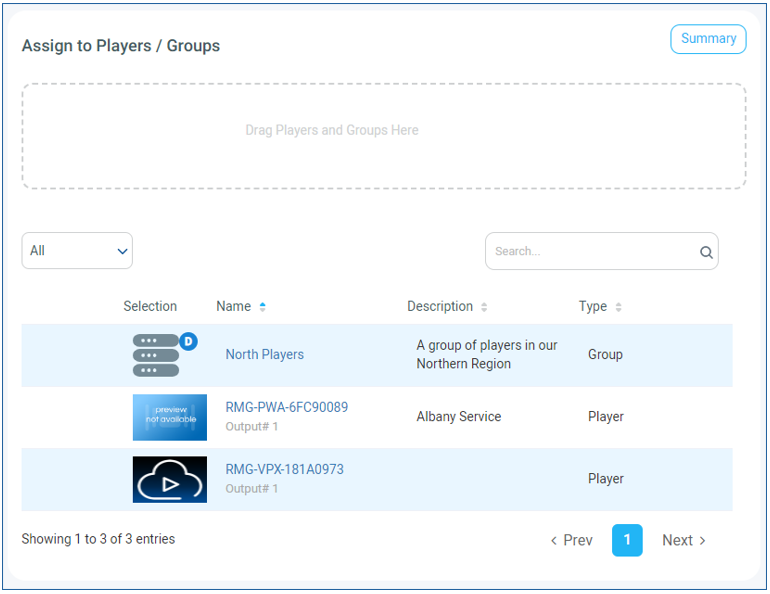
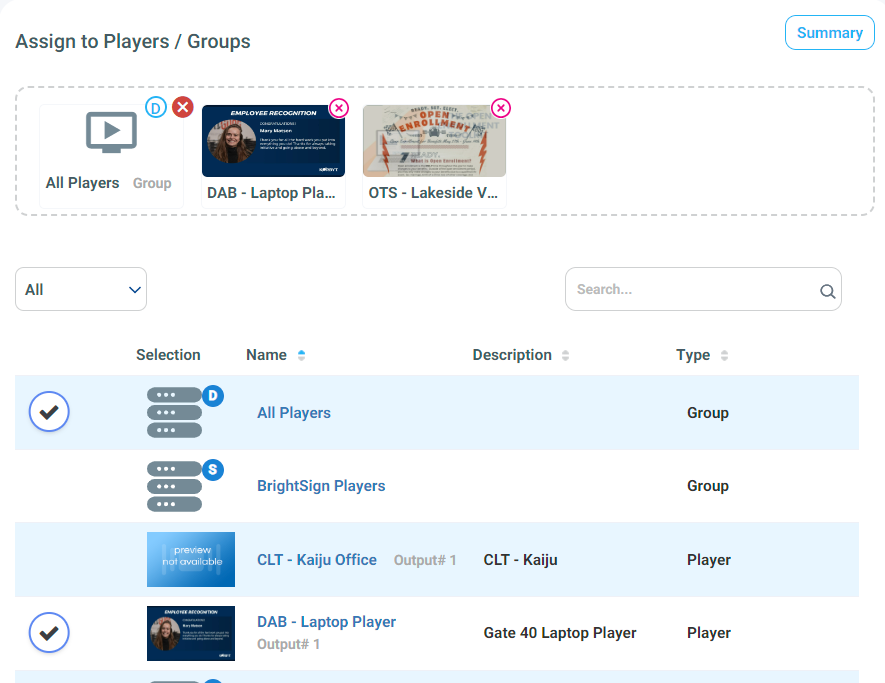
Drag and drop the appropriate players into the Assign to Players /Groups field.
Or, click to the left of the player thumbnail to select it
Once your player is added, clicking the Save Playlist button, will tell the selected players to perform a Check-In to download the playlist or any changes
You might also be using this Playlist to control content that shows within a section of a larger Layout. If that is the case, you will save the playlist with no players. For more information on nesting a Playlist see How To Use a Playlist Element
Controlling Item Playback Order
Options for setting Playback Order for items in a playlist will depend on the type of playlist and the way you have selected your items.
For setting the order for items inside a clever rule, see the Editing the Display Options for Clever Rules above
Manually Managing Order of Items
Available in Clever and Static Playlists
The playlist will show its items working from left to right in the order it appears at the top of the playlist. You can drag items to reorder them.
You can also create duplicate copies of items if you want them to show more than once in each rotation.
If a Clever rule limits where or when content should be shown, it will be skipped by players when it is not valid.
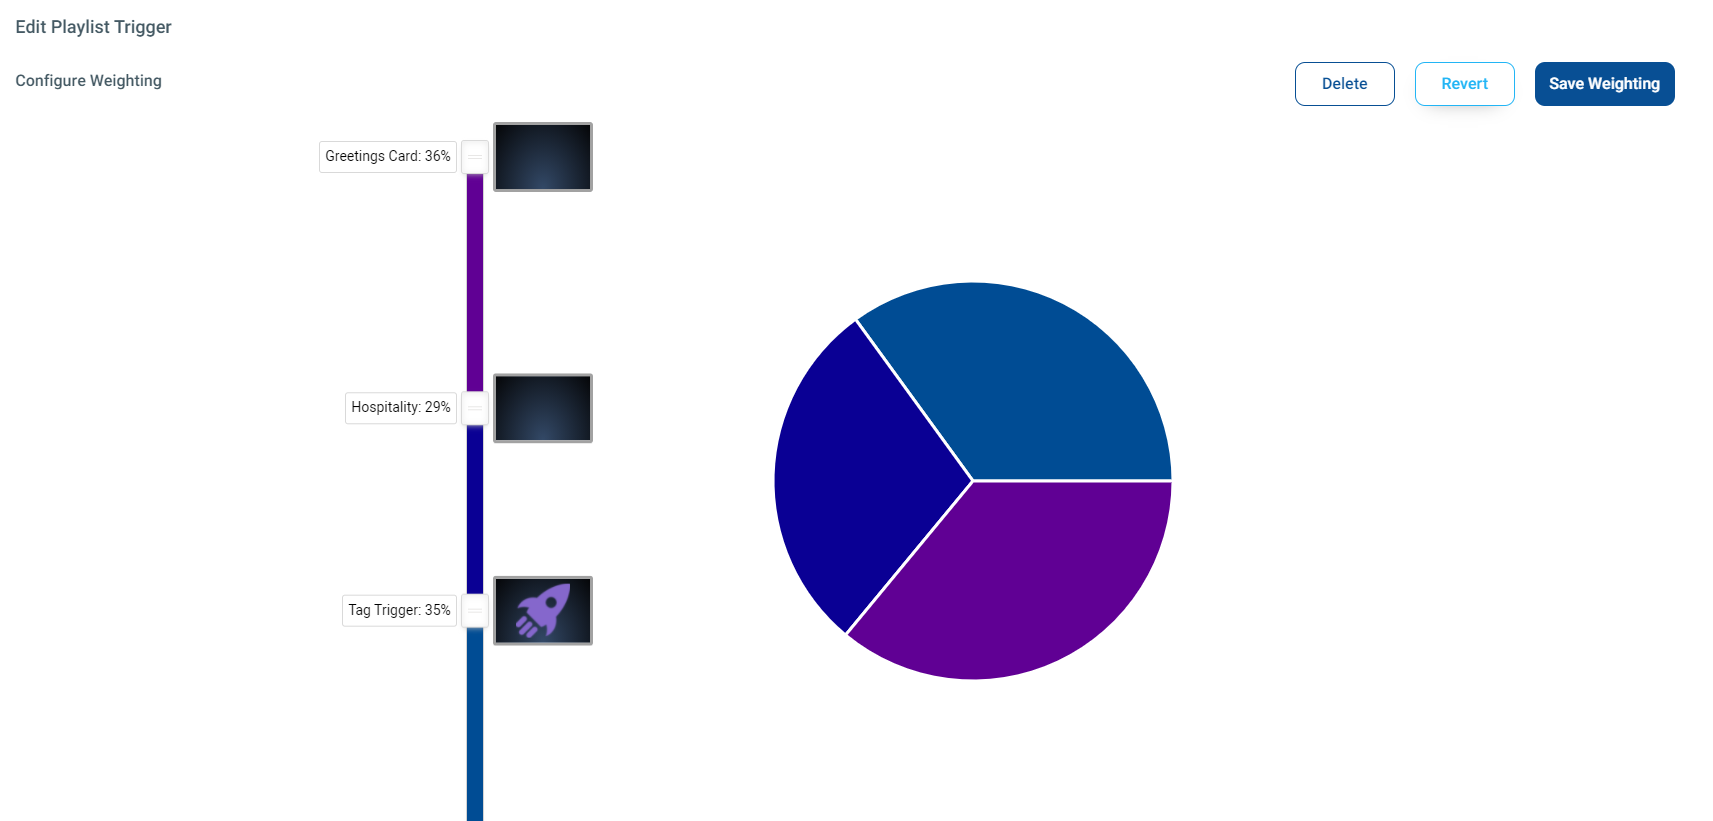
Content Weighting
Available on Clever Playlists, BUT can not include Clever Triggers/Rules
Content weighting is an option that weights how often a media items should play.
With a weightage set, your media will play in a randomized order where media with a higher weighting percentage will appear more often than media with a lower weighting percentage.
Click on the chart icon in your media to change its weighting.
To configure the weighting of your media, grab a slider and drag it to a desired percentage.
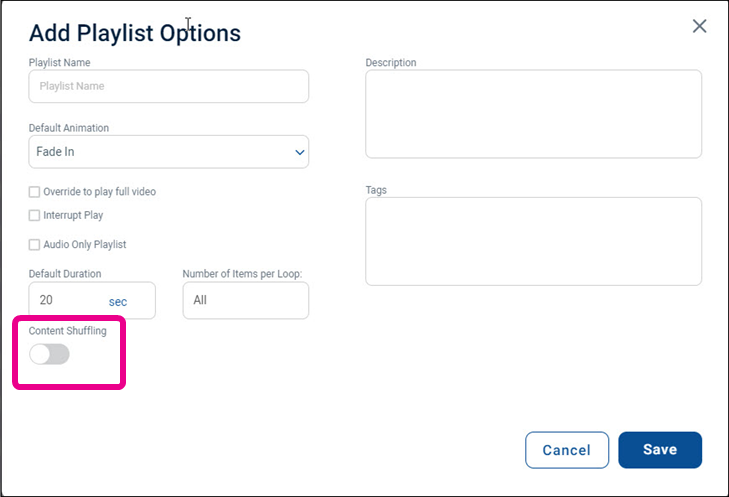
Content Shuffling
Available on Standard Playlists
Content Shuffling is a Playlist-wide setting available on Standard Static and Dynamic Playlists.
It is set when the playlist is first created OR edited in the Playlist Settings opened in the upper right
Creating and Editing Standard Playlists
Standard Playlist can be either Static or Dynamic, which is chosen when Content is selected
The first steps are the same for both
Click Add Playlist > Add Playlist.

Provide the following information on the Add Playlist Options pop-up.
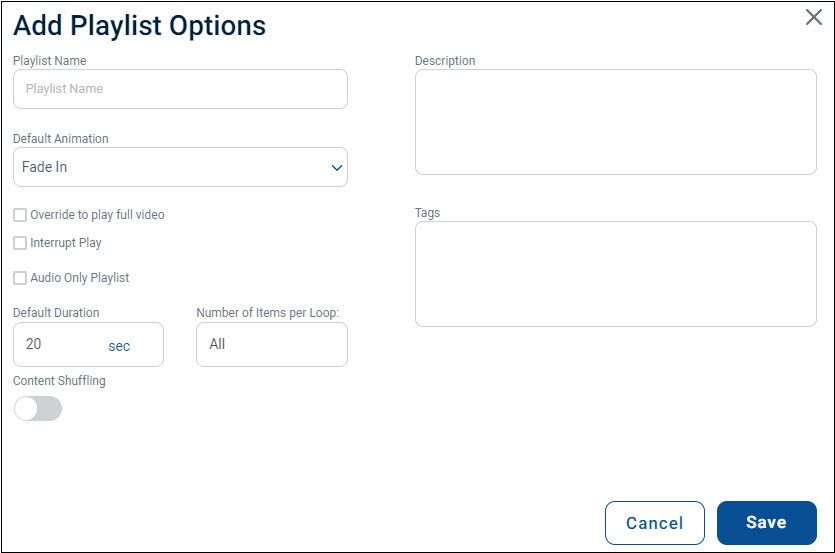
Playlist Name Required: Name of the playlist.
All other settings are optional, all can be edited later in the Playlist Settings
Description: Details about the playlist that will appear within the CMS.
Tags: Metadata used to identify your playlist.
Default Animation: Set of animations that will play for all media that has been assigned to your playlist. After setting up your playlist, your media can be modified to have individual animations if you don’t want to have a default one set up.
Override to play full video: Ensures that any video within your playlist will play for the entire duration instead of playing for the default duration.
Interrupt Play: Guarantees that your playlist will play at the time it’s scheduled even if another playlist is playing at that time in the assigned player.
Audio Only Playlist: Indicates that the playlist only contains audio content.
Default Duration: Default time that all media in your playlist will appear before switching to the next set of media. You can set the duration individually after the playlist is set up.
Number of Items per Loop: Specifies the number of media items that will be shown for each loop.
Content Shuffling: Shuffles the order of the content.
Setting a Playlist as Static
After saving your playlist options, you’ll be taken to the Playlists Edit screen. This is where you can manually select and add static content to your playlist.
To add static content:
Click Add Content
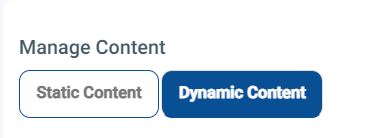
Static Content is the default choice for how to Manage Content
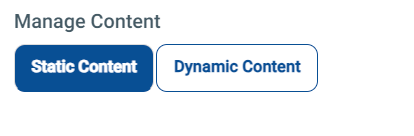
From the Manage Content section, select from the existing content across the Images, Videos, Layouts, and Messages tabs or drag and drop local files from your computer.

Select the checkbox for the corresponding file.
The number of files selected will display next to the Add button.Click Add button.
The selected files will display at the top of the Playlist Edit screen.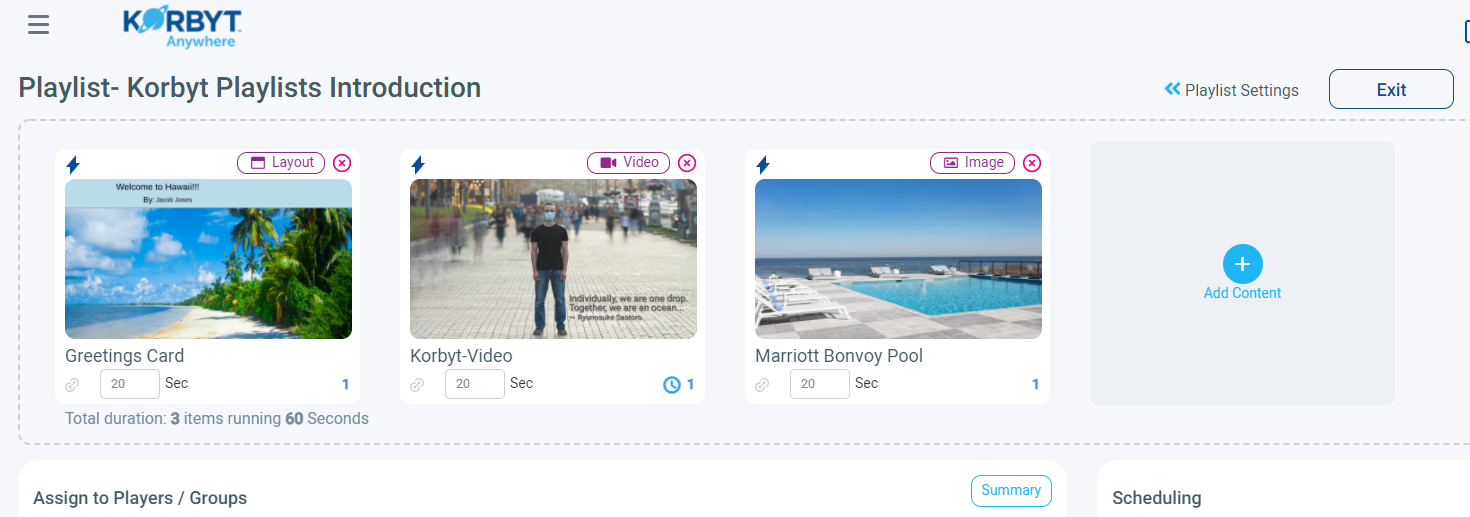
Adding a Schedule and Adding Players is the same as the steps above
Setting a Playlist as Dynamic
Dynamic content can be added to your playlist based on tag rules. For these tag rules to take effect, your content must have tag metadata.
To add dynamic content:
From the Manage Content section, click the Dynamic Content button.
Provide the necessary conditions within the Add Rule subsection.
Click Add Another to add multiple tag rules if needed.

Click Save Rules
Dynamic Playlists can only ever have 1 dynamic item controlled by Tag information

Adding Playlist Triggers to Standard Playlists
A trigger is a rule that controls whether the playlist should play or not.
Unlike individual Clever Rules, these will apply to the entire playlsit
To add trigger rules:
Click Manage Triggers.

The Playlist Triggers pop-up appears where you can define your trigger rules. These rules apply to the overall playlist, and not individual items within the playlist.
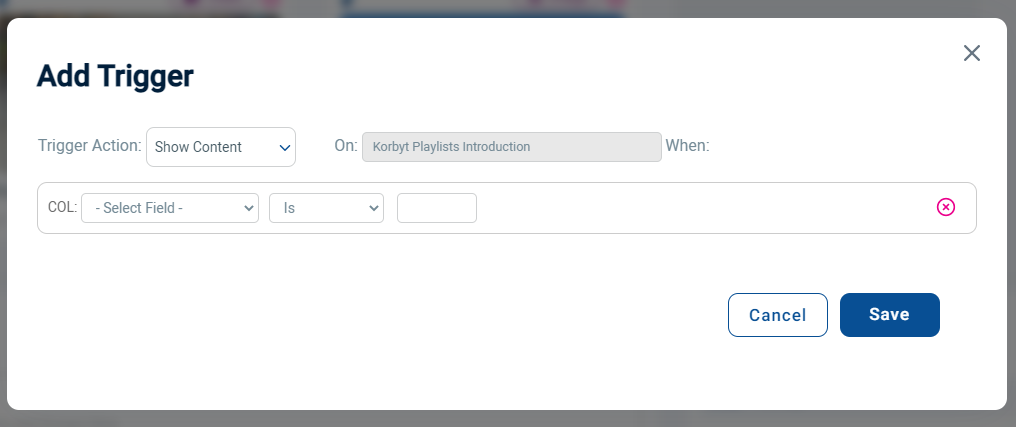
Click the Lightning Bolt icon.
From the Add Trigger pop-up, provide the following information:
select a trigger action, select a column, select a condition, and enter a value in the designated fields.