Media Player Screen Control Setup
explains how to configure Screen Control in Korbyt for powering displays on/off and sending panel commands
Written By Ed Kinne
Last updated 10 months ago
This article will explain how to complete the following steps
Add or select a Screen Control command set for a display model
Enable Screen Control on a Player
Configure the Action and Schedule the Screen Command
Verify saved and scheduled Actions
Prerequisites
Korbyt tenant access with permission to Settings and Device Management.
Player connected to the display with a supported control path (RS-232 / IR / HDMI-CEC).
Hex command codes for your specific display model.
Tip:
Command codes are usually listed in the display’s user manual, protocol guide, or the vendor’s support portal.
Search for “[brand] [model] RS-232 protocol” or “[brand] [model] remote control codes”.
Compatibility and Player Platform Choices
Player Compatibility
Windows-based players and BrightSign Players generally offer the most compatibility and support for sending screen control commands to a panel.
Other platforms can work, but their level of compatibility will vary by hardware, drivers, and connectivity method
Screen Panel Communication (transport) Options
RS-232, IR, HDMI/CEC (availability varies by model).
The same screen command (Hex code) typically applies regardless of transport/communication method
• Alternate manufacturer routes:
o Where available, built-in manufacturer control (e.g., Samsung Tizen Business Manager or direct TV configuration) is often simpler and more reliable than custom command sets.
Prefer these when supported by the environment and customer policy.
Step 1 - Create a Screen Control Command Set
In this step, you add the instructions (hex codes) for your display manufacturer/model to your Korbyt Tenant
In your Korbyt Tenant, click Settings in the Navigation bar, or the Gear Icon in the top right of the traditional navigation, then click Screen Control
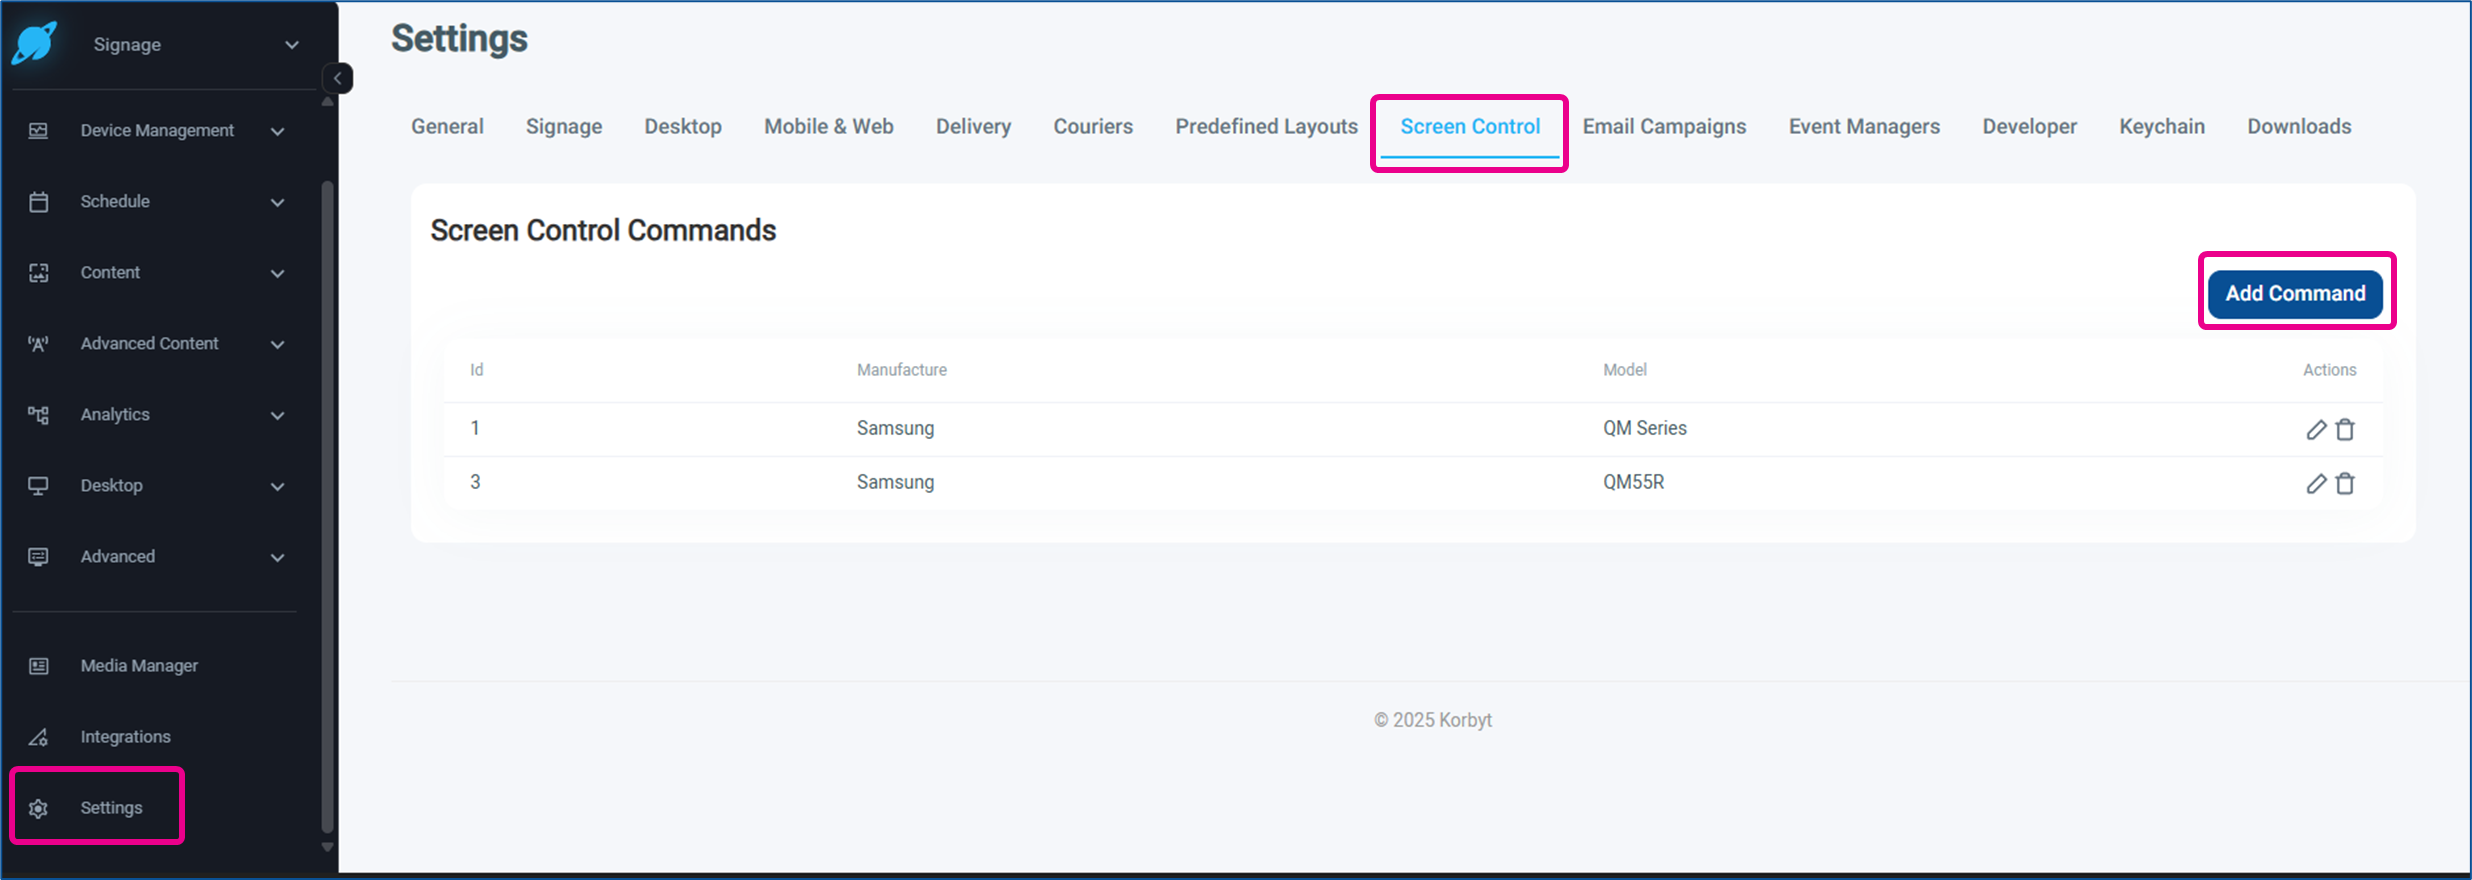
Click Add Command
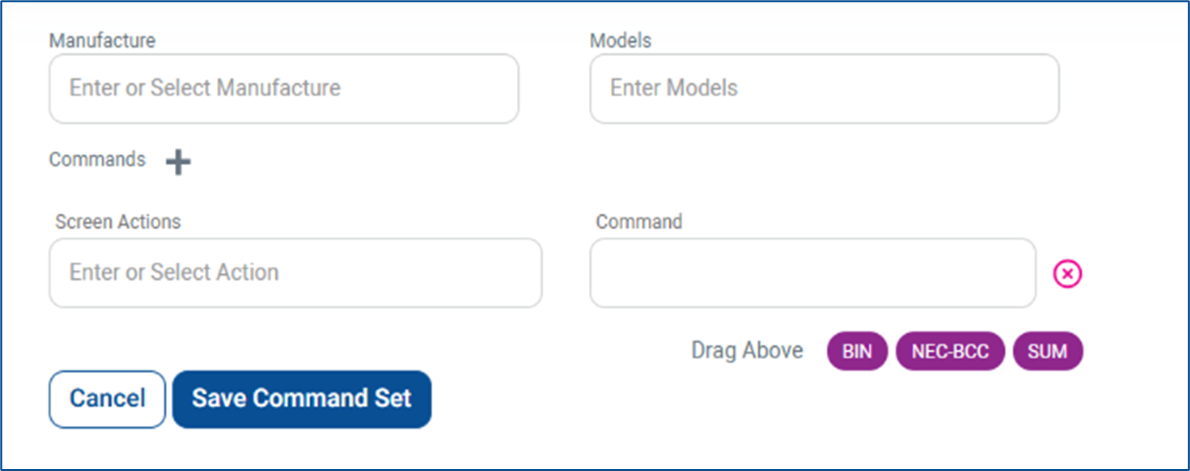
In the Add Command window, fill in:
Manufacture:
Samsung, Sony, …
Model:
Either a specific model or a series name
Screen Actions:
Select or type an action name
Command:
Enter the Hex code string for the action
Use a clean hex string with no spaces if your environment requires it (e.g.,
AA11FF), or the vendor-specified framing where applicable.
Click Save Command Set
Finding HEX Codes
You generally can find manufacturer command / HEX codes in
Vendor manuals (RS-232/IR protocol guides)
Vendor portals
Trusted AV community resources
Many manufacturers and vendors share identical codes across a display series (e.g. Samsung QM series displays), but you should verify for your exact model and firmware.
Step 2 - Enable Screen Control on a Player
Open the Mega Menu or in the Navigation Bar UI, locate the Device Management section, and click on Players
On the Players Screen, click on the pencil icon for the player for the display you wish to control
Scroll down and expand the Screen Control section in the lower right
Click the Toggle to turn on Enable Screen Control

Once enabled, you will be able to configure a screen control in the next step
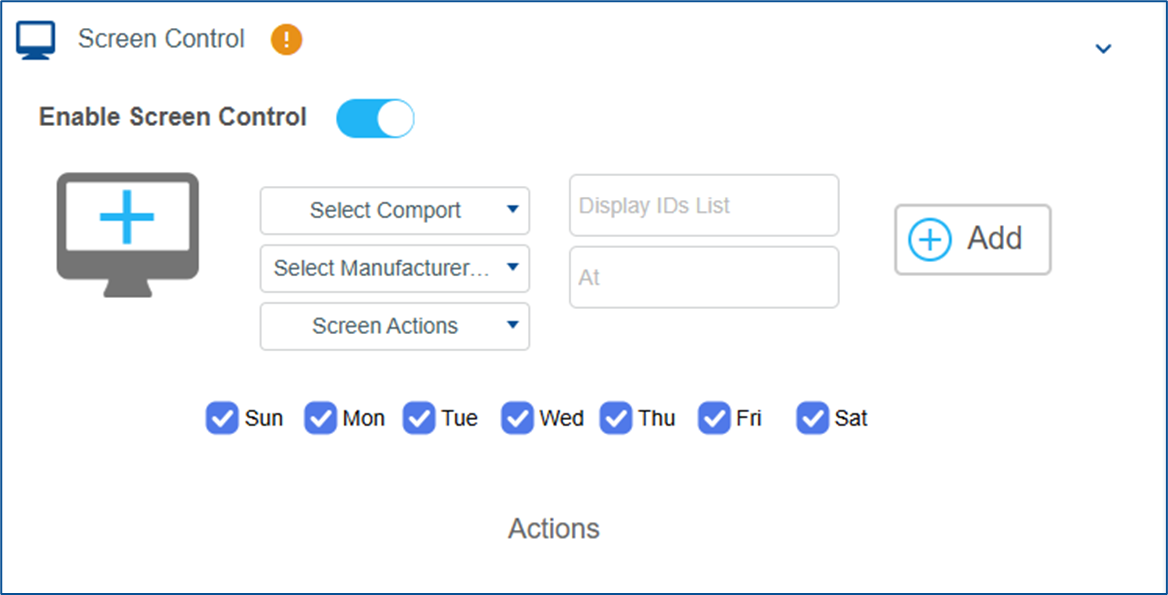
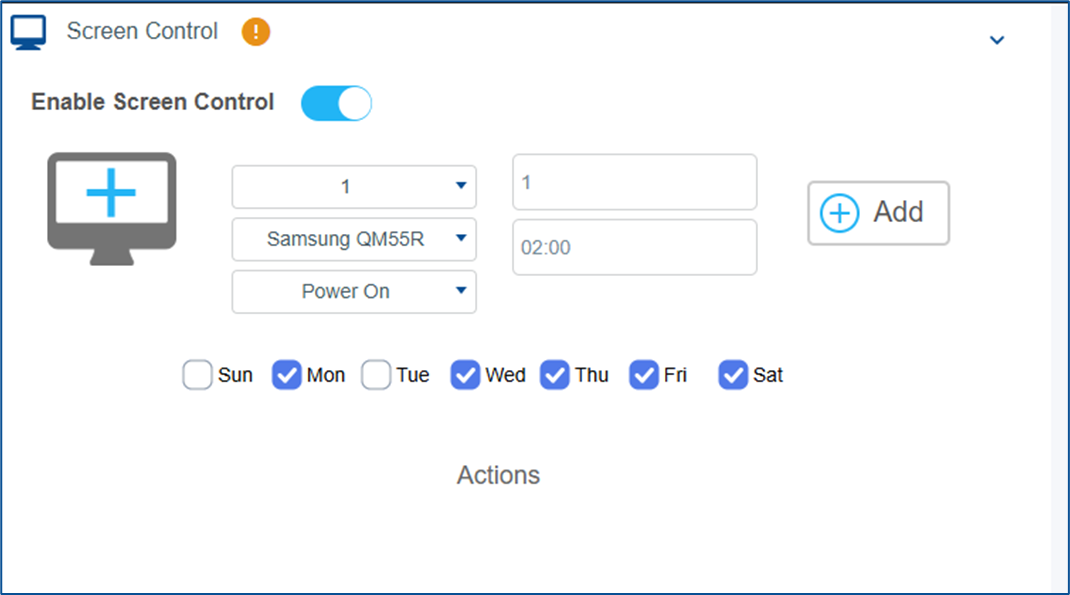
Step 3 - Configure the Screen Command
In the player’s Screen Control section (opened and enabled in the previous step) you will need to set
Comport:
Choose the port the display is connected to (e.g. 1 -4)
The available list depends on the player's hardware and outputs.
Manufacturer: pick from
Prebuild drivers
Your custom command sets were created in step 1
Screen Actions:
Select an action you defined
Display IDs List:
If controlling multiple panels on a bus, specify the target IDs (comma-separated)
At:
Set the time the action should run
Days:
Select the days of the week the command should run
Click the + Add button
Multiple Actions may be added
If your Display sits behind a matrix or extender, confirm the COM path and any required null-modem adapter or pinout
Verify and View Saved Commands
After adding, the action appears in the Actions table with its Days, Time, and Screen action

You can remove the screen command by clicking on the red X
Best Practices
Prefer Windows or BrightSign for mission-critical power control.
Use manufacturer-provided control frameworks when available (e.g., Samsung Tizen Business Manager) for simpler, stable operations.
Keep a library of verified command sets per customer/model in Settings → Screen Control.
Name models clearly (e.g., “Samsung QM55R” vs “Samsung QM Series”) to avoid selection errors.
Document COM wiring and CEC enablement during installation handover.
Testing
Bench Test
If possible, test commands with a single panel and direct connection before deploying at scale.
Validate Power On and Power Off first. Then add inputs, volume, and other actions as needed.
Transport Specifics
RS-232: Ensure the correct baud rate, parity, data bits, and stop bits if your display requires them.
IR: Confirm emitter placement and power.
HDMI-CEC: Confirm that CEC is enabled on both player and display, and that the display is not in a deep-sleep mode that ignores CEC wake.